An issue of the Society’s newsletter, transcribed from the original. Download as PDF.
(13 pages, 14381 KB)
Page 1
Canadian Society for Creative Leathercraft CANADIAN LEATHERCRAFT
Volume LXIV No. 2
0045-5121 Winter 2015 -2016
Making an Embossed Belt Buckle with Bob Pfister
In this Edition…
Page 2 Notes from the Editor, Highlights of the past Executive Mtgs, Membership Info Page 3 CSCL’s 66th Annual Weekend Information, How to Access the CSCL Library Page 4, 5, 6 Making an Embossed Belt Buckle by Bob Pfister
Page 7…13 Introduction to Bench Tools and Splitters by Lauch Harrison ACSCL
©2016 Canadian Society for Creative Leathercraft All rights reserved. Reproduction in whole or in part without permission of the copyright holder is prohibited.
President: Rob Regan, [email protected]
1st Vice-Pres.: Jim Wilkes, Apt. 19, 289 Shepherd Ave, Cambridge, On. N3C 1T9 - hespelerleather@ rogers.com
2nd Vice-Pres.:: Lauch Harrison, 68 Tisdale St. S, Hamilton, ON L8N 2W2 – [email protected]
Past President: Lauch Harrison, 68 Tisdale St. S, Hamilton, ON L8N 2W2 – [email protected]
Treasurer: Della Chynoweth, 3350 Monck Rd., Norland, ON K0M 2L0 - [email protected]
Recording Secretary: Della Chynoweth, 3350 Monck Rd., Norland, ON K0M 2L0- [email protected].
Correspondence: Pat Bullock, 139 Valentia Rd., Little Britain, ON K0M 2C0 - [email protected]
Membership: Barbara Chynoweth, 3350 Monck Rd., Norland, ON K0M 2L0 – barbarachy [email protected]
Editor: Madeleine Mitchell, 17 Light St., Woodstock, ON N4S 6G7 – [email protected]
Website: Kristi Grove, [email protected] or Eugene Pik [email protected]
Privacy Officer: Tracey Howard, 70 County Rd 41, Kirkfield ON, K0M 2B0 [email protected]

Page 2
2 Website:
www.canadianleathercraft.org
Notes from the Editor…
Winter, winter, winter, I’ve had my fill! December fooled us with mild temperatures and almost no snow…and now, a real Canadian Winter. Well it’s a perfect time to get some leather crafting done and I mean to do some, as soon as I stop procrastinating.
I get inspired by some of the leather crafting sites on the internet, among my favourites are our own Facebook Group –“Canadian Society for Creative Leathercraft”. Also on FB – the “Leather Artisan Digital Guild” and “Leather Crafters”. Our Mississauga member, Eugene Pik has a great site on “You Tube” with many instructional videos. Jim Wilkes, Paul Kitchener visit the sites, and whether or not they are inspired, it’s always good to see what the other guys are doing. Almost every week new images and suggestions appear and CSCL is set to open more doors through the internet. Be sure to watch.
As the world evolves, so does CSCL and an ambitious project to revise the
Constitution is underway. Members will learn more of the revisions in the coming months.
Norland Branch led by Tracey Howard will be hosting the 2016 Annual in Lindsay.
Be part of CSCL’s 66th Anniversary.
Branch meetings are held in Hamilton, Mississauga, and Norland, Ontario. Guests are always welcome at meetings with opportunities for newcomers to meet members and glean valuable leather crafting tips. Our suppliers and supporters are able to provide all your leather crafting needs.
The quarterly Newsletter “Canadian Leathercraft” is your source of information about CSCL and its members. Also, check out the CSCL website at www.canadianleathercraft.org and CSCL’s Facebook page.
As always, if you have questions, comments, or even a future article for this newsletter, contact your Editor, Madeleine Mitchell at [email protected]
Highlights from Past Executive Council Meetings…
November Meeting:
-Mark your calendar -May 13,14,15 2016 will be the dates for the Annual Weekend in Lindsay, hosted by the Norland Branch.
-Constitution review is underway, Executive members have received the revisions and will be commenting at the next meeting.
–CSCL’s next Exhibition is scheduled for November 26, 2016 until January 21, 2017 at the Woodstock Art Gallery, Woodstock ON. Workshop to be included during the Exhibition – Awaiting Workshop dates with Karen Weber demonstrating Machine Stitching. Probably to be held in 2 parts
-Future workshops will include Moulding Trays and Bowls, and Colouring. Watch for details.
CSCL Membership Information needed?
Contact our Membership Chair: Barbara Chynoweth 3350 Monck Rd., Norland, Ontario K0M 2L0 T: 705-454-0729 [email protected]
Page 3
3
CSCL 66th Annual Weekend Mark your Calendars for the 66th CSCL Annual Weekend to be held at the
Howard Johnson Hotel, Lindsay Ontario on
May 13, 14, 15 2016
It’s going to be a Hawaiian Themed weekend!
…so find your flowered shirts
& those flowing grass skirts!
The Registration Form & Details will follow in the mail from hosts, Tracey Howard & the Norland Branch
Check out the great List of Awards & Ribbons you can win at the Annual. So get busy and create! There will be-Workshops to Enjoy, Friends to meet with, the famous Draw Table, the Annual Banquet, and knowing Norland – Surprises!
How to Access the CSCL Library
-Look through the list of contents either by contacting your Branch President or through the website link at www.canadianleathercraft.org on the Gallery Page.
-Select item(s) you would like to borrow. Send your list to Paul Kitchener at [email protected].
-Branch Presidents will assist in the pick up and delivery of the orders.


Page 4
4 -Members-at-Large may order directly from Paul and arrange shipping or printing options.
“Blind Eagle” Bob Pfister
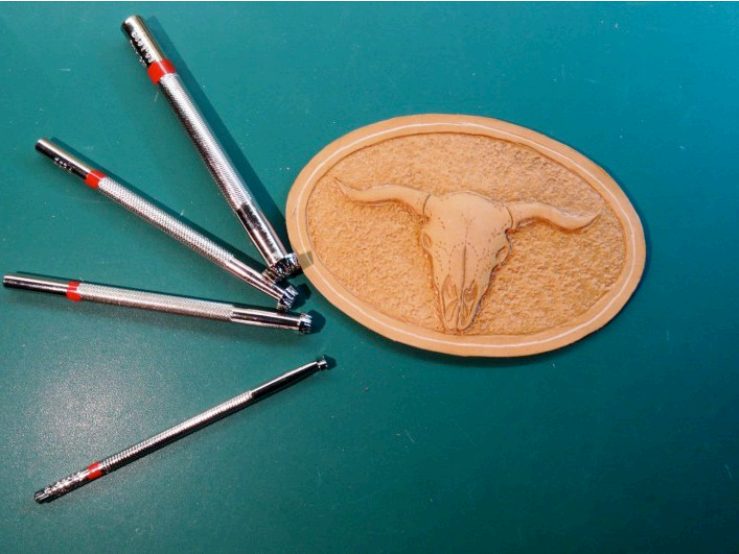
Making An Embossed Belt Buckle
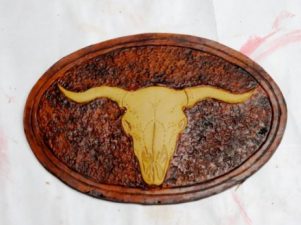
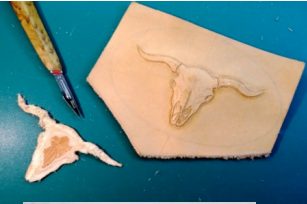
Transfer the pattern to a suitable piece of dampened 5-6 oz. “Veg.-Tan” leather. Carefully carve, the com-plete image with a swivel knife.
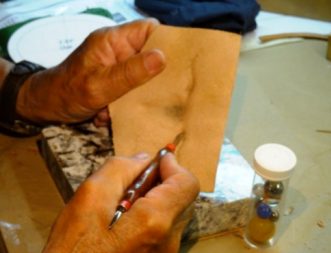
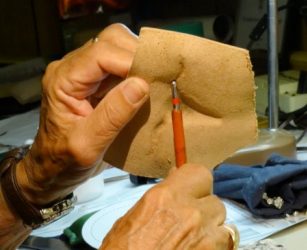
Start the embossing by soaking the leather, then let it dry somewhat. When it has returned almost to the original colour, reverse the piece. While holding it cupped in the palm of your hand, start shaping the head and horns from the reverse side using various sized modeling tools.
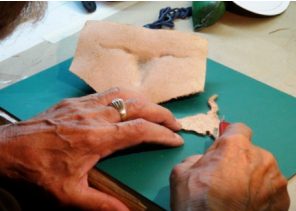
Using the original pattern, make another image on a piece of leather of thick- ness equal to the depth of the finished embossing to make a “plug”.
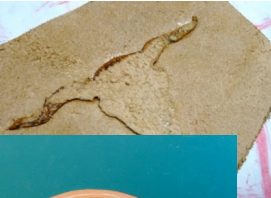
Cut the “plug” out, skive the edges of the finished side and shape it to fit in the de- pressed (embossed) area. When satisfied with the fit, glue in place.
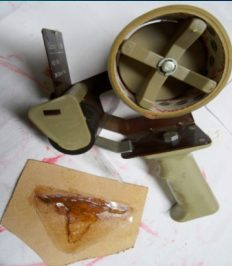
When the “plug” is set, take packing tape and cover the back so
Page 5
5 as to prevent stretching of the leather during the tooling of the front.
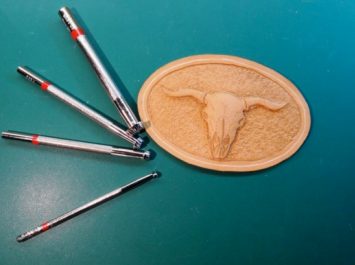
Using the same oval template, centre the Steer Head,.
Trace the oval outline and carefully cut out your buckle.
Utilize a groover to cut a stitching channel. Use your edger to finish the edges.
Tool the front with backgrounders of your choice.
Dampen the leather and with a fine paint brush, carefully apply your choice of dye, around the steer head. Apply colour to the balance of the buckle with a
Dampened sponge.
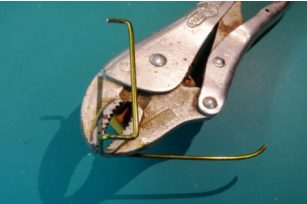
To make the buckle hardware, use a heavy gauge wire coat hanger. You will need to shape it to fit the buckle (in this case for a two inch belt).
Use a pair of Vice Grips and a pair of Diagonal
Cutters to bend and shape the wire (a vice also is handy if available).
Start with a 1/2” bend to form a hook. Mark off 2-1/2” and make another 90° bend. Next, move
3/4” for another 90° at 1-3/4”.
Do another 3/4” bend.
Complete the final step with 2-1/4” leg.
Using your template, cut another oval of leather to form the back of your buckle. Treat this piece the
Page 6
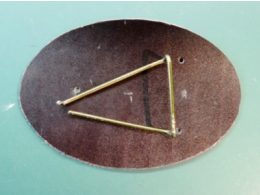
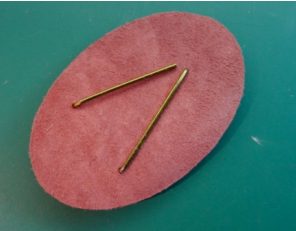
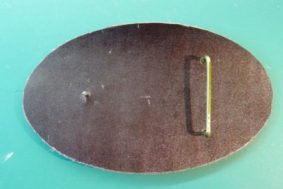
6 same as the front. Groove a sewing channel, bevel the edge, and dye. Lay your formed wire hardware on the back and mark the 3 holes to feed the wire form through, then punch the holes and complete this part of the process by feeding the wire through the punched holes.
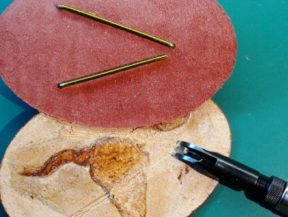
Using a small “V” groover on the back side of the buckle frontal piece, cut channels to accommodate a fragment of the thickness of the wire legs.
Now we are ready to glue together the two pieces, preparatory to sewing. The finished back should look like this.
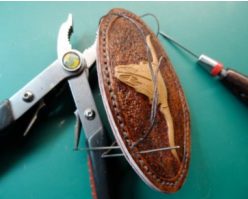
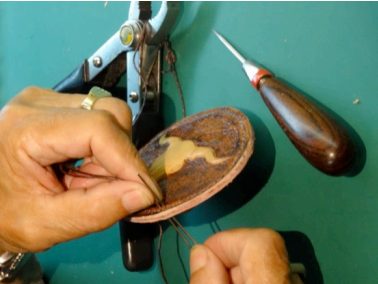
Using fine diamond chisels or a “pricking iron” and awl, punch your sewing holes along the grooved stitching channels. Be sure when making these that the holes line up with the front and back channels.
Use a heavy waxed thread and “saddle-stitch” around the buckles edge.
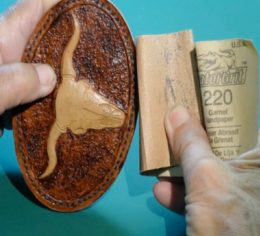
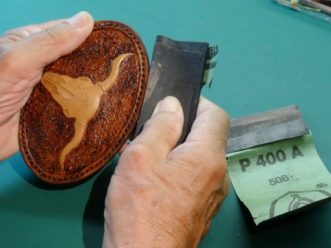
Prepare the edges by sanding first with “220
Garnet” paper then follow this with a “P400” wet sanding paper.
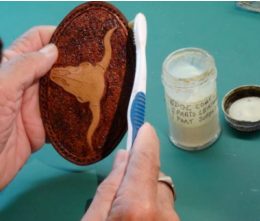
To complete the edges, brush on an edge coat of “Gum Tragacanth” or an edge coat of your own choice. Re-sand with the “P400”.
Repeat this procedure for sev- eral applications.
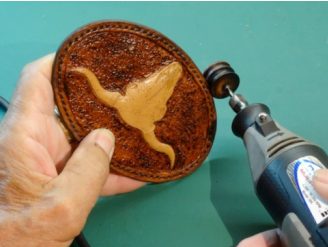
Between coats, buff with either a piece of canvas or a buffing wheel.
Page 7
7
To complete the project, apply one or more coats of a sealer such as “Satin Sheen”. Be careful when buffing not to transfer dye from the main area to the steer head. Use a clean piece of sheepskin or cloth and buff away from the head to the edge.
Lastly, you may want to spray with a clear coat such as “Krylon”.
Introduction to Bench Tools for reducing the thickness of Leather Skivers and Splitters
By Lauchlan Harrison ACSCL
The both machines are used to reduce the thickness of leather. Splitters reduce thickness across the width and length. The skiver is used like a splitter but it can also taper the split to a fine edge. The leather is pulled over a roller past a stationary blade; the blade is then able to cut across the work piece in a very controlled manner.
The earliest American production models were made in New Jersey and New Eng-land by number of Makers and Inventors in the middle of the 19th century. There have been many different configurations of blades and frames but the Osborne/Randall style seems to have had the right stuff as the machines made today follow the same principles and look very similar.
The Blade
The blade must be sufficiently thick that it will not distort when it is under heavy stress. The blade can be made in several different ways, laminated or all tool steel.
Most of the Blades are high carbon steel throughout, this can be tool steel, blister steel, and crucible steel, most of the famous is Sheffield Steel from England. The American Makers were capable of very fine steel manufacturing as early as 1825. The tool steel would have a higher carbon (0.7% and 1.4%) content, this steel can be hardened and tempered allowing the blade to hold an edge. Hardened steel more likely to chip and shatter if it was misused or dropped. Tempering was the key, properly tempered, the Steel is hard to distort –Tensil Strength, easliy sharpened to a fine cutting edge – Hardness. The combination makes strong and tough blades, easliy repaired and long lasting.
Laminated steel blades – the cutting edge is fine tool steel forge welded to mild steel back of the blade. This saved the cost of finer steel. Laminated blades must be more than 1 1/4” wide otherwise the edge has been consumed and the blade can not be sharpened.
The blades made with tool steel can be sharpened all the way through the width of the blade.
The blades can be hollow ground, this allows the user much more ease when sharping, as just the cutting edge and the back edge touch the stone. I’ve seen hollow grinding on both sides of the blade (HF Osborne #615). This speeds the process allowing just the cutting edge to be worked. Flat ground blades are great until a large nick has to be removed, if the blade is tool steel, the job is labouriuos.
The Frame can be cast iron, cast steel or welded mild steel, each has advantages. In the case of the cast iron, the least expensive, frames can be made lighter and more open, cast iron is very stiff and has many impurities, making the frame prone to shattering. Cast steel has the strength and the malleability to allow open lighter casting and resistance to breakage. The Welded frame is generally very tough, but it is heavier. Look for the absence of cracks, welds or broken pins or rivets. A highly pigmented lacquer – Japan, was put on in layers and polished to prevent rusting. Pitting, rusting and loss of Japanning will not affect the usability of the machine. Make sure all the parts and screws are present.
Page 8
8
The roller should be smooth and even, pitting is not a critical concern to the operation of the machine. More important is the gap between the blade and the roller, if the skiver is used mostly for strap widths less than 1 1/2” the gap can be larger on one side than the other. When splitting wider material, the gap must be very regular across the machine to prevent the strap from casting over towards the side with largest gap.
The springs on the machines are replaceable. The spring steel, has a slightly higher carbon content than mild steel, it is hardened then tempered to hold it’s shape then return to it’s shape with out breaking. The spring allows the roller to be opened to insert the strap, the tension pushes the roller towards the frame holding the strap in the same place for repeated splits. Look for the absence of cracks, and make sure the spring is still able to close the roller. Some makers marks are under the wishbone spring (CSO #86)
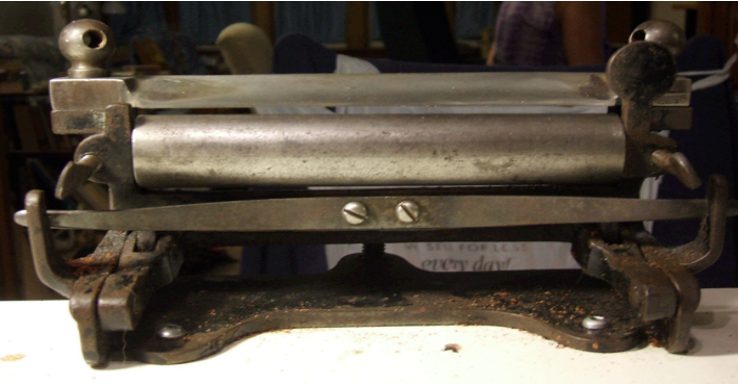
HF Osborne 6” Splitter
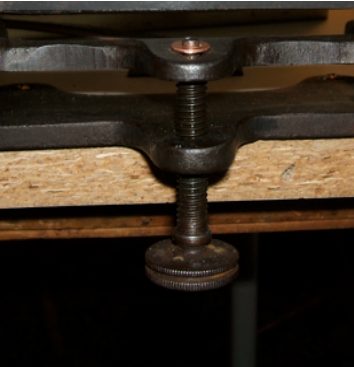
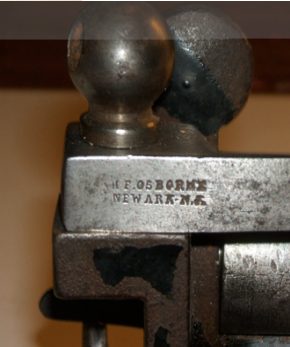
In 1874, Patent No. 179948, for a leather splitting machine was awarded to HF Os-borne. In an 1891 H.F. Osborne catalogue, lists this tool as a "615 -- Knives, New Pat'n, Iron Frame". It also was available in sizes from 5", 6", 7", 8", 9" and 10" sizes. The distinguishing features the castings are sharper than CSO #86 and the bump outs that hold the wishbone are cast pieces riveted on to the sides of the frame. This splitter has pad screws for the blade hold down. Most harness makers would have pad screw pliers in their kit. The thickness adjustment is made with a large knurled disc that protrudes down from the back of the splitter. This blade is clearly marked "H. F. OSBORNE NEWARK N.J." and "TRADE OPT MARK" (OPT is Osborne Patent Tools). Cost is $275 - $475 usd
Page 9
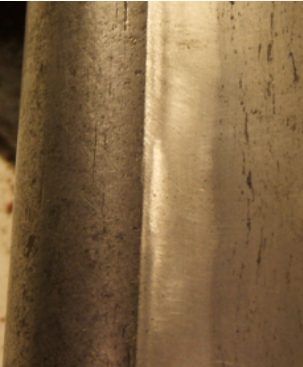
9 The differing steel colour and texture can be seen as the edge fades back to the milder steel, the roller is on the left. Frames were coated in Black Japan a highly pigmented lacquer, some frames may have 80% or more of the original finish.
CS Osborne 8 inch Keystone #84
In 1883, CS Osborne is listed as assignor of Patent No. 274921, Lap Shaving and Splitting Machine, by David Dixon.
This is the most popular style of Splitter/skiver, the handle moves the blade, this al-lows the worker to pull the strap thru as the gap is closing, giving a taper skived edge. The #84 has a spring-loaded stop screw that sets the machine up for repeated skives or splits.
Pad screws are used for the blade hold down. This machine was made in Newark New Jer-sey before the turn of the Twentieth Century. Collection of Lauch Harrison. Cost $350 $550 usd
CS Osborne #84 Splitter circa 1890
Heritage #84 (a work horse) on the bench at Tundra Leather. Collection of Kristi Grove
CS Osborne 6 inch #86
Page 10
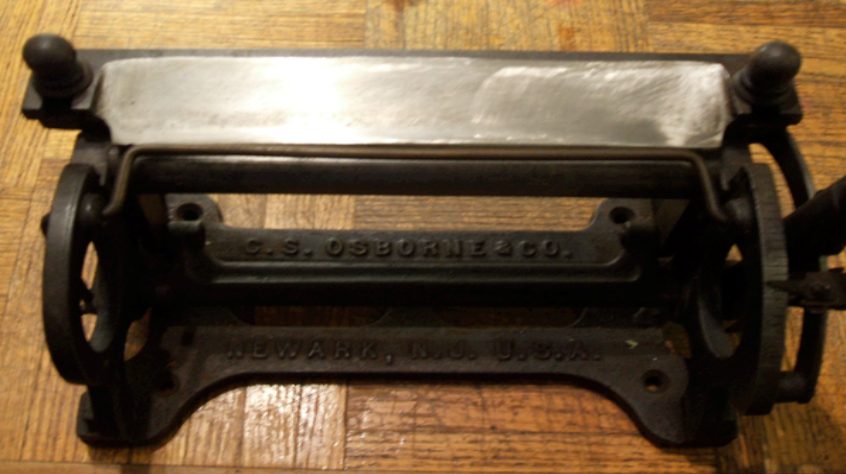
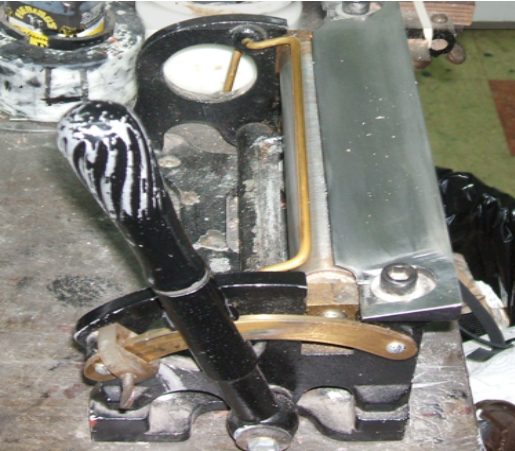
10 The #86 splitter is the most common splitter still made today. The 2001, C.S. Os-borne & Co. catalog #59 illustrates an almost identical 6 inch splitter design, with modern hardware.
The blade is stamped "EST'D 1826" inside a rectangle and "C.S. OSBORNE & CO."
A late 1880's vintage C.S. Osborne catalogue lists this tool as a, No. 86. Iron Frame Splitting Machine, made in sizes 5, 6, 7, 8, 10, 12 inches.
Note the pins that hold the Wishbone, and the thumbscrew.
Collection of the saddle tool dude http://home.att.net/~saddle_tool_dude/ Cost $250 -$400 usd
Randall 6” Lap Skiver
In 1888, the Patent No. 391190, was issued for a Leather-Skiving Machine, by Silas H. Randall, of Wyoming, Ohio. James D. Randall, listed as 1/2 assignor. The Randall lap skiver uses a concentric cam to close as the leather is pulled through the skiver, the gap closes up in a very controlled manner allowing the repeated skive. Saddle Skirt weight leather strap can easily be given a 4” - 6” long taper. This machine sells for $250 - $500 usd
Machines of Other Makers
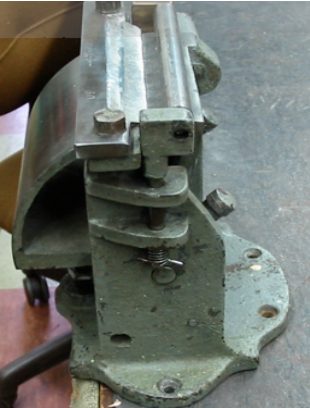
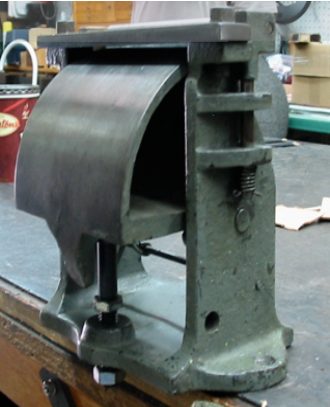
There are many types and makes each has advantages, look for solid castings and good blades. When you decide to get one you will find that you can use more of the ma-terial down in the workroom because now you can split it down to a more useful thickness.
That way you can convince yourself that you are saving money (sic).
Page 11
11 The decision to buy a new or used splitter can be worrisome, if you have the ability or the interest in learning how to sharpen and restore tools then you will buy used and/or antique equipment. If you are crazy and have a lot of spare cash you will buy new. The modern blades are not hollow ground and the tempering processes are not as exact as in the past, this results in a blade that requires lot of care and work.
If you see one that you are thinking of buying call me and send pictures I will give you an estimate and a report on the condition of the splitter. If you have questions about old tools let me know I’ll be happy to sit down with you and give you an idea of what they are, what they’re worth, and where they’ve been.
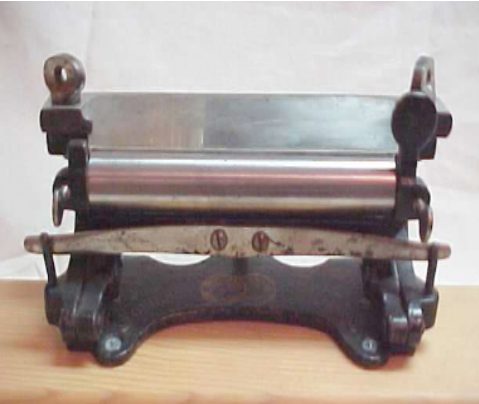
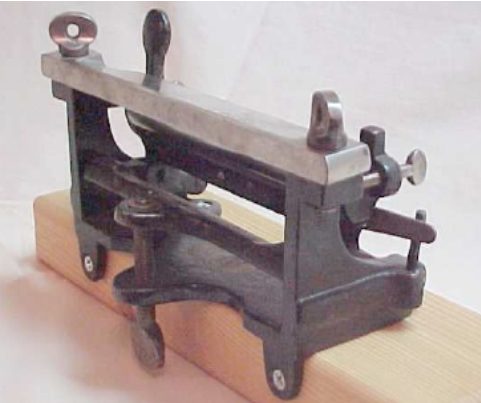
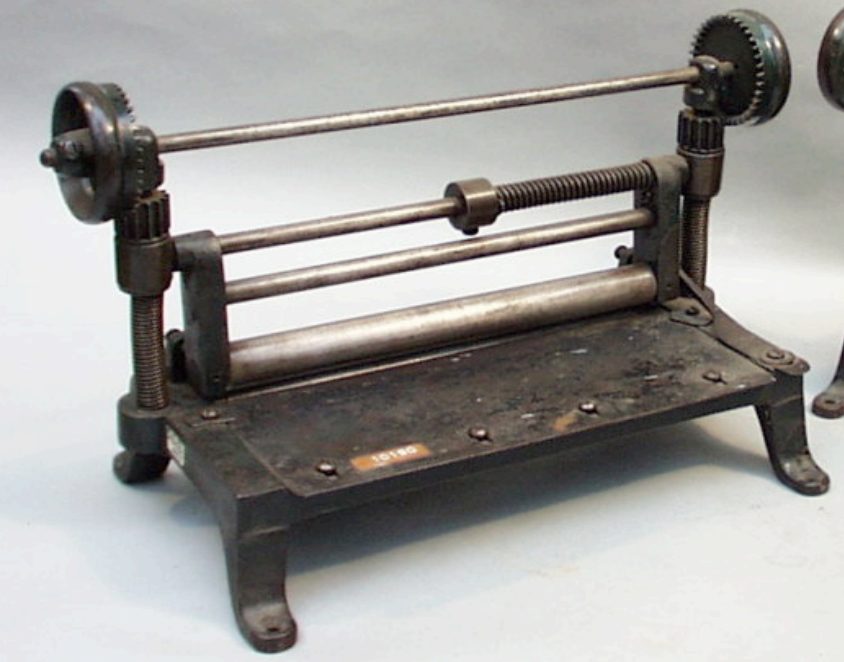
Chase Pattern Splitter circa 1890
This style of splitter is now called the Chase pattern splitter. Named after the patent holder J W Chase of North Weare, NH. C S Osborne bought out the patent and produced these under his name. The original patent is from 1859 and Chase took out a second one in the early 1860's. The blade is fixed and the table is sprung to move the thickness of the cut. The cut is regulated by the gap with the rollers and the blade and can be adjusted with the geared knobs at the top on either side. There is a spring release for the rollers are seen on the middle rod this could automatically lift the roller.
Page 12
12
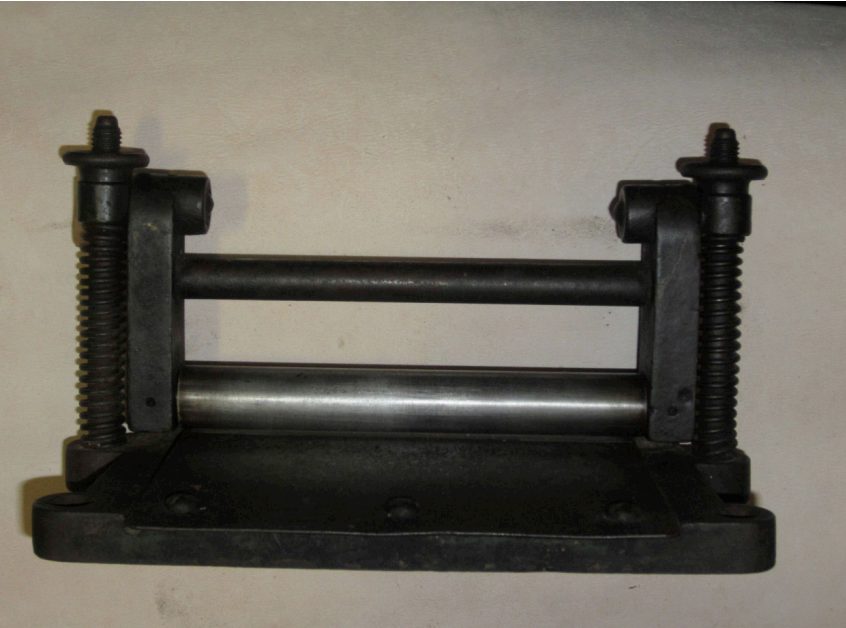
Boston Pattern Splitter Circa 1840
This splitter first made by J W Chase in New Hampshire. This splitter predates the Chase pattern. The similarity is seen with the fixed blade and flexible table with adjustable roller. From the collection of Lauch Harrison
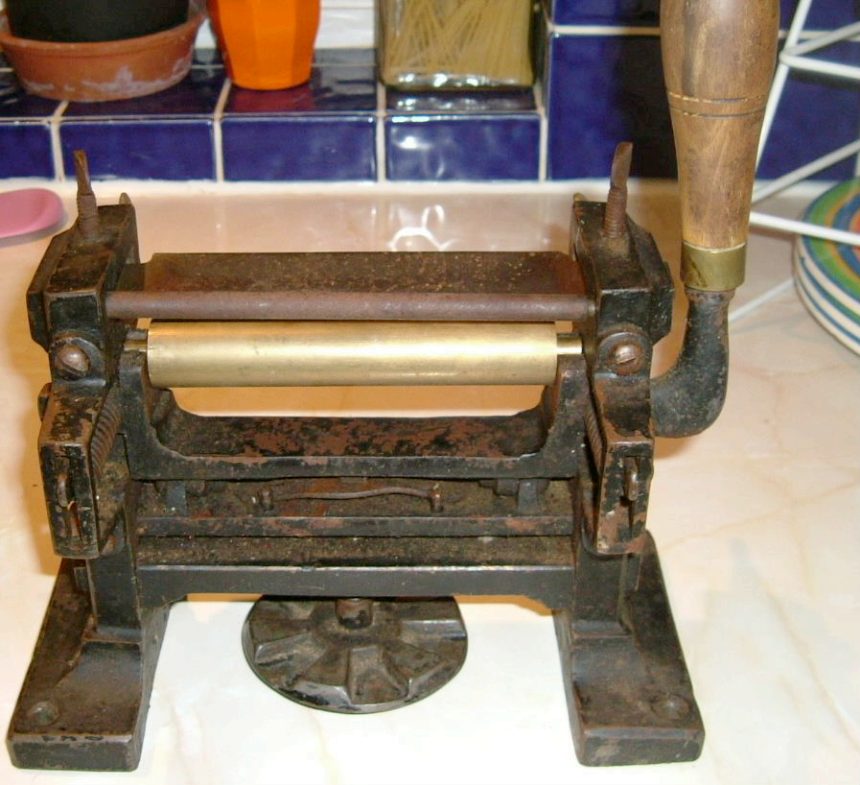
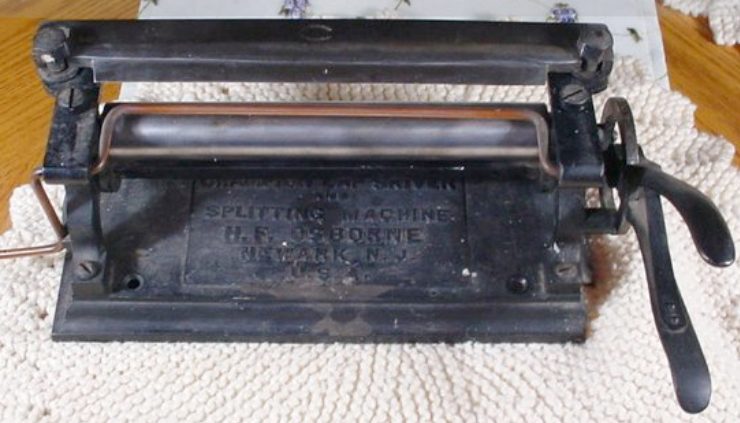
Spittler’s Patent Splitter Circa 1890
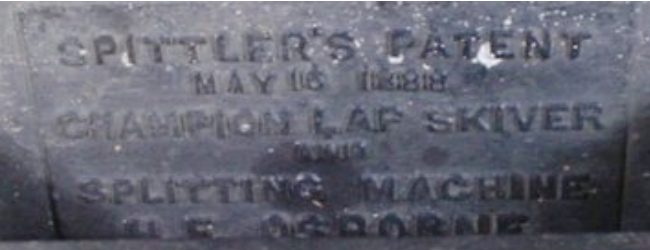
Leather Splitter marker HF Osborne Newark NJ USA. SPITTLER’S PATENT. The Patent date is marked May 16, 1888. The name is Champion Lap Skiver and Splitting Machine;
the blade is 8” long and 1 1/2” wide. There is a copper rod that holds the leather down on the roller, and the squeeze handle moves the blade up and down, releasing the handle locks the blade height. Collection of Lauch Harrison
Page 13
13
Dixon Splitter Circa 1950
Leather Splitter made by J Dixon Company in Wasall England. This tool company is still making this pattern today. The castings are rugged and bolted together allowing repairs if parts get damaged.