An issue of the Society’s newsletter, transcribed from the original.
(11 pages, 2.7 MB)
the full-resolution scan, 4.1 MB, for close research
Page 1
The Canadian Society for Creative Leathercraft CANADIAN LEATHERCRAFT
Volume LXVIIII No. 4, 0045-5121
September, October, November, December - 2021
The volume number and the issue's ISSN print side by side with the date range on the masthead, in two columns; set out above one after the other.
Flash Back in Time!
In this Edition…
Page 2 Notes from the Editor, Highlights of the past Executive Mtgs, Membership Info, CSCL Larmour Library
Page 3 – 4 – SEE - What Can You do with Scraps of Leather
Page 5 – Condolences – Plant Hanger – a great way to use up scraps - also
Page 6 – 7 Five Strand how to
Page 7 – Sharpening Punches
Page 8 – 10 Spanish Don’s Hat
Page 10 – Tool Tip and “Members-At-Large-At-Work” ©2021 Canadian Society for Creative Leathercraft All rights reserved. Reproduction in whole or in part without permission of the copyright holder is prohibited.
To contact any of our Executive please refer to the CONTACT section of our Website.
Website: www.canadianleathercraft.org
Facebook [Facebook page removed]
President: Lauch Harrison
1st Vice-Pres.: Jim Wilkes
Past President: Jim Wilkes
Treasurer: Della Chynoweth
Secretary: Lauren Malec
Membership: Kim Winchester
Editor: Barbara Chynoweth
ECO ( Electronic Communications Officer): Eugene Pik
Privacy Officer: Lauch Harrison
Workshops: Lauch Harrison, Jim Wilkes,
Page 2 — Notes from the Editor, Highlights of the past Executive Mtgs, Membership Info, CSCL Larmour Library
Note from the Editor….
The Newsletter “Canadian Leathercraft” is your source of information about CSCL and its members. Also check out the CSCL website at www.canadianleathercraft.org and CSCL’s Facebook page.
I am always looking for articles for the Newsletter, do you have a project that you have done that you think everyone would be interested in seeing, we are looking for articles?
This issue I am looking back in time to some of the magazines published in the 1970’s for projects.
Highlights from the Past Executive Council Meetings….
At our September meeting we discussed how the virtual Zoom AGM went. We had some suggestion and the Fellows are going to review how the judging went and what can be improved.
At our October meeting we had a guest, Kristi Cino from Tundra Leather talking about what is happening and what is new in her store in Hamilton. Della Chynoweth sent some sea leather fish skins to the President of each branch and we encourage members from the branches to come up with ideas to use the leather.
Visit Sea Leather Wear’s web site for ideas. Contact your President for further details. Lauren Malac has the skins for MAL’s and you can contact her for one.
At our November meeting we discussed the possibility of having Zoom training courses. Stay tuned for more info on that.
This page prints the secretary’s name Malac; the same issue’s own officer list, on its first page, prints Malec. Both are kept as printed.
CSCL Membership
Have you paid your membership? It’s a new Membership Year (April 1 to March 31).
- If you are joining trough a branch pay your CSCL membership to the Branch Treasurer along with your branch membership fee.
- if you are joining as a Member-at-Large or Sustaining Member send your membership payment to the CSCL Treasurer: Della Chynoweth, [address removed], Norland, Ontario [postal code removed] or you can e-transfer to [email address removed] Please be sure to include your contact information.
| General Member | General Member – Student* | Member-at-Large | Sustaining Member |
|---|---|---|---|
| Individuals interested in leathercraft who belong to one of the CSCL Branches. (Need not be a leathercraft person.) $40.00 | A registered full-time student shall pay $5.00 | Individual interested in leathercraft who does not belong to one of the CSCL Branches. (Need not be a leathercraft person.) $40.00 | Commercial Organizations interested in supporting the Society. $100.00 or material equivalent to $100.00. |
CSCL Larmour Lending Library
The CSCL lending Library of Books and Patterns can be referenced on our web site www.canadianleathercraft.org. Head to Gallery and click on CSCL Library of Books and Patterns. Under the Patter option there is 80 pages of patterns that may give you ideas of things to make. Under the Book section there is 13 pages of titles of Books and DVD’s about Leather crafting, design and colour. Remember these patterns and books are there for you to borrow from the library. Select item(s) you would like to borrow and send your list to Paul Kitchener at [email address removed]
Branch Presidents will assist in pickup and delivery of the orders from branch members.
Members-at-large may order directly from Paul and arrange shipping or printing options, fees may apply.
Memberships are due by March 31st
Page 3 — SEE - What Can You do with Scraps of Leather
SEE - What Can You do with Scraps of Leather
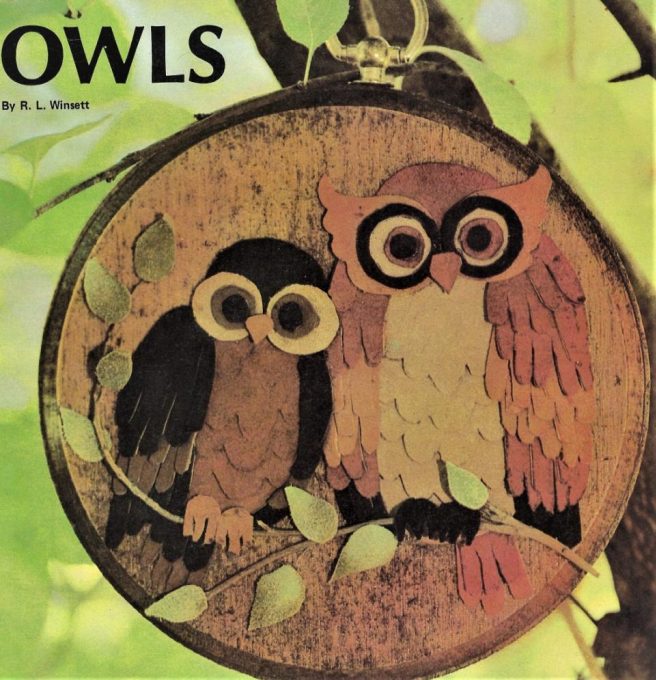
From Making It with Leather October-November 1974
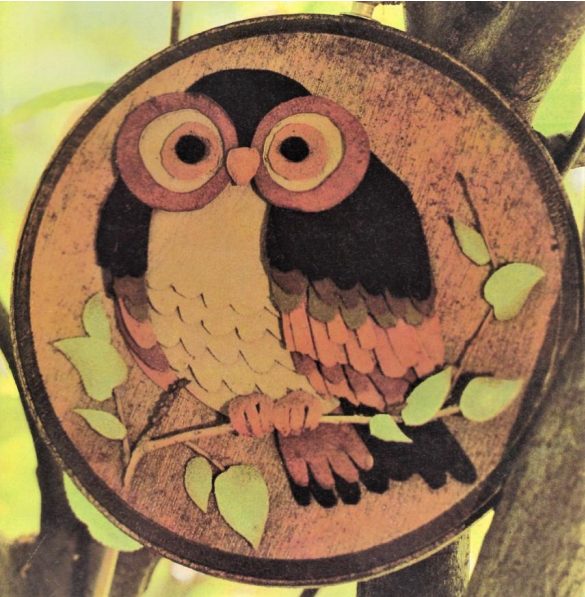
[This page reprints a "Making It with Leather" (October-November 1974) magazine cover titled "OWLS, By R. L. Winsett", and a second photo of a similar leather-scrap owl medallion. Winsett is the original magazine author, not a CSCL member; no CSCL names appear.]
Page 4
MATERIALS: Odd bits of suede, preferably more than one color. Use tobacco brown, amber, hickory, chocolate brown, earth brown, dark brown and green. Silicone glue, wooden plaques or random pieces of wood, wood stain, varnish, hangers in brass or gilt, sharp scissors or knife and twigs from tree limbs.
TO MAKE: Trace each pattern piece onto suede, adding enough allowance to each so the top pieces will overlap the bottom ones. REMEMBER: this is a build up of pieces, You will begin from the BOTTOM and work up through each layer. The first pieces to be glued down are the tail feathers.
But before any suede is glued to the plaque, sand, stain and varnish the wood. A medium brown or mahogany stain brushed onto the wood and wiped dry with a soft cloth adds an “earthy” look to the project. To glue, squeeze a small amount of silicone glue onto each piece of suede — use sparingly — then place the piece on the plaque.
After the tail feathers are in position, begin with the body Pieces, adding each layer until all the body is complete. To limit bulk, selective trimming may be done on the edges of the suede, especially on the body. The only point to remember is that the top layer should hide the edge below it.
After the body is finished, the wings are added, layer by layer. The eyes and head should be added last. For greater dimension, use larger amounts of silicone glue to raise eyes and beak above other parts.
A dry twig can be positioned at the bottom, complete green suede leaves. Cut feet and glue in place, wrapping each one around the twig though the owl were actually perched on the twig.
The last line above was cut short in the transcript, at "the twig though the owl were actually perched on the"; the missing word, "twig.", is restored. The sentence a few lines up, "complete green suede leaves", prints that way in the original magazine article reprinted here, without a connecting word; set out above as printed.
Page 5 — Condolences – Plant Hanger – a great way to use up scraps - also
We extend our sympathy to the Chynoweth Family and the Norland
Branch on the sudden passing of Phyllis McHale (nee Chynoweth) in
September. Phyllis had been a very active member for many years until poor health slowed her down.
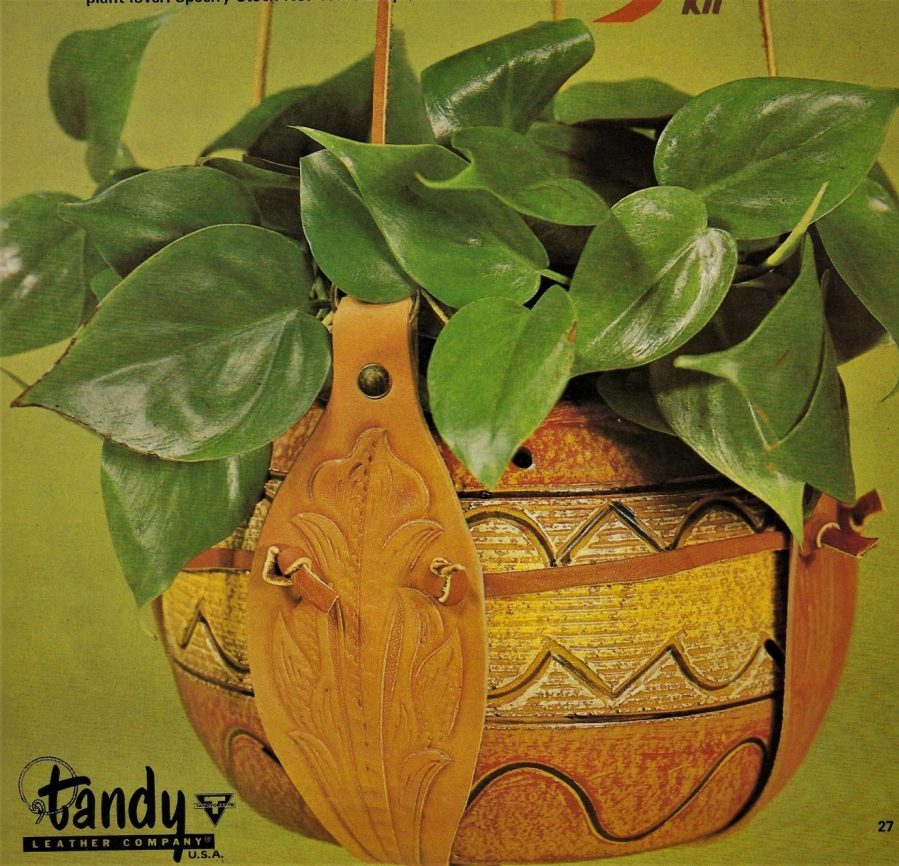
Shown in the Make It with Leather June-July 1976 Hanging Plant
Tandy had a kit available for this plant hanger but you could use your imagination and come up with your own design. A great way to use up scraps of leather.
Page 6 — Five Strand how to
Five-Strand How-To
The heading above is hand-lettered in script on the printed page; the contents list at the front of the issue names this item “Five Strand how to”.
Step 1: Make 4 cuts into strap, dividing it into 5 equal parts as in first illustration.
Step 2: Bring strip 1 to the right over strips 2 and 3 as in second illustration. Now bring strip 5 over strips 4 and 1. (Fig. 3)
Step 3: Take strip 2 and bring over strips 5 and 3 (Fig. 4) and pass strip 4 from right to left over strips 1 and 2 (Shown on Fig. 5).
Step 4: In Fig. 6 two steps are shown. First bring strip 3 around and over strips 5 and 4. The upper portion of this strap must be held intact. Next, take the bottom of the strap and pass through the opening between strips 3 and 4.
Step 5: Now the braid should look like Fig 7. Pay no attention to the tangled strips at the bottom and continue to work at the top.
Step 6: Take strip 1 and bring over strips 2 and 3 (as shown
Page 7 — Sharpening Punches
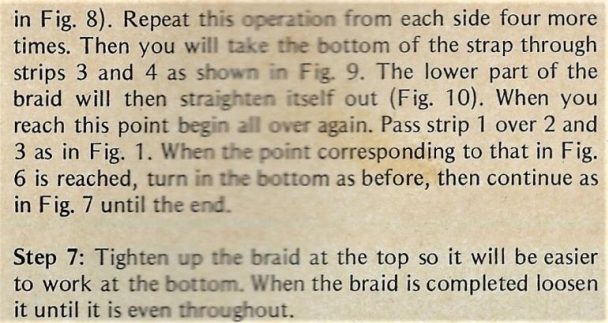
...in Fig. 8). Repeat this operation from each side four more times. Then you will take the bottom of the strap through strips 3 and 4 as shown in Fig. 9. The lower part of the braid will then straighten itself out (Fig. 10). When you reach this point begin all over again. Pass strip 1 over 2 and 3 as in Fig. 1. When the point corresponding to that in Fig. 6 is reached, turn in the bottom as before, then continue as in Fig. 7 until the end.
Step 7: Tighten up the braid at the top so it will be easier to work at the bottom. When the braid is completed loosen it until it is even throughout.
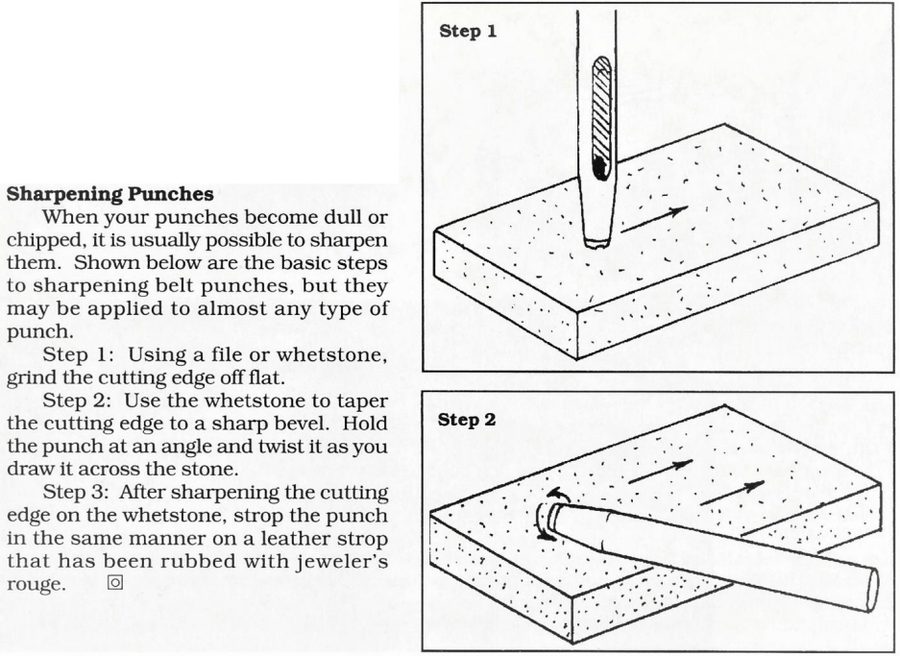
Sharpening Punches
When your punches become dull or chipped, it is usually possible to sharpen them. Shown below are the basic steps to sharpening belt punches, but they may be applied to almost any type of punch.
Step 1: Using a file or whetstone, grind the cutting edge off flat.
Step 2: Use the whetstone to taper the cutting edge to a sharp bevel. Hold the punch at an angle and twist it as you draw it across the stone.
Step 3: After sharpening the cutting edge on the whetstone, strop the punch in the same manner on a leather strop that has been rubbed with jeweler's rouge.
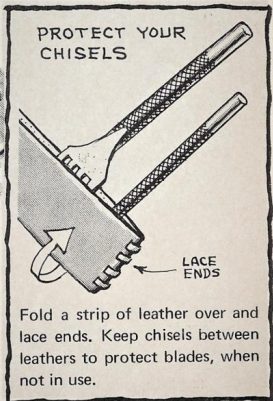
Protect Your Chisels — Fold a strip of leather over and lace ends. Keep chisels between leathers to protect blades, when not in use.
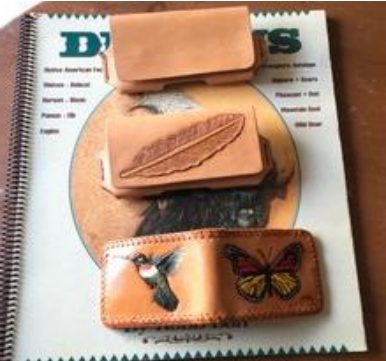
Some projects that Jim Wilkes just finished. Way to go.
This page had been left with only the photo caption at the foot; the rest is restored above: the end of a strap-braiding how-to continued from the previous page (steps and figure references only, the diagrams themselves not reproduced here), a reprinted "Sharpening Punches" instructional item in three steps, and a "Protect Your Chisels" tip. All three are illustrated with diagrams that carry no further text. No names appear beyond Jim Wilkes, already captioned.
Page 8 — Spanish Don’s Hat
From the Craftsman Volume XIV Number 4 May-June 1970
[Genuine near-blank: a single source line crediting a reprinted pattern, with the rest of the page left empty.]
Page 9
Spanish Don's Hat
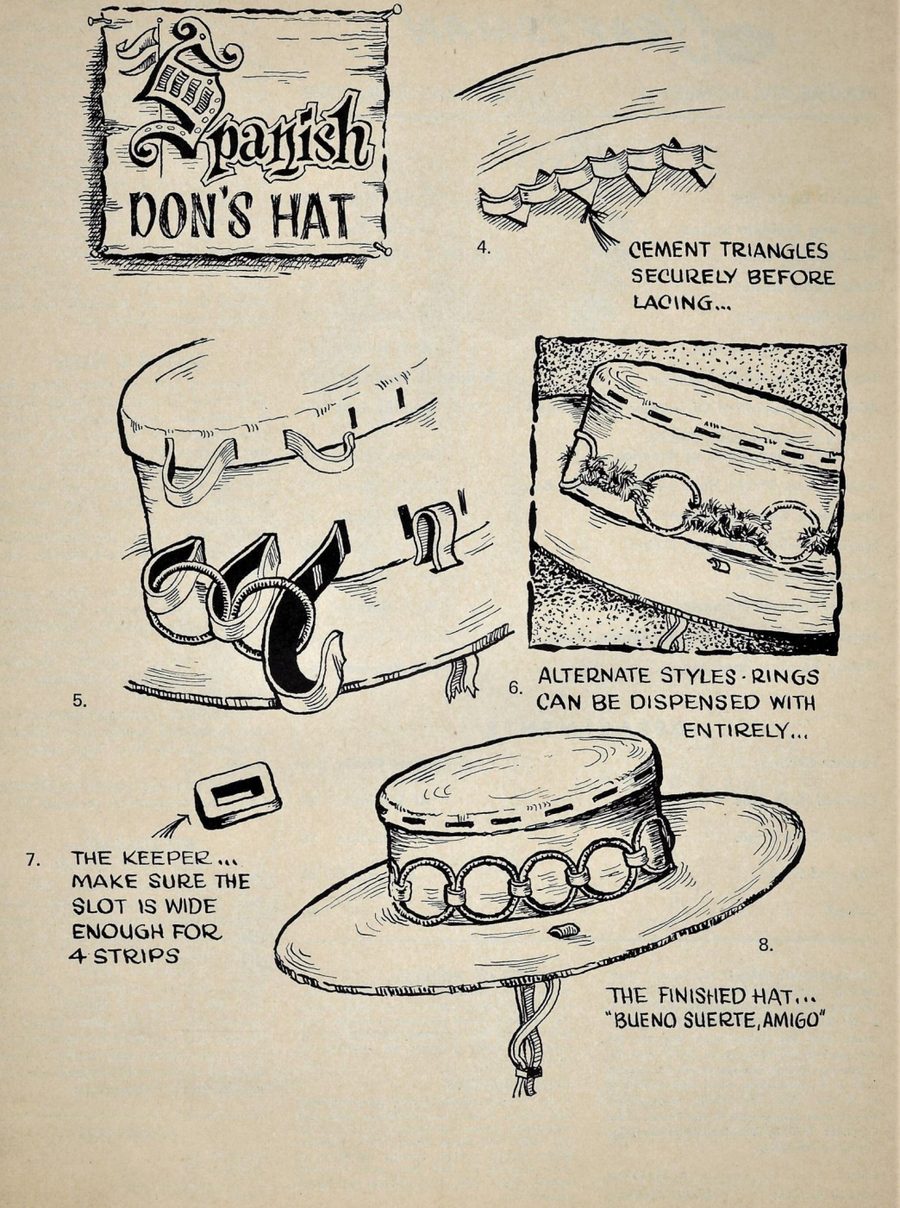
[The hand-lettered title banner "Spanish DON'S HAT" is on this page, not the next; the article continues on the following page with construction steps 1-3 and the "By BILL MACK" byline, and that page carries no title banner. This page also carries the pattern illustration with five numbered construction steps, 4 through 8; steps 4, 6, 7, and 8 have hand-lettered captions, and step 5's illustration has no caption text. Transcribed from the printed page below.]
4. CEMENT TRIANGLES SECURELY BEFORE LACING…
5.
6. ALTERNATE STYLES · RINGS CAN BE DISPENSED WITH ENTIRELY…
7. THE KEEPER … MAKE SURE THE SLOT IS WIDE ENOUGH FOR 4 STRIPS
8. THE FINISHED HAT… "BUENO SUERTE, AMIGO"
Page 10 — Tool Tip and “Members-At-Large-At-Work”
[This page opens directly with construction steps 1-3 and the "By BILL MACK" byline; it carries no title banner — the hand-lettered "Spanish DON'S HAT" banner is on the previous page.]
By BILL MACK
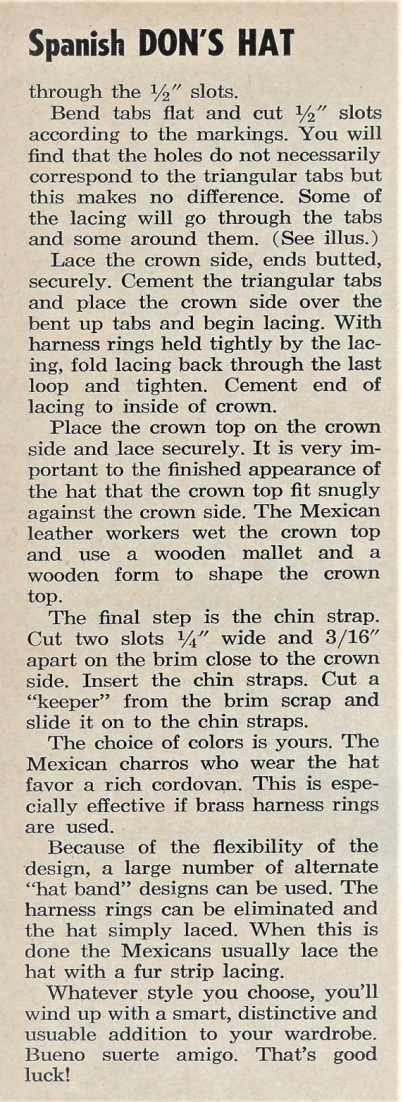
The dashing young Spaniards who colonized Mexico brought with them an elegance of manners, an elaborate code of chivalry and styles in dress that persist to the present day.
One of their contributions was the Castillian “sombrero,” a low crowned, wide flat brimmed hat, usually made of felt and covered with velvet. The rugged Mexican countryside was a bit hard on velvet, so with the practicality that Mexico demands, they retained the smart style of the Castillian hat and employed the durability of leather in its manufacture. The result was a hat as charming as its cloth cousin, but infinitely more practical.
These handsome hats are still in use by mounted men who travel the rugged jungle and mountain trails of the State of Nayarit, Mexico, But the majority of the hats are worn by North American visitors, male and female, who are charmed by its rugged good looks.
USE HARNESS RING TO MEASURE BETWEEN SLOTS…
MAKE SLOTS IN CROWN TOP AND USE TO MARK SIDE
BUTT ENDS AND LACE
BEND UP AFTER SCORING…
The four lines above are captions inside the pattern diagrams; a couple of short marks near them are pencil strokes in the drawing, not lettering, and are left out. Read from the printed page, the three steps are lettered: 1. PAPER CLIP and CARDBOARD TEMPLATE; 2. USE HARNESS RING TO MEASURE BETWEEN SLOTS…; 3. MAKE SLOTS IN CROWN TOP AND USE TO MARK SIDE, BUTT ENDS AND LACE, and BEND UP AFTER SCORING…
Materials are as follows:
One piece, ⅙” thick, 16” square (Brim)
One piece, ⅙” thick, 3¾” wide by 25” long (crown side)
One piece, 1/16” thick, 10” square (crown top)
Lacing material, 1/16” thick, ½” wide, 36” long.
Lacing material, 1/16” thick, ¼” wide, 36” long.
10 iron or brass harness rings, 1¼ or 1½” in diameter.
The two lacing widths are in small fraction type: the printed page gives one as ½" and the other ¼", set out above. Several other measurements on this page use the same small fraction type.
It should be pointed out that the hat is extremely flexible in design. More experienced leather workers may want to add their own ideas and may see shortcuts that would facilitate the making of the hat. However, these instructions follow the exact procedure of the Mexican leather worker who makes the hat.
The first step is the brim. Draw a circle 14” in diameter and cut out.
At this point, cut a piece of cardboard or heavy paper 3¾” wide and 25” long. Place it around your head and paper clip it together. This is your template for cutting out the head area in the brim, It also serves as a guide for the crown top,
When you mark your head outline on the brim leather be a little on the generous side as some of the interior of the head space will be taken up by the folded tabs and lacing which secure the brim to the crown side,
Use the cardboard pattern to trace the outline of your head for the crown top, Measure out from that line ¾” all around. This is the cut line. Score the leather at the pattern line to facilitate the shaping of the cup-like crown.
Undo the cardboard strip and use it as a pattern to cut out the crown side.
At the butt ends of the crown side punch holes so that the ends can be secured with any conventional lacing.
Cut the head space in the brim material as per illustration. The triangular tabs should be at least 1¾” long to facilitate assembly. Score around their base and fold up.
With the three pieces of leather cut, you can begin assembly.
Using the harness rings as a rule, mark each edge around the crown side. Cut ½” slots at these marks. The slots must be wide enough for a doubled strip of the lacing to fit through.
Cut ¼” slots in the crown top, temporarily secure the crown side by butting ends together and tying with a bit of lacing. Place crown top in place and mark thru the slots to the crown side. Cut slots on mark in crown side.
With the crown side still temporarily secured, place it over the bent up triangular tabs and mark
Page 11
Spanish DON'S HAT
through the ½" slots.
Bend tabs flat and cut ½" slots according to the markings. You will find that the holes do not necessarily correspond to the triangular tabs but this makes no difference. Some of the lacing will go through the tabs and some around them. (See illus.)
Lace the crown side, ends butted, securely. Cement the triangular tabs and place the crown side over the bent up tabs and begin lacing. With harness rings held tightly by the lacing, fold lacing back through the last loop and tighten. Cement end of lacing to inside of crown.
Place the crown top on the crown side and lace securely. It is very important to the finished appearance of the hat that the crown top fit snugly against the crown side. The Mexican leather workers wet the crown top and use a wooden mallet and a wooden form to shape the crown top.
The final step is the chin strap. Cut two slots ¼" wide and 3/16" apart on the brim close to the crown side. Insert the chin straps. Cut a "keeper" from the brim scrap and slide it on to the chin straps.
The choice of colors is yours. The Mexican charros who wear the hat favor a rich cordovan. This is especially effective if brass harness rings are used.
Because of the flexibility of the design, a large number of alternate "hat band" designs can be used. The harness rings can be eliminated and the hat simply laced. When this is done the Mexicans usually lace the hat with a fur strip lacing.
Whatever style you choose, you'll wind up with a smart, distinctive and usuable addition to your wardrobe. Bueno suerte amigo. That's good luck!
Tool Tip The stamp tool Veiner 406 gives a floral design with a different look – ripple-edged daisies. A single petal requires two impressions and a Seeder347 is a nice disc for the daisy flower centre. Easy to grow!
“Members-At-Large-At-Work”
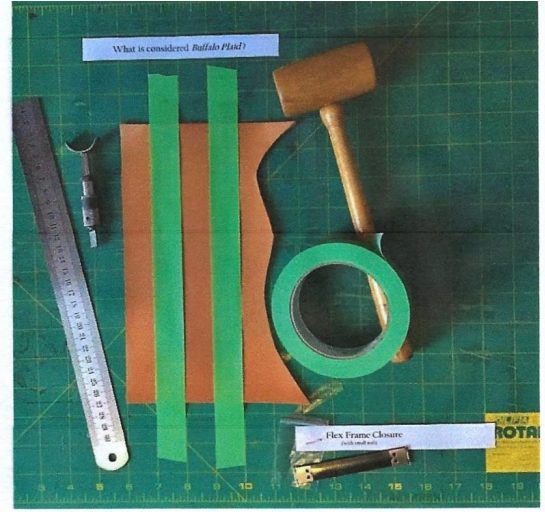
What is considered Buffalo Plaid? See the next issue of CANADIAN LEATHERCRAFT!
WANTED: Free patterns that use a FLEX
FRAME CLOSURE. Possible uses include eye glasses case and coin purse. Please send to:
[email address removed]