
An issue of the Society’s newsletter, transcribed from the original.
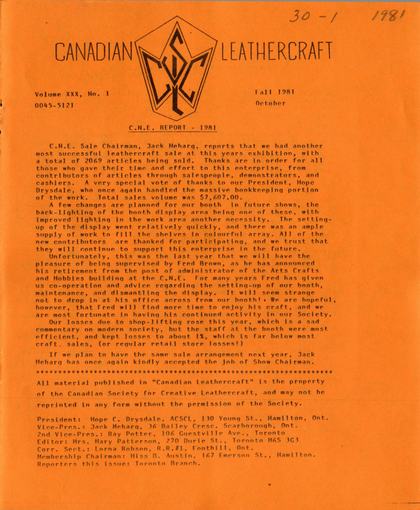
(12 pages, 2.0 MB)
the full-resolution scan, 32 MB, for close research
Page 1
30 - 1 1981
Volume XXX, No. 1
0045-5121
CANADIAN
LEATHERCRAFT
Fall 1981
October
C.N.E. Sale Chairman, Jack Meharg, reports that we had another most successful leathercraft sale at this years exhibition, with a total of 2069 articles being sold. Thanks are in order for all those who gave their time and effort to this enterprise, from contributors of articles through salespeople, demonstrators, and cashiers. A very special vote of thanks to our President, Hope Drysdale, who once again handled the massive bookkeeping portion of the work. Total sales volume was $7,607.00.
A few changes are planned for our booth in future shows, the back-lighting of the booth display area being one of these, with improved lighting in the work area another necessity. The setting-up of the display went relatively quickly, and there was an ample supply of work to fill the shelves in colourful array. All of the new contributors are thanked for participating, and we trust that they will continue to support this enterprise in the future.
Unfortunately, this was the last year that we will have the pleasure of being supervised by Fred Brown, as he has announced his retirement from the post of administrator of the Arts Crafts and Hobbies building at the C.N.E. For many years Fred has given us co-operation and advice regarding the setting-up of our booth, maintenance, and dismantling the display. It will seem strange not to drop in at his office across from our booth!. We are hopeful, however, that Fred will find more time to enjoy his craft, and we are most fortunate in having his continued activity in our Society.
The original prints a small stray mark after "booth!", kept as printed.
Our losses due to shop-lifting rose this year, which is a sad commentary on modern society, but the staff at the booth were most efficient, and kept losses to about 1%, which is far below most craft, sales, (or regular retail store losses!)
If we plan to have the same sale arrangement next year, Jack Meharg has once again kindly accepted the job of Show Chairman.
All material published in "Canadian Leathercraft" is the property of the Canadian Society for Creative Leathercraft, and may not be reprinted in any form without the permission of the Society.
President: Hope C. Drysdale, ACSCL, 130 Young St., Hamilton, Ont.
Vice-Pres.: Jack Meharg, 36 Bailey Cresc. Scarborough, Ont.
2nd Vice-Pres.: Ray Potter, 106 Guestville Ave., Toronto
Editor: Mrs. Mary Patterson, 270 Durie St., Toronto M6S 3G3
Corr. Sect.: Lorna Robson, R.R.#1, Fonthill, Ont.
Membership Chairman: Miss B. Austin, 167 Emerson St., Hamilton.
Reporters this issue: Toronto Branch.
Page 2 — BOX WITH LEATHER HINGE
BOX WITH LEATHER HINGE - by Nora Huyck, Member-at-large, CSCL.
(We are most fortunate in having had such excellent support for our members-at-large/Norland issue (Summer, 1981), that this article had to be carried. forward for this fall '81 issue.. We appreciate Nora's suggestion that this. could. be held. over........ )
This article is typed with small extra periods scattered through some sentences; kept as printed throughout.
This method of. covering wooden boxes uses the leather covering the inside and outside of the back of the box to form a hinge, which holds the lid and body of the box. together. Previous issues of the bulletin have shown methods of forming the boxes,.various types of which could be effectively used for this project. Millboard boxes would be equally acceptable.
1. Make a brown paper pattern as follows:
The front of the body of the box - this will continue onto the lip of the box and down inside to the bottom. There will be 1/2" turnovers to turn onto the outside bottom of the box and onto the ends of the box.
2.&3. Each end of the box will need a pattern since the ends may not be identical. The pattern should continue onto the lips of the box and down insude. There is also a 1/2" turnover onto the bottom of the box.
The original prints "insude" for "inside"; kept as printed.
4. The outside bottom of the box - 1/16 to 1/8" smaller all around than the bottom of the box in size.
5 &6. The inside bottom and top inside - These are the same size as the inside bottom measurement of the box, and also the same size as the top of the box. These areas may be padded, and this will necessitate making your pattern guide 1/2" larger all the way around.
7. The lid and outside hinge, a pattern piece which covers the top of the lid, the front and ends of the lid, the lips on the front and ends of the lid, and the inside of the front and ends of the lid. There is a 1/2" turnover from the front onto the ends of the box. The pattern continues onto the back of the lid and the back of the body of the box, with a 1/8" allowance between the two pieces. (This allows for proper hinge "movement" to open and close the box.) There is also a 1/2" turnover onto the ends of the lid and body, and onto the bottom of the box.
[Diagram: brown-paper pattern pieces for the box, numbered to match the steps above — 1 (Front), 2 & 3 (End), 4, 5, 6, and 7 (Lid), each drawn as a labelled rectangle.]
Page 3
8. The inner hinge pattern. This covers the inside of the back of the box body, the entire lip of the back of the body of the box, and the back of the lid and inside back of the box.
When all these pattern guides have been prepared, arrange them on the leather (or leathers) chosen for the various parts. The leather for these instructions is wallet weight morocco The leather will be cut out larger than pattern pieces 1,2,3,7,&8, since some of the length will be used up in turning the 90 degree angle from one part of the box to another part. This small-size addition to each piece is necessary whenever a 90 degree turn occurs, and pieces 4,5 &6, being flat, do not need any addition when laying out your leather.
The leather will NOT be cut the size of the paper guide but will be marked up in much the same way, BUT NOT EXACTLY, before being cut out of the leather.
Starting with the piece for the front of he body of the box. Place the front of the body of the box on the flesh side of a piece of leather, as selected, and with a pencil or ballpoint pen draw the exact outline of the front of the box.
The original prints "he body" for "the body", dropping the first letter; kept as printed.
Set the box aside. With a ruler, extend the lines indicating top and bottom of the front of the body of the box by a distance of 1/2 inch. These extensions formthe 1/2" turnover onto the ends of the box. Add 1/2" along this bottom to form the turnover onto the outside bottom of the box. Set the box front back in place. Hold the box firmly and pull the leather against the lip of the box pressing firmly against the inner edge of the lip. Then pull the leather along the inside of the front to reach the inside bottom. Press firmly enough here to make a mark on the leather. Set the box aside again, and mark with a pencil the line indicating the inner edge of the lip and the inside bottom. Cut out the leather on all lines except the one for the inside bottom. Allow 1/4" extra, since it is difficult to get this line exact at this point in the construction. With the ruler and bone folder, or a bent tracer, crease the lines well. Skive the turnovers.
The original prints "formthe" as one word, without the space; kept as printed.
Next do the pieces for the ends of the box, in the same way as above, omitting the turnover. Skive the parts which will cover the thrunovers. The skiving of the turnover and the covering leather will reduce the thickness of each so that the two together are equal to only one thickness of leather.
The piece for the outside bottom is skived sufficiently to make a neat finish when cemented in place.
Nothing is done yet to the pieces for the inside of the lid and for the inside bottom of the body of the box.
Page 4
Now do the large piece for the lid and back of the box.
Place the lid upside down on the leather. Draw the outline of the lid carefully, so that the pencil lines are the exact size of the top of the lid. Extend both ways the lines which you have drawn along the front of the lid and the back of the lid. With a knife cut these extensions. This will allow you to pull the leather up against the ends of the lid while that for the front and the back remains flat.
Pull it up firmly and press against the inner and outer edges of the lip and the inside bottom of the lid. Mark these lines with a pencil, then cut off bit beyond the line for the inside bottom.
The leather for the front of the lid is done the same way with the addition of 1/2" turnovers to turn onto the ends of the lid.
The rest of the leather covers the back of the lid, allows for the hinge equal to twice the thickness of the leather covering, the back of the body of the box, and allows for a turnover of 1/2" onto the ends of the box. Crease well all lines indicating turns.
Turnover, and parts covering turnovers will be skived.
The inner hinge will have to be fitted after the other parts are glued into place.
Cementing the leather in place is done in the following order. Sand turnovers where necessary as work progresses.
1. The front of the body of the box, the bottom turnover, the end turnovers, the lip of the box. After these are glued, cut away a small amount at either end of the part which goes down inside the box to make it fit properly. Don't trim away any leather from any part which does not go down inside the box. The complete front lip must be covered from outside edge to outside edge.
2. The next glue area is the large piece for the lid and outside hinge. Cement the top of the lid in place first, then the front of the lid, the turnovers onto the ends, the lip, and down inside in the same way as above. Next, cement the back of the lid. Slit the turnovers along the edges of the lip to separate this part of the turnovers from the parts which will be turned onto the ends of the body of the box.
There is now one thickness of leather on the upper and lower lips of the front of the box. Cut two narrow strips of the covering leather to put temporarily between the lips of the back of the box to hold them apart the same distance as the covering leather holds the front lips apart.
Now cement the leather to the back of the body of the box, the turnovers onto the ends and the bottom. Trim away neatly any extra bit of turnover which is not even with the ends of the body of the box.
Page 5 — 1981 C.N.E. WINNERS; LIBRARY
The leather is cemented in place on the ends of the lid, then glued onto the lips. The leather is trimmed as before to fit down inside neatly; there are two thicknesses of leather at the front corners, and these are mitred, and then the leather is glued down inside.
The ends of the box are done next, in the same way. There will be an overlapping at all four corners on the outside bottom. Mitre these carefully to fit evenly.
Cement the bottom covering in place.
Do the inside hinge next. Trim it so that it fits exactly the full length of the lips, overlapping at the corners. Skive the part covering the lips just a bit. Cement the leather against the inside back. Pull it firmly over the lips. Trim so that it goes neatly down into the lid. Mitre the corners. Then finish cementing in place.
Finally, trim the parts for the inside top and bottom, to fit exactly, and cement these into place.
1981 C.N.E. WINNERS
This year the C.N.E. classes for Leathercraft were reduced, as were many of the crafts, in an effort to streamline the handwork sections of the C.N.E. This was also necessitated by the move to smaller quarters in the lower level of the Arts, Crafts and Hobbies building. Two classes only were listed, and Hamilton members swept the awards with the following winners.
First in both small articles and wearing apparel- Hope Drysdale(Ham.) Second in both of the above classes - Ruth Haig (Hamilton) Third in one of the above classes- Art Morris of Hamilton, who also took a first in the over-65 craft class for leather.
Congratulations to these excellent craft workers!!
*** CORRECTION ***
It was reported in error that the Secretary at the Annual Meeting was June Somerville. Actually, Muriel McKnight filled in for June on brief notice, and the Executive wish to express their appreciation to Muriel for her continuing helpfulness to the Canadian Society for Creative Leathercraft. Our apologies for this error!
*** LIBRARY ***
Jean Hunter requests the Executive to have book crates returned at our Feb. meeting, so we request members of Branches to have their books back to their Branch librarians by mid-February.
Page 6 — DISPLAY TECHNIQUES FOR SALES AND EXHIBITIONS - A COMPARISON
DISPLAY TECHNIQUES FOR SALES AND EXHIBITIONS - A COMPARISON by Mary Patterson, Toronto Branch.
There is a wide variance in some aspects of setting up displays when we consider general "sale" shows as opposed to "exhibition" shows. The craftsman must learn to create proper settings in both types of displays, as one exhances his image as an artist, while the other provides him with necessary income to further his career.
The original prints "exhances" for "enhances"; kept as printed.
We will not deal with the types of places that these. "shows" may be held, as circumstance of place of residence and stature in the arts community generally dictates the quality and size of display area one has access to, although in societies such as our C.S.C.L. the novice artisan often has an opportunity to display at a much higher level than he could as an individual.
The display area allotted for an exhibition usually already includes the use of cases, or some type of display stands. This may cause the craftsman to have to compromise on the size of pieces he wishes to show. Most sales-type shows provide, at the very most, a table and/or 3-walled area in which to create a setting. It is particularly a wise move to visit the gallery or sales area well in advance to see what materials will be needed to make your show a well-balanced viewing site. This is particularly true of places that provide display cases of limiting size. If you plan to make craft shows a regular source of income, it would be a wise move to invest in some of the newer display cases that can be assembled in cube units, by using chrome "clips" that hold sheets of glass or plexiglass together.... these can be varied from show to show, but each unit remains a constant size, with only the pattern in which they are stacked being variable.
Early in one's "show" career, the best investment would merely be a few stands, of either chrome, glass, plastic or wood, so that pieces may be raised at different levels from the floor of cases, or from the sales table. In an "exhibition" show, this is done to define the importance of some pieces, and to relieve monotony of levels for the viewer. It also allows smaller pieces to not become lost to the eye. As a sales booth feature, these same stands draw attention to small items, and maximize use of the area allotted, as larger pieces can be supported against them. For sales area use a "turn-around" carrousel of either table-top size, or a floor model chrome unit to give maximum display space. For this type of stand, you should plan ahead when making your articles, mounting pins on cards, with holes punched in the corner so that they can be hung up, (as on a button-card display rack,) or using standard belt buckles that will slide on to the "arms" of the stand, and clear the floor in length. These are obtained through display material stores, but often may be purchased cheaply from a store which is closing, even if you must respray them with either chrome paint, black flat enamel, (for a wrought-iron look), or gilt paint. These can be an invaluable help, allowing you to keep your sales area looking well-stocked, for as one card is removed, the next pin comes to view, allowing your customers to have a good choice
Page 7
readily on view, as well as taking up only 2 feet of valuable show space to display about 4 dozen items. A floor stand will use up about 4 or 5 square feet of space, but can hold a half dozen shoulder bags, plus a dozen belts, without any crowding. For leathercrafters, either of these stands would be an excellent investment, perhaps shared by several branch members!
After you have found out what the exhibition gallery will provide for background for their cases, or you have measured your sales area, the next decision should be about background fabric. Sometimes this is unnecessary, but for leather, I myself prefer to have a fabric background, as it softens the hard reflections of glass cases, creating a more subtle area for the warm rich colours of good leather. It is helpful to check the techniques used by shoe salons to bring out the best features of their purses and shoes. For an exhibition of your own work, you can choose a fabric texture and colour that suits your principle colour range. (We all tend to work in certain individual colour ranges, usually!) For a group show, a compromise colour must be established, generally more neutral in tone. For most exhibitions, velveteen, velvet, felt or burlap can serve well, but the best idea is to pick up a few of your items, and travel to the nearest fabric store, holding the samples of your craft against a number of backdrops. (And don't neglect to try the backs of some fabrics, as they may be of a more interesting weave than the right side of the cloth!) My personal preferences lean toward rich garnet tones of tweed burlap, perhaps with a swatch of cranberry velvet across a diagonal area. This may sound totally inharmonious, but it really works well. If you can get some true French silk velvet, the substantial difference in cost is more than worth the extra dollars spent. It is an excellent foil for glossy leather! For sales area, where people will be handling things a great deal, I generally use only the burlap, or perhaps a soft wool that drapes well. Keep a few swatches around to change the look of your sales area from show to show, as they do not wear out and may really boost sales by giving your booth a "professional" look.
Remember! If the public's eye is not caught by their first sight of your booth, they may never stop! Make an impact with colour and harmony in tones in your work!
Try out pieces at home in a mock-up, and check to see if you need auxiliary lighting at a sales booth. Luckily, this problem does not occur at exhibition areas usually, so all that you have to worry about is placement of items to not shadow one another.
A well-lettered sign is necessary for both exhibitions and sales, easily read from some distance away. One that is too "artsy" in letter-type is not wise. Once again, the first glance is the most important one that the public will give to your display! For an exhibition, your name, and craft, in larger letters will suffice, with small printed cards available in a small holder on the sign, for address and telephone. For a sale, remember to take along a few extras, to avoid answering the same questions all day. I always have one "special" for each sale, as old customers tend to watch for what new item you have created....and by "special", it does not necessarily have to be a cheaper than usual item, just something not generally shown in your stock. A polite little sign noting whether you will accept cheques also helps.
Page 8
Another small sign that is handy to have is one mentioning whether or not you accept cheques. Often the public is reticent about asking this question. Yes, we accept cheques most gladly, and have as yet to get a bad one! It is my experience that people make more purchases when they only have to sign a cheque...I do it myself! Don't we all?
For an exhibition, a price list is necessary, generally kept at a desk at the gallery, and this should be typed neatly, and kept tidy in appearance. A nice touch is to enclose these in a clear plastic file cover, so that they remain clean and unsmudged. It is wise, if the exhibition area does not have a sales office, to add, after your name and address and telephone number, some information as to when items requested to be held for purchase by viewers may be available for pick-up. Most shows are about a month in length, and someone may be waiting to present one of your pieces as a gift, so be sure that they know how long they will have to wait!
Common errors that occur at exhibitions are often related to the method of grouping pieces. A display can become most static if all the belts are placed together, all the purses, etc. This often occurs because a specific show case "fits" the purses etc. This is where pre-planning, by mocking-up the display at home helps. One of the most pleasing shows I have ever visited was our "Leather '78" show. The cases were large and workable, and the groupings of objects was done often by colour, or by size. As this could not be planned ahead, I feel it was handled by an inspired show committee!! The worst show that I have ever visited was in a mid-town gallery, where a multitude of tiny pieces were spaced so far apart that there was no continuity of display or shape. A smaller area could have been made in the gallery by moving the cases together, instead of filling all the available room space.
A very usual error to see at sales is a fanatic desire by the exhibitor to keep each and every inch of space filled! As we have mentioned, the use of a stand, or a rack could free some table space to good advantage. If every space is filled, it appears that nobody has even thought of buying your work! People often purchase by the "herd" technique, where everyone stampedes to buy a particular item, whether or not it is good, and this often shows in a store where something is marked as a "special". Supermarkets thrive on this habit of "follow-the-leader". I was recently amused, (but annoyed!) to see one of our local supermarkets mark a pile of items with a "special this week" sign, 15¢ higher than the regular price for the same item, available up the aisle on the regular shelf space at the "unspecial" lower price! And, they sold all the "specials" first!
Another sales error is the overly tidy table, or the one with a display that is so artistic, that you hesitate to buy for fear that you ruin the whole display. (You also hesitate to touch these pieces for the same reason!) The tactile richness of leather is our best sales attraction, so it must be within reach of the public, for a sale is NOT an exhibition.....
Page 9 — TORONTO BRANCH PROGRAMME - 1981-1982
The worst error in judgement that is made at exhibitions, in my opinion, is the allotting of numbers in consecutive order to each exhibitors pieces, and then handing the pieces over to a display co-ordinator who hangs them in groups by shapes and colours. I spent an hour today trying to see a show, but over ninety percent of the time was wasted turning back and forth through the lengthy catalogue for material descriptions, etc. I believe that it is wiser to number the pieces in order of hanging, and adjust the catalogue to follow in sequence. An extra page or two at the back can be devoted to listing the exhibitors alphabetically, with an enumeration of the pieces that they have entered, but all descriptions of materials, along with the title of the piece, and the maker's name, in my opinion, should be easy for the public to follow. (I actually gave up trying to see the show today for this reason!) A one-man show is, of course, easier to manage in this area, but sometimes lacks the interest that can be generated by a group of craftsmen working in the same medium.
A "theme" show is perhaps the most interesting type to arrange, as you have fascinating comparisons between the methods used by artisans to comply with the "theme" format. The Ontario Crafts Council gallery was the scene of a "teapot" show a short while ago, and the multitude of variations on this one theme were enormous! I would personally enjoy seeing a "box" show by leathercrafters, as we have such a wide range of ways to make boxes in our chosen medium.
A craft sale, on the other hand, often suffers from similarity of objects, as the average person attending a sale wants to find a particular item to buy, and if one is showing only belts, then you lose all sales for wallets, pins etc. A sale must be planned with something for everyone, to the best of your ability. A key to success is to demonstrate your craft, as most people don't realize the amount of delicate handwork that is involved in making a simple item of fine quality. Besides, we all enjoy watching someone else work, don't we?!
TORONTO BRANCH PROGRAMME - 1981-1982
Visitors are always welcomed at the Toronto meetings, now being held at St. Martins in the Field Church, just north of Bloor and Keele St. subway station, every second Friday. Nov. 13th will be a moccasin pattern-making evening, under the capable supervision of Gladys Riddell, Toronto Branch President. Dec. 13th will be a Christmas social evening, plus a time for assembling our moccasins. On Jan. 8 we are having a "Do-It-Yourself" evening, with all members participating in a workshop for the proper finishing of small articles. Feb. and March will be a Purse design and assembly project, with April 9 set aside for Leather Designs by Pokering (heat marking). Jack Meharg is demonstrating his new art of spray dyeing by air-brush on May 14th, and June 11 will be our annual Hobby night and Social. Please note the new meeting time for Toronto Branch - 7:30 p.m.
Page 10 — MAKING A COVERED FOLDING PICTURE FRAME (For 3 Pictures)
MAKING A COVERED FOLDING PICTURE FRAME (For 3 Pictures) (.... Making the frame and covering it with leather.....) by Gladys Riddell, Toronto Branch
Making the frame: Use millboard. This can be either 1, 2 or 3 levels in front thickness plus back... this creates a 3-D effect. Cut out the pieces for the three fronts, (we will be describing making a frame 3 thicknesses deep throughout these instructions). Cut out the centres of the frame pieces, making each centre hole one step smaller the the previous one, and then stack the fronts together, after applying glue, and press them flat to dry overnight. Sand edges well.
The original repeats itself: "one step smaller the the previous one"; kept as printed.
[Diagram: four small rectangles showing the three frame fronts, numbered 1, 2 and 3 from largest to smallest opening, and a fourth labelled "STACKED" showing them nested together.]
Cutting out backs: These may be cut out of either X-Ray plate or lightweight millboard, (about 3/16th " thick). Cut backs the same dimensions as the fronts. Set aside until needed, after fronts are covered.
Front leather marking: Now that the front frames are made, place them on your leather and mark all the way around, allowing at least a 1" margin around frame inside and outside of front. Skive edges.
Fitting the front frames: Moisten your leather, centre frames on the leather, then turn over to work on the front face to mould the leather to the front stepped areas of the built-up frame. When well fitted, remove, and apply glue to the frame. Then reapply fitted leather front to frame, and, using your finger,(watch out for marks if your fingernails are long!), gently refit the leather into place on the steps of the built -up frames. Use a modeller that does not have any sharp edges as some spoon modelers do, and work the corners of the depressions very neatly and square. Also use your modeller to work in side lines of various levels of frames.
Finishing the rest of the front piece: Turn your piece over, (on a clean sheet of paper for protection of damp leather surface,) and cut the corners on the inside to within 1/2" of correct size, for further fitting. Put glue on the frame back, then fold leather corners over frame until they fit properly, trimming small amount as needed. Use bone folder to smooth leather to fit, so that no frame shows from the front. Work one corner at a time. When thoroughly dry, sand the back edges smooth, but do NOT sand the outer edges of the frame which would ruin the leather finish, naturally! Take a piece of skiver 1/8" smaller all around the frame. (Cut this out in strips, as it saves material from the centre which is covered and will not show.) Skive both edges of each strip, mitre corners to fit, and glue in place, one at a time. Let whole front section dry before proceeding to back.
Back: Your piece of leather should be big enough for 3 frames plus 3/4" and 1" allowances as listed below. We will call the 3 frames #1, #2 and #3 for easy reference, when giving dimensions.
Page 11 — HOW TO MAKE A HAND-MADE BACK FOR STICK PINS
Back (Continued): Turn leather flesh side up, and mark, using back pieces, as indicated below.
[Diagram: a strip marked out for the three frame backs, each about 1 inch wide with 3/4-inch gaps between them, labelled Frame 1, Frame 2 and Frame 3; beside it, the same three frames shown with their top, bottom and outer edges cross-hatched to mark where glue is applied.]
Skive all the way around for turning. Lay your pieces of millboard, (or X-ray plate), on the 3 rectangles that are marked Frames 1,2 &3. Glue the skived edges of the leather, turn in neatly all the way around, and smooth into place. Let glue dry.
Skiver lining: Measure a piece of skiver to go right across all 3 frames, and thin out the edges by skiving. Glue one frame portion at a time, using waxed paper as protection for finished areas. To be able to score correctly for folding, it is suggested that you apply glue to the start of the next frame section at the same time, and then score neatly with a modeller to form a fold mid-point between each two frames. (Along dotted lines of diagram). Do each frame section in turn, let dry.
Joining back and front sections: Use a contact type glue on the front frames on the top, the bottom, and the outside side of the two end frames, and on the centre frame, top and bottom only. Do same on the back pieces. ***It is recommended that you do only 1 frame section at a time, putting the glued 1/3 of the frame unit in a press overnight to bond firmly. (If you have a very sizeable press, it might be done all at once.) The areas to be glued are marked on diagram above (Diag. 2), and are indicated with cross-hatched lines. The areas left unglued allow for insertion of the pictures in the frames.
Note: Since it essential that the folds work well, check your back piece by gently folding over as you lay it out, as millboard thickness may vary as much of it is now prepared in metric measurements, rather than in fractions.
The original prints "Since it essential", dropping "is"; kept as printed.
HOW TO MAKE A HAND-MADE BACK FOR STICK PINS by Dorothy Brandford
Materials: Nickel wire, 19 gauge, (available at Home Hardware stores).
or Rolled Gold Wire, (HARD), 20 gauge, available at "The Amulet", Craft Supplies, Kingston Road, Toronto.
Method: Cut a 3 3/8" length of wire, and using round-nosed pliers, fashion a small circle at one end. (Fig. 1)
Using square-nosed pliers, grasp the circle, and wind the wire to form a multiple circle. (Fig. 2)
With round-nosed pliers, bend the long end behind the circle, (at right angles). (Fig.3)
To finish, sharpen end on a grinder.
Page 12 — UPCOMING EVENTS FOR C.S.C.L. MEMBERS
UPCOMING EVENTS FOR C.S.C.L. MEMBERS
Leather '82 July 1 to 25, 1982 Bramalea Centre
A Call for Entry, with accompanying brochure will be sent out shortly to members of the C.S.C.L. We trust that we will have the support of many of our craftsmen again for this biennial event which is our special "showcase".
A Workshop in Photography will be a highlight of the spring season, with Randy Brinkman conducting the workshop on Saturday May 29, 1982. Place: St. Martins -in-the-Field Anglican Church, Toronto. (See map below for November workshop). Cost: T.B.A. Time: 9:00-4:00. Photography skills have become a "must" for all serious craftsmen, as most shows prefer to jury by slides these days. Lighting, backgrounds, placement etc. etc. need special consideration, so plan to attend this informative and interesting workshop!!
Annual Meeting 1982. April 30, May 1 & 2, 1982
To be held at the Howard Johnson Motor Hotel, Markham Rd. and #401 Highway, east of Toronto. Further information will be forthcoming in the next issue of Canadian Leathercraft.
WORKSHOP ON "ESPO DYES" - SAT. NOV. 28TH
... A BATIK TECHNIQUE ADAPTED FOR LEATHER...
DEMONSTRATOR - ESTELLE POST -
TIME - 9:00 - 4:00 COST PER PERSON - $9.00
PLAN TO ATTEND & PLEASE LET YOUR BRANCH PRESIDENT KNOW BY NOV. 20TH PLEASE.
(MEMBERS-AT-LARGE CAN CONTACT TORONTO BRANCH PRES. GLADYS RIDDELL AT 762-7466 (EVENING) PLACE: ST. MARTINS-IN-THE-FIELD CHURCH, TORONTO.
[This last notice, giving directions to a leather-dye workshop, is hand-lettered rather than typed, with a hand-drawn map of the streets around the church — South Kingsway, Windermere, Bloor Street West, Keele Street, Indian Grove and Parkside Drive — marking the building with an X and noting that Parkside Drive and Keele Street are two names for the same street, one south of Bloor and one north. A note promises a light lunch, with tea and coffee served.]