
An issue of the Society’s newsletter, transcribed from the original.
(8 pages, 1.3 MB)
the full-resolution scan, 19 MB, for close research
Page 1 — REQUIREMENTS FOR ASSOCIATE & FELLOW MEMBERSHIP - CSCL
PL- fees
| CANADIAN | LEATHERCRAFT |
| Volume XXXI, No. 2. | Winter |
| 0045-5121 | January 1983. |
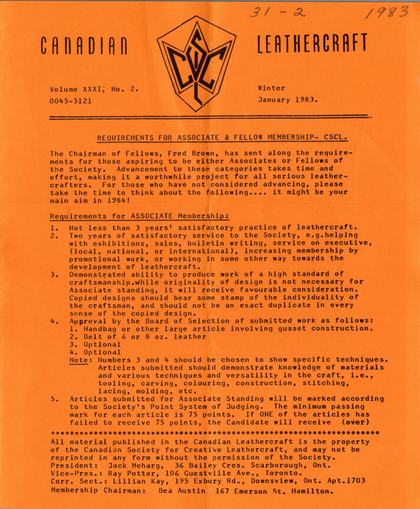
REQUIREMENTS FOR ASSOCIATE & FELLOW MEMBERSHIP- CSCL. The Chairman of Fellows, Fred Brown, has sent along the requirements for those aspiring to be either Associates or Fellows of the Society. Advancement to these:categories takes time and effort, making it a worthwhile project for all serious leathercrafters. For those who have not considered advancing, please take the time to think about the following.... it might be your main aim in 1984!
Requirements for ASSOCIATE Membership:
1. Not less than 3 years' satisfactory practice of leathercraft.
2. Two years of satisfactory service to the Society, e.g.helping with exhibitions, sales, bulletin writing, service on executive, (local, national, or international), increasing membership by promotional work, or working in some other way towards the development of leathercraft.
3. Demonstrated ability to produce work of a high standard of craftsmanship.while originality of design is not necessary for Associate standing, it will receive favourable consideration. Copied designs should bear some stamp of the individuality of the craftsman, and should not be an exact duplicate in every sense of the copied design.
4. Approval by the Board of Selection of submitted work as follows:
1. Handbag or other large article involving gusset construction.
2. Belt of 6 or 8 oz. leather
3. Optional
4. Optional
Note: Numbers 3 and 4 should be chosen to show specific techniques. Articles submitted should demonstrate knowledge of materials and various techniques and versatility in the craft, i.e., tooling, carving, colouring, construction, stitching, lacing, molding, etc. 5. Articles submitted for Associate Standing will be marked according to the Society's Point System of Judging. The minimum passing mark for each article is 75 points. If ONE of the articles has failed to receive 75 points, the Candidate will receive (over)
HR KKK A OR EEE EEE IEE ETE SE EEE EE GIGS SII GIGS
All material published in the Canadian Leathercraft is the property of the Canadian Society for Creative Leathercraft, and may not be reprinted in any form without the permission of the Society.
President: Jack Meharg, 36 Bailey Cres. Scarborough, Ont.
Vice-Pres.: Ray Potter, 106 Guestville Ave., Toronto.
Corr. Sect.: Lillian Kay, 195 Exbury Rd., Downsview, Ont. Apt.1703 Membership
Chairman: Bea Austin 167 Emerson St. Hamilton.
Page 2
26 Requirements for Associate (cont'd)
credit for the three qualifying articles and a condition on the fourth. The candidate may submit another article the following year, and, if it qualifies, will receive his/her associate standing and certificate at the next Annual Meeting when all four articles must be displayed. A candidate may fail on only ONE article to receive this condition. 6. Work submitted must be accompanied by the signed declaration on the application form that the work is solely that of the candidate. Work done in a leathercraft studio may be submitted for the Associate,Standing, provided it is done without assistance. 7. Enclose fee as set forth on application to cover exam and certificate. Requirements for Fellow Membership:
1. At least one year as an Associate Member, and three years of service to the Society.
2. Wide experience and meritorious achievement in the field of leathercraft.
3. Approval by the Board of Selection of submitted work as follows: 4 articles,(2 large, 2 small), of the applicant's choice. All pieces to have different function, size and treatment, as well as demonstrating versatility in the craft, and grasp of techniques. NO piece submitted for Associate will be eligible.
4. Articles will be marked according to the Society's Point System of Judging. The minimum passing mark on each of the four articles is 80 (eighty) points. All four articles must qualify.
5. All work submitted must be original in design and decoration, and should include, if possible, new forms and uses. Simplicity of decoration is most acceptable. Commercial, or copied patterns must NOT be used.
6. Candidate shall submit an article, not necessarily technical, for publication in Canadian Leathercraft for the approval of the Board of Selection. An article previously published may be submitted.
7. Work submitted must be accompanied by the signed declaration on the application form that the work is solely that of the candidate, done without supervision or assistance.
8. Acceptance by a two thirds vote by the active available Fellows. 9. Enclose fee as set forth on application form to cover examination and certificate.
NOTE: Any further questions on the above, including applications, requests for entry forms, etc. should be requested from: Mr. Fred Brown,
9 Nashland Avenue,
Islington, Ont. M9B 2V5.
It might be wise to call to the attention of those interested in the above "testing" of their skills, to refer to the Fall(October)'82, issue of Canadian Leathercraft, where definition of the difference between "design" &"decoration" was clarified by the Executive. (see page 11 of the Fall issue.)
[A stray underscore is not part of the printed text: "techniques. NO_ piece" is set out here as "techniques. NO piece".]
Page 3 — TOOL & KNIFE SHARPENING - A RESUME of the Fall Workshop
TOOL & KNIFE SHARPENING - A RESUME of the Fall Workshop, as presented by Ed Lautenschlauger of Norton Abrasives.
by Ralph Whately, Toronto Branch.
Mr. Lautenschlauger gave a lecture with practical demonstrations to the members of the C.S.C.L. at St. Martin's -in-the-Fields Anglican Church, Toronto. This resume suggests that most members are familiar with some types of sharpening, and with sharpening stones, fine and coarse, so I will just suggest the "fine tuning" that Ed suggested.
Sharpening is neither a skill or an art. It is an acquired mechanical ability developed through constant practice. So do - not hesitate to try your hand at sharpening, it can only get better as you work at it.
Try to maintain the angle of the edge that is already on the piece to be sharpened. Then take the edge to be sharpened to the abrasive, (i.e. sharpen from the edge back, in one direction only). This eliminates the "swarf" or"wire edge" which is the "sawdust" of sharpening. Round stamping dyes are "rolled" when being sharpened, and small cutters like hole pliers should be sharpened touching the full circle edge of the cutter lightly.
During the question period that followed, Ed suggested metal cloth of 320, 360 or 400 grit could be used for "touch-ups". The angle of the edge of scissors should be 15°, and on knives the angle should be 5°-15°.
This is very brief, but if anyone wants more information, Ed left an article on sharpening with the stones needed for various tools, and two "consumer catalogues" of Norton stones, such as he used in his demonstration. Several people from each Branch attending have copies of these which they will be glad to share. (Ask at your next branch meeting!)
Fig. to the rt. demonstrates the direction in which to sharpen.
A hand-drawn diagram beside this caption is labelled "SHARPEN IN THE DIRECTION OF THE ARROW", with "TOOL", "EDGE" and "STONE" marking its parts
Page 4 — Book Review
4.
Book Review
Creative Bookbinding by Ms. Pauline Johnson pub. by University of Washington, Seattle Wash.1977.
This book, a new addition to the Larmour Memorial Library, is surprisingly creative for a craft as ancient as bookbinding. There are many novel and interesting ways of looking at binding materials. This book is not confined to leather-- though it covers its use adequately--and as such, opens itself to a wider market.
There is an interesting historical review- a short trip of binding through the ages with interesting highlights and illustrations of period work. Ms. Johnson does not neglect the moderns, my own favourite, Edgar Mansfield, a New Zealander working in England is featured, as well as French and German binders. There is a sample of her own work that is a tasteful modern design.
There is, of course, a real problem in obtaining tools, equipment and materials useful to binding. She suggests alternatives and home made equipment which is useful and this is interspersed with the various steps in binding. A variety of binding exercises includes booklets, boxes, cases, etc. A novel section on sewing demonstrates Japanese binding, a hitherto untouched area in binding. As a paper enthusiast, she has a section on using paper for binding as well as end papers. Colours applied using potato, eraser, lino, sponge, brayer, string, stencils and torn paper make interesting possibilities.
The last section deals exclusively with leather, with an excellent section on inlay and onlay of leathers. She goes on to gold tooling, titling, and concludes with general repairs and recipes for paste, glue and leather dressing.
Ms. Johnson has done an excellent presentation and has an interesting viewpoint. This book may be read with both pleasure and profit.
by Ray Potter,
President, Toronto Branch.
SPECIAL NOTICE
All Branch members should note that items for their Branch entries for the WESTON TROPHY must be ready to be sent to Bob and Dorothy Muma's for judging by the end of March. See your Branch representative for exact dates and support the competition!
Page 5 — BOX MAKING WITH MILLBOARD
No stray mark precedes the heading below; it is clean typescript throughout, and nothing here needed dropping.
BOX MAKING WITH MILLBOARD
A Toronto Workshop Series with Fred Brown, part l of 2.
Part 2 will appear in the next issue of Can. Leathercraft, and gives design details for "Covering the Box with Leather". ) Millboard is available at art stores, and some custom framing shops, in a variety of thicknesses..070 thickness in suitable for this type of box making, where two thicknesses are laminated together. If your store does not have the thickness noted on the board you are buying, look for this grey millboard stock to be approximately as thick as two dimes.... not quite 2 pennies in thickness. This should make a relatively rigid construction.
PATTERN MAKING:
Sides: Plan ahead on a piece of paper to obtain the finished Size that you want. Measure the inside size you want, and add on the following thicknesses to obtain the final outside size of the box you will be making. (For example, if you wish to make a box to fit a deck of playing cards, or other specific items.) The following list of items are the thicknesses to add: Inside size + thickness of outside leather + thickness of two layers of millboard, + thickness of lining leather + thickness of back retaining tab of leather + 1/8" for leeway.
This may look complicated, but you can merely pile samples together, and measure the total plus the leeway. If this is your first box, perhaps it would be wise to make a comfortable sized box to work with, not being too specific about fitting something as rigid as cards etc. A box of about 3"X 5" is a handy size for a desk or for jewellery.
Fig. 1 is a hand-drawn cross-section of the box wall, labelled in the margin: "Thickness of outside leather", "Thickness of 2 layers of millboard", "Thickness of lining leather", "Inside measurements of box", "Thickness of back retaining tab", captioned "(Fig. 1) Thicknesses exaggerated for clarity."
Check the grain (machine direction) of the millboard itself, as even paper has grain. Always mark your small scrap with an arrow to show the direction of the grain, as well as marking the large sheet itself with an arrow indicating grain direction.
A second hand-drawn sketch beside this paragraph shows a piece of millboard flexed both ways, captioned "Flex cardboard both ways to find easiest way it bends."
Run the grain the LONG way of the box. The direction where the board bends easiest is the grain.
An arrow drawn here points from that sentence to a sketch of the box blank with corners marked A and B.
Therefor your box would be made with the long dimension of the box running from A to B. (Fig. 2.)
Page 6
A hint to keep your cutting chore easier... cut a long strip at one time and subdivide into the small lengths you need... this tends to keep lines straighter.
Knife to use: For millboard, a utility knife is quite functional, or one of the snap-off Olfa cutter, or a regular (blue-handled) skiving knife. Since a fair amount of pressure is needed, keep your knife sharp, and try not to use a flexible blade which encourages crooked lines.
Assembly is aided if you have a small press. This can be made quite simply from two pieces of smooth, 1/2" or 3/4" wood, about a foot square, with holes drilled through the four corners, as illustrated in Fig. 3, these holes large enough to just fit a carriage bolt with a nut. So that the wood doesn't split too easily when tightening down the nut, drill the holes 3/4" in from the corners. Pieces are inserted in the press for pressure when glue is drying. A small cupboard handle afixed to the top (be sure not to drill holes through top to mount this, or it ruins inside surface of press), aids in dropping the press top down without shifting the position when the glue is still wet.
Three hand-drawn diagrams sit here. The first, captioned "Press (Fig. 3)", sketches the two-board press just described, with its wing nut and carriage bolt labelled. The second, "Fig. 4A", is a rectangle marked with corners Z, W, X and Y and arrows to points A and B, showing how the box's long and short millboard strips are laid out. The third, also captioned "Fig. 4A" and "Fig. 4B", sketches the strips themselves, one labelled "4 thicknesses for cutting" and the other "2 thicknesses for gluing".
Measure the box size you want, as described earlier, and cut strips of millboard to the desired height. Subdivide these long strips into & (four) long pieces, for the front and back sides, and 4 (four) shorter pieces for the other sides (ends). (See Fig. 4)
Make sure that the long strips are cut running WITH the grain of the millboard. MARKING for cutting can be much more accurate when marked with a sharp knife, rather than with a pencil. MARKING can also be done using a pair of callipers to groove the mark, as you can preset the width on the dividers and mark quite a few strips with this one setting.
You will notice on Fig. 4 that there is a difference in length of the front and back sides (long pieces). This difference in length may be quickly found by stacking four pieces together, and cutting off the thickness of these 4 pieces from pieces X-Y. (see illustration Fig. 4A
Glue pieces Z-W to pieces X-Y, thus forming 2 laminated pieces. To position the shorter X-Y pieces on the longer Z-W pieces, use 2 thicknesses at each end to position them quickly. (See Fig.4B Put glued pieces in the press, after preparing the sides, pieces A-B and C-D in the same manner,to obtain the correct lengths. (These are ALL the SAME length, unlike the other sides.)
Use regular white glue. (Lewiscraft) or similar, such as Bondfast.
Page 7
All sides should be glued together' to form an open square before cutting the bottom. It is wise to make yourself a small SQUARE for positioning the pieces. This, could be something as simple as 2 pieces of 1"x2" afixed to a bottom. (See fig. 5). To glue the sides together, apply glue to one end of a short piece, press against the end of the long front piece, thus fitting into (and filling up) the small gap formed where you shortened the piece X-Y. Press the piece into the corner of your square, to make sure it is exactly square before the glue hardens.
Do the same with the other end, and the back.
You then have two right-angled pieces, and glue is then applied to the last 2 corners, then the box is pressed into the square corner to ensure it remains square, (if one newly glued corner is square, the other will also be square), and slip an elastic AROUND the box sides, to hold all tightly while the glue sets.(Fig. 6).
TO FORM BOTTOM: Set on millboard, (while in the square), and mark around the inside with a knife to mark bottom inside piece. Cut out this inside bottom piece. It should be tested for fit prior to glueing, and should fit so tightly that it remains in place without glue. Hold it up to the light to see if there are any gaps, and no light should show through cracks. If you have made a miss-cut, since you have fitted it without glue, you still have a chance to make a better effort!! The marking with the knife is what allows you to have such a fine fit, since it makes such a thin mark. REMEMBER... the grain should run the LONG way of the box bottom!:
Apply glue to edges of bottom piece, and insert into sides, (this should take a bit of pressure, if the fit is snug enough, and allow to dry in position, flush with the bottom of the sides.
Now cut bottom outside, measuring by cutting around the OUTSIDE of the partially assembled box, after marking with a knife once again for perfect cutting. Apply glue to one side of this outside bottom piece, and glue into position. (Set it in square while positioning. )
SANDPAPER all edges when dry.
TOP: Cut out two pieces 1/4" larger than box.
FALSE BOTTOM: If you want box to have a "platform" base, cut out two more pieces 1/4" larger than box.
Glue each of these two sets of pieces together.
BEVEL top piece (edges) by sanding firmly with regular sandpaper. This makes a much nicer form to cover with leather.
(Cont'd Next Issue).
Printed as one run-together word, "dryin" (no space) — read as "dry in"
Page 8 — UPCOMING DATES OF INTEREST; LEATHERCRAFT WORKSHOP
Toronto Branch has acted as reporters for this issue, rather than the pre-announced Norland issue. Norland is working hard preparing for this year's ANNUAL Meeting
APRIL 30 and MAY 1, 1983.
ROYAL HOTEL -- BALSAM LAKE, (near Coboconk).
Your Branch representatives will be receiving their application forms for reservations at the end of February, so contact them for details in early March. Members-at-large may follow their usual manner of booking, and new members-at-large can contact the Corr. Sect. (see front page this issue) for an application.
UPCOMING DATES OF INTEREST
Place: Toronto, Queen Elizabeth Building, C.N.E. grounds.
"Winter's End - Sale of Handmade Crafts" Wed. April 20th (7 p.m.- 10p.m.) Thurs. Apr. 21-Sat. Apr. 23(Noon- 10 p.m.) Sunday Apr. 24 -(Noon to 6 p.m.)
Prices: 8 3.00 for adults, SENIOR CITIZENS NO CHARGE.
Place: ONTARIO CRAFTS COUNCIL GALLERY - 346 Dundas St. W. Toronto.
Mar. 3-Har.27 - "Nothing But Rings" (finger rings.) 26 May- 19 June -" Banks and Alternative Places"
(Places to keep your cash... banks, belts wallets, etc.) - (in our field of interest!)
June 23 to 17th July - "Ontario Crafts'83 - Juried Exhibition of multi-media items.
Place: Harbourfront, Toronto: Aug. 4-7
Fourth Annual CRAFT FAIR - Multi media show "by the lake". Date for those wishing to rent space: Deadline Mar. 15th.
LEATHERCRAFT WORKSHOP
To be held on Saturday May 28th- at St. Martin -in-the-Fields Church in Toronto. Hold this date open Workshop T.B.A.
Toronto Branch invites all interested members to attend
"Bottle Covering" - Friday Apr.8th - 7:30 p.m. with Carol Mclean, F.C.S.C.L. as guest lecturer. Due to Norland's work with the Annual, next issue will have Woodstock Members as reporters. Norland Branch and the Members-at-Large issue will be fitted in in FALL, 1983,