
An issue of the Society’s newsletter, transcribed from the original.
(12 pages, 2.1 MB)
the full-resolution scan, 32 MB, for close research
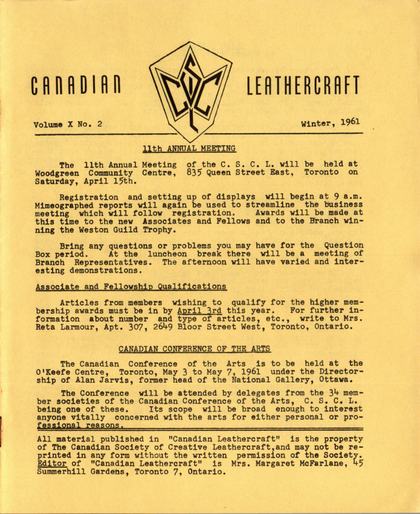
Page 1 — 11TH ANNUAL MEETING; Associate and Fellowship Qualifications; CANADIAN CONFERENCE OF THE ARTS
CANADIAN LEATHERCRAFT
Volume X No. 2 Winter, 1961
11TH ANNUAL MEETING
The 11th Annual Meeting of the C. S. C. L. will be held at Woodgreen Community Centre, 835 Queen Street East, Toronto on Saturday, April 15th.
Registration and setting up of displays will begin at 9 a.m. Mimeographed reports will again be used to streamline the business meeting which will follow registration. Awards will be made at this time to the new Associates and Fellows and to the Branch winning the Weston Guild Trophy.
Bring any questions or problems you may have for the Question Box period. At the luncheon break there will be a meeting of Branch Representatives. The afternoon will have varied and interesting demonstrations.
Associate and Fellowship Qualifications
Articles from members wishing to qualify for the higher membership awards must be in by April 3rd this year. For further information about number and type of articles, etc., write to Mrs. Reta Larmour, Apt. 307, 2649 Bloor Street West, Toronto, Ontario.
CANADIAN CONFERENCE OF THE ARTS
The Canadian Conference of the Arts is to be held at the O'Keefe Centre, Toronto, May 3 to May 7, 1961 under the Directorship of Alan Jarvis, former head of the National Gallery, Ottawa.
The Conference will be attended by delegates from the 34 member societies of the Canadian Conference of the Arts, C. S.C. L. being one of these. Its scope will be broad enough to interest anyone vitally concerned with the arts for either personal or professional reasons.
All material published in "Canadian Leathercraft" is the property of The Canadian Society of Creative Leathercraft,and may not be reprinted in any form without the written permission of the Society. Editor of "Canadian Leathercraft" is Mrs. Margaret McFarlane, 45 Summerhill Gardens, Toronto 7, Ontario.
Page 2 — BLIND TOOLING
BLIND TOOLING by Robert Muma, F.C.S.C.L.
The nature of vegetable tanned leather is admirably suited to decoration by "tooling." Through the centuries a number of different methods and tools have been devised for accomplishing this enhancement of leather. These methods can be grouped roughly into three types: (1) Line Tooling and Modelling; (2) Blind and Gold Tooling; and (3) Saddle Carving and Stamping.
Contemporary leathercraftsmen will be most familiar with the oldest and the most recently developed of these techniques. Line tooling and modelling is probably as old as the vegetable tanning process itself. Although saddle cutting and stamping developed during the early history of the American West,it is still young compared to Blind Tooling, which was born in the Middle Ages,and which is the preliminary step to Gold Tooling, but can be a very beautiful and satisfying end in itself.
One basic principle is involved in all these forms of tooling: The leather is moistened with water (or vinegar in water) and when the fibres have reached their maximum swelling with moisture they are crushed with tools to form a preconceived pattern.In line tooling and modelling this is accomplished with tools under pressure of the hand. In stamping, it is done under pressure of tools struck with a mallet. In Blind Tooling it is done with a heated bronze or brass tool pressed into the barely moist leather.
In each case the result is a darkened impression of the tool applied. Good vegetable tanned leather turns dark in this bruising process;and uniform tone in your tooling is a mark of good tooling.
Very few leathercraftsmen have ever tried blind tooling, probably because it is a traditional method of decoration in leather bookbinding and is considered inappropriate for any other purpose or too expensive to attempt.Both of these assumptions are incorrect. Books and boxes do provide a hard surface beneath the leather which is ideal for blind tooling after the project has been completed; but leather can be tooled in this way before it is applied if you prefer just as in any other kind of tooling. As for tools, only the most elementary knowledge of toolmaking is necessary to hacksaw and file a few simple tools from inexpensive pieces of brass plate and rods, which are fitted into wooden handles. Bronze or brass is used because these metals hold the heat longer than steel,and copper would be too soft. A beginner's set of about seven pallets (straight lines) and gouges (curves) can be bought for around $10.00. Compared with other leather tools this is quite reasonable. Now all you need is a sponge with water and an electric hot plate or gas burner to heat the tools.
Page 3
Practice on scrap leather for a while as this is an entirely new kind of skill. Its success depends on the proper combination of heat, moisture and pressure, and length of time the tools are in contact with the damp leather.
This combination when perfect gives you maximum bruising of the leather fibres. It does not burn the leather. It will burn the leather only if you have too much of any one of these factors. Remember it is a balance of factors that you need. Thus you can accomplish the same result with little heat and much moisture that you can with much heat and little moisture; or little heat and moisture with greater pressure and longer contact. Experiment and practice, practice, practice, until you find the proper balance without burning.
To start with, moisten the leather thoroughly with a sponge. A spoonful of pure cider vinegar in a cup of water for moistening will help prolong the moisture in the leather. This is important, as it will allow you to get more tooling accomplished before having to re-dampen the surface and wait for the right balance of factors again.
Successful blind tooling will be dark and shiny. A burned impression will be black and dull, or rough on the surface. If you have made your own tools be sure they are polished smooth on the tooling surface. Any little irregularity will show in the finished work. Best results will come with tooling just after the moisture has settled beneath the grain surface of the leather; that is, just as soon as the leather has resumed its natural color after sponging.
To use the tools, grasp the handle firmly in right hand with thumb on top. Guide it into position on the leather with left thumb nail against the metal part of the tool. A second or even third impression may be necessary for satisfactory results and skill will be necessary in returning the tool to the original impression without spoiling it.
Now that you have had a little practice and gotten acquainted with your tools, lay out a simple geometric pattern on a piece of thin tracing paper and lay it on a piece of prepared leather. Press the heated tools into this design, thus transferring it to the leather. The impression will be obscure and dull. Reheat the tools and repeat on the bare leather until the impression is clear and dark. This is a blind tooling executed from your own paper design onto leather.
For interest and variety you may want to expand and add type to your equipment for blind tooling. This can be either regular foundry or brass type used in a type holder; or brass "handle letters" used individually.This can add considerable expense of course but it opens up many more opportunities for the leathercraftsman.
(See next page for diagrams)
Page 4
Diagram accompanying "Blind Tooling," hand-lettered by Robert Muma:
Some Simple Decorative Stamps
Pallets
Gouges
Tools for Blind Tooling
A Pallet with Impression Below
Two Types of Design Possible.
Robert Muma
[This page is a hand-lettered instructional plate accompanying the "Blind Tooling" article (p2–3): a row of decorative stamp shapes over "Some Simple Decorative Stamps," sample line and arc impressions labelled "Pallets" and "Gouges," and two boxed sample impressions — a dot pattern under "A Pallet with Impression Below" and a scalloped gouge mark with a hand holding the tool — under "Two Types of Design Possible." Signed "Robert Muma."]
Page 5 — 7th INTERNATIONAL ASSEMBLY; CANADIAN HANDICRAFT GUILD (ONT.); "CANADIAN ART"
7th INTERNATIONAL ASSEMBLY
The 7th International Assembly is to be held on the 6th and 7th of May 1961 at Prudhomme's Motor Hotel, Vineland, Ontario.
The hard working committee have plans well underway to provide one of the most interesting get-togethers in the history of leathercraft, featuring some of today's top demonstrators, panel discussion, slides, movies, etc. Also a unique display of antique leather articles, which will be insured and placed in locked show cases at Prudhommes so they will be well protected from theft and handling.
Registration fee is $1.50 per person and the banquet on Saturday is $4 per plate. Registration cards will be sent to members at a later date. Bring your family and friends with you as there is something at Prudhommes for everyone - swimming (indoor pool, bring your suit), 5 and 10 pin bowling, golf, tennis and horseback riding. This is the time to learn something new in leathercraft, meet old friends and make new ones.
CANADIAN HANDICRAFT GUILD (ONT.)
The Women's Committee of the Canadian Handicraft Guild (Ont.) in conjunction with the Royal Ontario Museum is bringing the Salvador Dali "Art in Jewels" Exhibition to the Museum on Monday, May 15th for three weeks. The purpose is to raise funds for the Women's Committee and the Museum. The Committee has a three-fold object: (a) to provide scholarships for talented Canadian craftsmen for advanced study;(b) to commission work from established professional craftsmen; (c) to procure more adequate premises for the sale and exhibition of the fine crafts of Canada than is possible in the present quarters on Bloor Street.
"CANADIAN ART"
As an experimental venture "Canadian Art" magazine is now including a special crafts section called "Canadian Fine Crafts," looking at crafts from an art viewpoint. A later issue will feature leathercraft, with news of activities, competitions, etc. The Editors would welcome all leathercraft news, with pictures of winning pieces. Published 6 times yearly at $7.50 a year, the address is 77 McLaren Avenue, Ottawa, Ontario.
A decorative row of small solid diamonds closes the page; not otherwise transcribed.
Page 6 — MAKING A BINOCULAR CASE
MAKING A BINOCULAR CASE
by Clarence Redmond, A.C.S.C.L.
Binoculars vary greatly in size and shape regardless of the power of magnification. For this reason, there can be no standard case or pattern and you will have to make the case from measurements to fit the individual binoculars.
To do this: Measure around binoculars top and bottom, with a piece of soft wire. Pull tight and splice at the back, being sure not to change size of binoculars by squeezing them smaller. Shape wire to fit. (Fig.1) Binocular cases are made to carry the binoculars upside down; so the case will be smaller at the bottom than at the top. Check accuracy of measurement as this will be the inside measurement of the case.
Make a wooden form like Fig.2 from these measurements to mould your leather on to get the shape of case. Complete form must be the same size as binoculars.
Now take a piece of thin cardboard and bend around this form. Butt the ends together at the left side of form and tape together. Trim even with the top and bottom of plywood and make sure it is a perfect fit. This is your pattern.
Now lay pattern on some leather splits and trace,allowing 3/8" on the top and bottom and about 1/2" on each end for shrinkage. Wet completely through. When leather is dry enough to form into shape mould it around the wooden form. Place the join at the left side slightly lapped. Fasten with thumb tacks through splits and into the plywood, at top and bottom. Put this into the oven to harden into shape. Set oven at 225° and remove leather as soon as it is dry. Trim off the lap from the ends and butt them together. Also trim off all extra that was left for shrinkage.
Cut the lining a little larger all around and also leave a good lap. It is joined where the splits are butted together. Now take off wooden form,apply rubber cement to the inside of leather splits form and also to back of the lining leather. Open up the formed splits at the end where they butt together and place two pieces of waxed paper on the fresh cement and lap them at the centre. Now you can put the lining in place without any trouble. Then do the same with the second piece. Now pull formed splits ends together. The lining will have a nice lap. Trim off top piece of lining flap so it comes in the centre where the splits are joined and the bottom piece goes well past the centre. Cement these together, which also fastens the formed splits and makes a solid form with the lining and splits fastened together. Let the cement and leather dry overnight, then trim the excess lining off the top and bottom of this new stif-
[The word "stiffener" breaks at this page’s last line, which ends "stif-", and continues on the next page as "fener form"; both halves are printed.]
Page 7
fener form you have made, which is a base for the case. Also keep wooden form inside this new form which you have just made as much as possible, as it helps to keep it in shape. (Fig.3)
Now fit a piece of light cardboard around the front of new form and run it from the centre of one side to the centre of the other sides; do the same at the back and butt the ends together. Trim any excess off and make it a good fit. Now lay these patterns on 6 oz. cowhide leather and trace,but don't forget to allow at least ¼" for shrinkage all around. Decorate as desired and after leather has dried trim to exact size. Cement these to front and back of splits form and butt the ends together on each. Now cut two pieces 6 oz. cowhide leather 5/8" wide and approximately 7½" long. Skive the edges and cement over the butted joins at each end as in Fig. 4. Mark with dividers 1/8" from each side,then run down lines with No.6 overstitch wheel, punch holes and saddle stitch with 5-strand waxed thread. If you want to you can run a gouge over the divider line before marking for stitching and the thread will sink in level and not wear as easily.
BOTTOM
1. Outside bottom piece is made of 6 oz. leather same size as outside of case.
2. Next piece is made of 6 oz. leather same size as inside of case.
3. Stiffener cardboard fits inside case also.Allow for lining thickness. Cement lining to cardboard and fold up to the top of cardboard as Fig. 5. Cement all together, fit into the bottom of case and cement into place. Take dividers and mark ¼" from edge of bottom, then run over this mark with a No. 6 overstitch wheel. Keep case upside down and punch holes downward with a curved awl and come out the side at the overstitch wheel marks. Make sure the holes are opposite (Fig.6). Now saddle stitch together with wire flexible needles, using 5-strand waxed thread.
Cut a piece of 2 oz. cowhide 1¼" wide and approximately 21" long. Skive edges. This piece is used to cover raw edges at the top of the case as Fig. 7 shows. It will be ½" outside and ½" inside. Dampen and when moisture content is right, mould over the edge, and put the splice at the back. Skive ends and make a neat join. Mark and stitch 1/8" from the edge on the outside.
Make two wooden blocks 1" x width of case and 1 5/8" deep, and cover with lining. Cement and nail into place. These blocks are for the binoculars to rest on. Fig. 8 shows shape of block.
[Five measurements on this page are printed with a raised fraction mark: "¼”" for shrinkage, "7½”" long, "1¼”" wide, "½” outside and ½” inside", and "mark ¼” from edge of bottom" in item 3 under BOTTOM.]
Page 8
LID
1. Top (lid) piece is made of 6 oz. leather and must be the thickness of 6 oz. leather larger all around than the outside of binocular case at the top.
2. Next piece is made of 6 oz. leather and the same size as the outside of case at the top.
3. Stiffener cardboard when covered with lining must be the same size as No. 2 piece. Cement all together. Now cut a piece of 6 oz. leather 1" wide and long enough to go around No.2 and No.3 pieces and butt together at the back. Cement in place and cut the lock strap from 6 oz. leather 1 7/8" long and 1" wide. Cement it in the centre of lid at the front,using "Barge"or other similar cement. Mark and stitch this in when sewing the lid together. Also put a rivet in the lock strap. Proceed the same as you did when sewing in the bottom. (Fig. 11)
Make two loops on each side for carrying strap. These are from 6 oz. leather 2½" x 5/8" rounded at the ends, and two holes punched in each. Place these on end of case (Fig.9) 1 3/4" from top and 1¼" from bottom. Mark where holes are to be made in the case. I found a hand drill makes the holes in the case easily. It will be necessary to have a solid piece of metal held against the rivets inside of case to make a secure job. Put a heavy piece of metal in a bench vise and slide the case on to this.
Fig. 10 shows hinge pin and also where it is placed in hinge leather pieces.The hinge comes next and is made from 3 0z. cowhide leather. Cut two pieces 2½" x 2¼" and fold each double. Get some soft wire, not too thin; fold as in Fig. 10 and fit hinge pieces over wire. Next make 3 holes in each hinge piece and rivet these to lid and to top of binocular case.
If lock strap is too long, cut it, then attach lock to strap and find where the other part of lock will be fastened to case. Punch leather and attach. I used a "Tuck-Tite" lock, which is used for small bags and camera cases.
Cut carrying strap from 6 oz. cowhide 72" long, which can be made in two pieces, and allow for splice, and 5/8" wide. Rivet a 5/8" strap buckle to one end. Edge crease all straps, loops, etc., and burnish all raw edges.
Fig. 11 shows strap part of lid being attached to lid assembly. Ends are butted together at the back and when.lid is closed fits around top of case.
(See next Page for Diagrams)
[Two more measurements on this page — the carrying loops’ "2 1/2”" and the "1 3/4”" / "1 1/4”" placement from the top and bottom of the case — are typed as "2½", "1 3/4" (with a slash) and "1¼".]
Page 9
Pattern diagrams for the binocular case described on the surrounding pages, eleven figures, hand-lettered:
Fig. 1 — Wire pattern.
Fig. 2 — 3/8" plywood, 1" x 2" post, 3/8" plywood.
Fig. 3 — Top view of case showing butt-join of splits and overlap join of lining.
Fig. 4 — (case top, stitched edge shown dotted).
Fig. 5 — Bottom and Top pieces, with a strip marked: outside bottom piece — 6 oz. leather; 6 oz. leather to fit inside bottom; cardboard stiffener covered with lining.
Fig. 6 — Marking for stitching.
Fig. 7 — Binding on top edge, join marked.
Fig. 8 — Wooden block rests; shape of block from top; nail.
Fig. 9 — Strap-loops riveted in place.
Fig. 10 — Leather hinge & hinge pin.
Fig. 11 — Lid Assembly.
[This is the hand-lettered pattern-diagram plate for the binocular case whose construction steps are given in prose on the surrounding pages (p8 "LID" etc.), captioned above. The diagrams themselves are not reproduced. No names on this page.]
Page 10
The second seminar arranged for C.S.C.L.Associates and Fellows on "Design in Leathercraft" was held on the evening of April 9, following the Annual Meeting. Twenty-five members attended the extremely stimulating talk given by Mrs. Dora de Pedery Hunt, and some of the criticisms and suggestions she gave could well affect decisively the development of leathercraft amongst our professional members.
Mrs. Hunt was born in Budapest, where she took her art training in painting and sculpture at the Royal School of Applied Arts. She is an Associate of the Royal Academy,where she took her general craft training. She came to Canada in 1948, is a member of the Sculpture Society of Canada, and spent last year studying in Europe on a Canada Council grant. She has her own studio in Toronto and also teaches at Northern Vocational.
Mrs. Hunt's discourse was directed entirely to those craftsmen who are striving to improve their work artistically to the point where it might find acceptance in top-ranking art and craft exhibitions and displays. She was most understanding of and sympathetic to the difficulties encountered by Canadian leathercraftsmen in their struggle to advance in their craft -- the lack of well-trained teachers who can develop in their students the ability to appreciate the higher quality of professional art, and the dearth of superlatively crafted articles which would illustrate the goals toward which we should strive.
Mrs. Hunt suggested as a solution to these difficulties that we might consider arranging for a course in leathercraft from a master craftsman, possibly brought from Europe. At present this is quite impossible financially, but is an idea which could be kept in mind. Also we might try to obtain small but excellent exhibitions of handmade leather articles from other countries, for careful study and visual appreciation. She promised to inquire on her next trip to New York as to the possibility of getting such an exhibit here, and felt that this whole question merited exploration.
She commented on a number of Associate and Fellow articles shown at the Annual Meeting, and her criticisms illustrated the particular points she felt must be considered in all handmade articles. She stressed that all articles must be functional as well as beautiful. Nothing must be done which destroys the usability of those articles or ruins the character of the leather itself. If the decorative design does not add that special touch which enhances the beauty of the leather and the design of the article, it is much better omitted. Originality just for the sake of being different should not be considered unless such originality
Page 11 — Christmas Sale
fulfills the main requirements of function, design and leather character. If the craftsman has used good leather and has taken the time to construct a handmade article, it must proclaim itself as handmade and special - that it is meant to be handled and that it leaves no doubt that it is not a factory made article off an assembly line. Superlative craftsmanship is of course essential.
Three of the articles she examined met with her particular approval - Sadie Roebuck's pipe stand, Jean Newton's shoe horn and Derrick Fielding's braided belt. Other articles either lacked character, the decorative design did nothing to enhance the beauty of the article, there were flaws in craftsmanship, coloring techniques detracted from the particular quality of leather, some articles were only partially successful in their decorative design and would have been much improved had parts of the design been omitted. She felt that a greater effort should be made to overcome the difficulty of suitable fittings, such as purse clasps, belt buckles, etc.,that an attempt should be made either to conceal such fittings or find others of better quality.
However, Mrs. Hunt felt that Canadian leathercraft had improved greatly in the past few years, that our craftsmen were working in the right direction,but that the time had come to capitalize on the advances we have already made by arranging for better instruction design-wise and for careful study of superb leatherwork.
Christmas Sale
The Christmas Sale this year at the Handicraft Guild Shop on Bloor Street West was one of the best. Although the sale was only two days instead of three the same amount of money was taken ani The quality of the articles offered for sale was higher than in previous years which was very gratifying.
The committee wish to thank all who so kindly helped to make this one of the best sales yet.
Due to a typographical error the last 3 issues of the bulletin were wrongly numbered. Below are the correct numbers.
Spring, 1960-Volume IX No. 3 Summer, 1960-Volume IX No. 4
Autumn, 1960-Volume X No. 1.
Page 12
We are pleased to have you come in and choose from our wide selection of Quality Leathers and Accessories. If not convenient, phone or write:
Lewiscraft
284 King Street West
Toronto 2B • Canada
EMpire 3-5206
AN ALL-CANADIAN COMPANY SERVING CANADIANS SINCE 1913
[A second, separate advertisement follows, its brand name printed in white script on a solid black rounded oblong.]
Garnett
Leather Dyes and Finishes
For the Leathercraftsman:
Antiques - Toning Dyes
Polish Coat
Edge Dressing
Inlay-Background Dye
Leather Cleaner & Polish Remover
All at your hobby supply store
CANADIAN DISTRIBUTOR:
LEWISCRAFT
284 King St. West, Toronto, EM. 3-5206