
An issue of the Society’s newsletter, transcribed from the original.
(12 pages, 1.6 MB)
the full-resolution scan, 30 MB, for close research
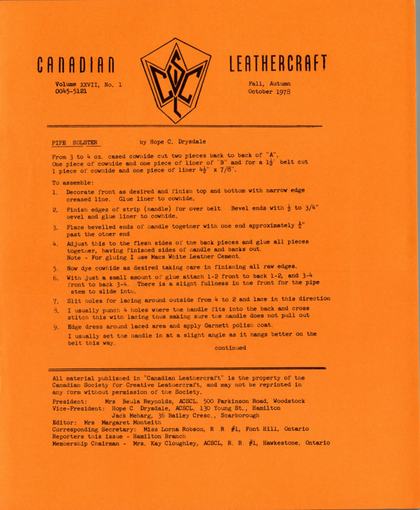
Page 1 — Pipe Holster
| CANADIAN | 7 LEATHERCRAFT |
| Volume XXVII, No. 1 | Fall, Autumn |
| 0045-5121 | October 1978 |
| PIPE HOLSTER | by Hope C. Drysdale |
From 3 to 4 oz. cased cowhide cut two pieces back to back of "A", One piece of cowhide and one piece of liner of "B" and for a 1½" belt cut 1 piece of cowhide and one piece of liner 4½" x 7/8".
To assemble:
1. Decorate front as desired and finish top and bottom with narrow edge creased line. Glue liner to cowhide.
2. Finish edges of strip (handle) for over belt. Bevel ends with ½ to 3/4" bevel and glue liner to cowhide.
3. Place bevelled ends of handle together with one end approximately ¼" past the other end
4. Adjust this to the flesh sides of the back pieces and glue all pieces together, having finished sides of handle and backs out.
Note - For gluing I use Macs White Leather Cement.
5. Now dye cowhide as desired taking care in finishing all raw edges.
6. With just a small amount of glue attach 1-2 front to back 1-2, and 3-4 front to back 3-4. There is a slight fullness in the front for the pipe stem to slide into,
7. Slit holes for lacing around outside from 4 to 2 and lace in this direction
8. I usually punch 4 holes where the handle fits into the back and cross stitch this with lacing thus making sure the handle does not pull out
9. Edge dress around laced area and apply Garnett polish coat.
I usually set the handle in at a slight angle as it hangs better on the belt this way.
continued
Step 8 ("I usually punch 4 holes...") is numbered 8 on the page: the figure's lower left arc failed to ink, which is why it can look like a 3.
All material published in "Canadian Leathercraft" is the property of the Canadian Society for Creative Leathercraft, and may not be reprinted in any form without permission of the Society.
President: Mrs Beula Reynolds, ACSCL, 500 Parkinson Road, Woodstock Vice-President: Hope C. Drysdale, ACSCL, 130 Young St., Hamilton
Jack Meharg, 36 Bailey Cresc., Scarborough
Editor: Mrs Margaret Monteith
Corresponding
Secretary: Miss Lorna Robson, R R #1, Font Hill, Ontario Reporters this issue - Hamilton Branch
Membership Chairman - Mrs. Kay Cloughley, ACSCL, R. R. #1, Hawkestone, Ontario
Page 2 — Summer Skill School Programme
Pipe Holster - continued
Do You have a Summer Skill School Programme in your community?
For several years I have had the opportunity of working for the Hamilton Board of Education on their Summer Skill School Programme. It is a programme that gives children the pleasure of developing skills in crafts as well as in sports, There could be many variations of activities; however, I will try to outline the nature of the summer school as well as the subject I was involved in, which, of course, was Leathercraft. Students who are in grades seven and eight as of June are eligible to go in August, or whatever time in the summer you would choose, Brochures are given to the children, the end of May or first of June to be taken home for parents to study, approve and return with the fee, which in 1976 was $10.00. Of course. this is subsidized by the Board of Education. This programme was originally designed to provide for city children not able to go to summer camp or leave the city for a holiday: We have expanded from one school to four schools with an overall average of approximately six hundred students. It runs for four weeks from 9 a.m, to 12 noon, with a twenty minute break at 10:20 to allow some teachers to travel to other schools between classes; it is also a coffee break for students and teachers, The subjects are in two categories--Physical and Non-physical. Examples of Physical subjects are gymnastics, judo, weight and strength training, golf, tennis and archery, and Non-Physical subjects include guitar, instrumental music, rapid reading, photography, leathercraft, exotic cooking, hand sewing and crocheting, electronics and art. Many new subjects are offered with the most popular ones continued each year, depending on teachers, equipment and room available.
Page 3
I am sure there are many of you that have been involved with teaching children. This age group is very rewarding, but a demanding role, Both understanding and patience are very necessary. The classes have been larger than ideal size--usually fifteen to twenty students but with the low fee the large number is necessary to help balance the budget. My goal is to make the children aware of the value of the leather and tools that they will be using» Also this is an opportunity to use their own creativity by making their own design whenever possible. I impress upon the students this is a craft they can relax with and introduce the craft as a possible lifetime hobby, It would be ideal in my opinion to have a continuation of these courses for older teenagers, As it is these students will have to wait until they are night school age to continue in leathercraft,
Here is an outline of how the leathercraft course operates, The School Board provides each student with a basic carving set of tools rented from Tandy's, which consist of veiner, camoflauge, pear shader, beveller, seeder, background, swivel knife and wooden mallet. Materials provided are one square foot of chrome tanned light weight leather, (suitable for wallet interiors) one needle, one pin back, domes, antique dye, lacing and glue. It is necessary for the teacher to use some of his/her own tools, such as dome setter, scissors, knife, punch, initial stamp and patterns- I found old doodle pages very helpful, or any simple carving patterns that could be used for small articles. Each student learns to trace the pattern onto the damp leather, use a swivel knife and do basic carving. I encourage them to use a design of their own as much as possible; for instance if they are taking judo, golf or are interested in some other hobby or sport I suggest they look for a design using that theme I mention this at the beginning to give them time to draw or look for a design, After learning how to use the swivel knife with a piece of scrap leather, I give each student a piece of leather to make a book mark: They trace their design onto the leather, cut, carve and learn to use antique. I purchase a roll of parchment paper from a cake decorating supply store. I find it much more enconomical to use than tracing film especially for the children, Perhaps this is the time to mention that I precut all the leather for the articles that they will be making, to prevent mistakes and waste of leather. What children can do to a hide of leather you wouldn t believe. As a member of a creative society like C.S.C.L. I do not use kits. I will give a student, who shows promise and is dependable an opportunity to cut his own leather as we near the end of the course, It is amazing how well most children do and the amount of articles they complete in the short time they have at summer school. Most students complete a book mark, key case or change purse (made from the same size leather) finished with braid lacing; a wallet including a simple interior; a wrist band and pin such as a turtle, maple leaf or flower Two of the most rewarding days of the course are open house and bring a friend day, not because they are the two last days of the summer school, but because everyone can see what the other classes have been doing and the students are eager to show their parents what they have achieved. Musicians from the instrumental music and guitar classes perform; exotic cooking class provides refreshments; there are craft tables to admire and gymnastic and judo demonstrations to watch. While parents and friends tour this exhibition of accomplishments the proud youngsters are also eyeing what they might like to take next year. I highly recommend this programme for a community large or small.
Muriel McKnight
Page 4 — Canadian National Exhibition 1978
Canadian National Exhibition 1978 by Hope C. Drysdale
The 1978 C. N.E. was good to C.S.C.L. in the Arts and Crafts Building. Under the sponsored Arts and Crafts Division the C.S.C.L. Booth was one of six winners—this is our first time. In the Banner competition Catageory "A" Helen Wheaton won a third prize for her blue and white leather mobile Banner.
This year at the Booth 25 members produced for sale 2239 articles of which 1858 articles sold for a dollar value of $6,805.90 giving the Guild a commission of $1,361.18.
In the Better Living Building Carol McLean, Fellow, won the Chatelaine award for her Checker Board.
| Category 213: 1st Checker Board | Carol McLean |
| 2nd Book Cover | Ruth Haig |
| 3rd Checker Board | Hope C. Drysdale |
| Category 214: 2nd — Gloves | Gertrude Hilder |
| 3rd — Hat | Margaret Monteith |
| Category 215: 1st - Belt | Ruth Haig |
| 2nd — Belt | Hope C. Drysdale |
| 3rd Belt | Dave Elliott |
| Category 216: 1st — Hand bag | Mary Patterson |
| 2nd — Hand bag | Dave Elliott |
| 3rd — Hand bag | Hope C. Drysdale |
| Category 217: 1st — Wallet | Ruth Haig |
| 2nd — Wallet | Hope C. Drysdale |
| Category 218: 1st — Mask | Carol McLean |
| 2nd — Tray | Margaret Monteith |
| Category 219: 1st — Pin & earring set | Margaret Monteith |
| 2nd — Necklace and earring set | Carol McLean |
| 3rd — Pin and earring set | Gertrude Hilder |
| Category 462: 1st — Hand bag | Arthur Morris |
Muriel McKnight won 2nd for her Afghan and Margaret Jennings won 1st for her Quilt.
If I have missed anyone other than leather please advise and we will get your name in the next bulletin.
1978 was truly a Banner year for C.S.C.L. when out of 24 areas in eight categorys C.S.C.L. members won 19 prizes. It pays to keep our standards high.
Category 214's second row ("3rd — Hat, Margaret Monteith") is easy to lose from its own line and run into the 2nd-place Gloves row, crediting Gertrude Hilder and Margaret Monteith to the same placement; set out here separated, matching how the page numbers and labels the two prizes distinctly. None of this competition's results appear anywhere else in these pages.
Sympathy is extended to Margaret Jennings in the loss of her husband and to Ruth Haig in the loss of her father.
Page 5 — DOUBLE 6 HOOK KEY CASE
DOUBLE 6 HOOK KEY CASE - Frank Torry
The following is a description of e double six hook key case, which I made, following a request from our son for a key case with 12 hooks. Unable to locate a 12 hook key plate I realized the only way was to incorporate two 6 hook key plates into one key case.
Please note the illustrations:
Fig. 1 is a view of the finished article showing, inside the top, the tongue that holds the two key plates.
Fig. 2 is an open view of the key case, showing the tongue with the plates attached. Note that the tongue does not extend to the top or the bottom, being a quarter of an inch shorter than the height of the key case. The key plates are placed level with the top of the tongue and attached to each other, (with the tongue in between), with rivets.
Fig. 3 gives the dimensions of the reinforcement, (all dimensions are in inches), which is glued between the lining that comprises the tongue, More will be said of this later.
Fig. 4 gives the measurements of the cover of the key case. Note that you are looking at the flesh side of the cover. I would suggest that you make an exact copy of Figs. 3, 4, 5, and 6 on cardboard.
The letter "R" indicates the position of the reinforcement.
Fig. 5 This is the reinforcement that strengthened the two end folds of the case, These reinforcements should be skived along each long edge. Fig. 6 Here we have the measurements of the lining of the key case, Note particularly, you are looking at the good side of the leather. After the reinforcement for the tongue is glued in you will find that the lining is one quarter inch larger all around than the cover. This surplus will be trimmed off when the lining is attached to the cover.
Leather Used: The first one I made I used morocco both for the cover and the lining, This I sent to our son in California and talking with him three months later he said it was working fine, he had the church keys on one side and the house keys on the other. For the second one, I used cowhide for the cover with a carved design on it and used morocco for the lining. Others that I made I used skiver for the lining, but I think the morocco will wear better,
Method of Construction: Start with the cover. Using a very fine ball point pen draw the size with the position of the reinforcements on the flesh side. Skive the very edge of the reinforcement just enough to take off the sharp corner and glue these into position, making sure that they are positioned accurately.
Next the lining: Again draw the dimension out on the flesh side of the lining. Take the reinforcement and round one long edge, This is so, that when the lining is glued around it, it will be a nicely rounded front edge. Do not attach key plates until after the lining is glued to the cover,
With the reinforcements glued in place on the cover and the lining, you are now ready to glue the lining to the cover, Note that the lining is one quarter inch larger than the cover,
Page 6
DOUBLE 6 HOOK KEY CASE
FIG 1.
FIG 2.
FIG 3. Cut from 2 oz. — 4" x 1-15/16"
FIG 4. Top, flesh side — 1-7/8", R 5/8", 3-1/2", 2-3/8", R 5/8", 1-9/16" — position of tongue marked
FIG 5. 2 required, 2 oz. — 5/8" x 4"
FIG 6. Top, good side — 2-1/8", R 5/8", 2-11/16", 2", 2", 2-1/8" — these two sections are folded on centre line and glued together with reinforcement in between
[Pattern plate for a leather key case with a fold-out hook panel for six keys; no names. The hand-lettered dimensions are easy to run into an unreadable table; set out below instead. The fine fractions on Figs 4 and 6 are small handwriting but read plainly; the picture of the page above remains the reference for cutting.]
Page 7 — LEATHER AS AN ART AND CRAFT by Thelma R. Newman
The important thing here is to position the tongue on the center line of the right hand reinforcement as indicated in Fig. 4. When you have the lining glued in place then trim the surplus lining from around the cover, The next step is very important, Cut the top of the tongue one quarter of an inch below the top of the cover and cut the bottom of the tongue one quarter of an inch above the bottom of the cover, see Fig. 2. You are now ready to attach key plates. Medium rivets were used, make sure that the key plates are level and well secured. Lace the edges and then attach domes, Attach domes so that when key case is closed there will be room for keys, see Fig. 1.
LEATHER AS AN ART AND CRAFT by Thelma R. Newman
A Book Review by Audrey A. Gorton.
This book seems to be an all-encompassing craft book with regard to contemporary leathercraft, not only for the novice but also those who have an infinite variety of talent and experience.
For the novice a history of leather, the types of skins used and the processing of same as well as a glossary of terms used by the more experienced craftsman is given in detail in order to give them inspiration to take up the craft. This together with well illustrated projects answers just about any question a novice could think of.
The more experienced and talented craftsmen will find much to whet their appetite by giving them a new understanding and a chance to experiment along different lines with both old and new ideas. Many of the projects are well detailed and illustrated and while it may not appeal to some, perhaps it will trigger a brain wave of their own because leather has so many different aspects and applications which can be used.
The author has drawn on some of the best talent from the United States and Mexico in researching and editing this book and her feeling and love for leather is felt as one reads the preface to it. To her there is no limit on the uses as long as one will let their imagination have full play. She also has written other books on various crafts, which if they are like this one, would inspire even those with just a little talent to become more gifted and create their own own masterpieces.
"Create their own own masterpieces" is printed exactly so, the repetition falling across a line break — the reviewer's own slip, kept as printed.
The only drawback that I find in this and many other leathercraft books is that the list of suppliers for leather findings are limited to the United States and here perhaps is where the novice will run into problems unless they are associated with a group.
Page 8 — THAT OLD BOOK
THAT OLD BOOK
I am getting old, I have been read many times, I don't always get handled as I think I should be. They don t always leaf through my pages carefully. But hurriedly without thinking that I might get my pages torn, Children sometimes get hold of me, and I begin to wonder what will happen next to me, as they do not understand my value.
Sometimes they will even put flowers and leaves between my pages, and if they are left too long a period of time, the sap deteriorates my pages. I try to be helpful to people, If I am the Bible I show people how to live at peace with their neighbours, and prepare for eternity. If I am another book, I am also of great value, because that which I contain helps people in many ways, in whatever is of interest to them, and as there may not be any more printings of me coming off the press. Please do not forget I can be repaired, and made beautiful once again. I may look as though I am beyond help, but I have seen some of my friends on the shelf next to me come back to life.
This is the subject I wish to talk about for a while. The restoration of your old books, that have a real meaning to you. It could be any good book that has helped you or is of value to you and sad to say is falling apart and you would like to preserve it.
It is surprising what you can do yourself--you might say its impossible for me, I am no good at anything like that; I wouldn t know where to start; but just think a minute; if you had some step by step information what you could accomplish
There are Librarys which have books you can borrow which will be of great help to you. One book I borrowed from the main Library in Hamilton and finally bought is, Pictorial Manual of Book Binding, by Manly Banister, (Ronald Press of New York). The photography and drawings are by the author
There could be other Library Books that I do not know about Then there is a little set of books on Book Binding that are used as a school subject by Douglas Cockerell and put out by W. Russell and Son Ltd., which are very good on the basics,
The Pictorial Manual book will show you the necessary equipment you will need, and a whole lot more. But don t get too much when starting. One thing you will need is a cheap press of some kind and a sewing frame if you are sewing on tapes or cords, This book will show you how to make these things as well as the measurements. If you are repairing a Bible you will not need a sewing frame. This book will show you how to sew a special stitch, just using a needle and thread. The reason for sewing is, a book is made up of sections, and these must be sewed together if they are coming apart. If it is not too bad, you can sometimes, just put it in the press and glue it together on the spine with a good flexible glue. This may be all that is necessary--end papers are one of the first things that seem to come apart on a book. This is fully explained and shows how they are assembled and put in a book. Quite often the old cover can be reused If a new one is necessary, make it the same size as the old one, You will need a paste of some kind--flour paste can be used with good results. The adhesive in it is slower to work than some of the newer pastes, but it is very satisfactory and may be better for a beginner, you will also need a flexible hide glue for the spine. If you have a hide glue and it is not flexible, add a small amount of glycerin to it. Always remember to use a glue or paste that can be softened with water, in case you wish to take it apart again This is very important
This page and the next carried a weak "h" throughout the whole run ("wuey", "snelf", "wisn", "tnat", "photograpny", and similar) — the typewriter's own worn key, not a spelling choice
Page 9 — Do's and Don'ts for Beginners
Then repairing pages is a must. It can be done in various ways. One that is very satisfactory and can hardly be seen, is to take a real good transparent tape and put it over the tear. This can be difficult if it is a long tear and it will have a tendency to wrinkle, as it will also do if you are repairing the front of a page. An easy way is to get a thin piece of steel about twelve inches by one inch and take three quarter inch tape, and put the edge of tape on the steel, and you can put the tape anywhere real professional with no wrinkles. Also you can even cut the tape in half and not use as wide a piece by putting it half way on the steel and cut along the side of the steel, now you have two pieces three eights of an inch wide, which is a saving if the wider piece is not needed. Practice on something else first, then you will be surprised what you can do. Have fun and repair those old books and bring them back to life again, and make them usable.
C. Redman, Hamilton
Do's and Don'ts for Beginners - Bea Austin
Don't try to trace on soggy wet leather, let the water evaporate until the leather has returned to its natural colour yet still damp under surface so that a clear, easy to follow traced design is left on the leather with but slight pressure on the tracing stylus.
Don't undercut with the swivel knife
Hold the knife perpendicular or the bevelled edge will be ragged, smooth bevelling is essential to good leather work.
Don't allow any thing made of steel to remain for any great length of time on damp leather. Steel stains are almost impossible to remove. Dirt and finger smudges can be removed with oxalic acid (dissolve one teaspoon of oxalic acid crystals to a pint of water. This is poison Be careful
Do when working with leather that stretches easily--such as tooling sheep, steer, cowhide or goat--fasten heavy paper to the back or flesh side of the cased leather with rubber cement to prevent it from stretching out of shape--this also will allow deeper stamping on these leathers.
If the project is so large that it cannot be finished with one casing of the leather, and is to be left in a dampened condition over a period of time, add one teaspoon of formaldehyde to the gallon of water used for casing, this will help to prevent mildew. This too is poison--Be Careful.
When making the ornamental cuts the leather should be damp, in fact the moisture content should be higher than when using the stamping tools.
Don't try to carve with a dull knife, no leather carver, no matter how experienced, can do good work with a poor swivel knife--use a fine grit stone to sharpen and strop it on a jeweller's rouge board, form the habit of stropping the knife everytime you pick it up. All carvers use at least two blades--one is sharpened for shallow cutting of thin leathers and for wide dress cuts, the other blade is sharpened at a steeper angle for deeper cutting of heavy leathers and for fine narrow cuts,
Tip - To hold a narrow piece of leather to be skived--use scotch tape folded so it is sticky on both sides, Put one side on back of leather and one on skiving board--holds leather and makes skiving easier, pulls off both leather and skiving board easily.
Page 10 — YOUTH IS A FEELING NOT AN AGE
YOUTH IS A FEELING
NOT AN AGE
Whether you are 8 or 80, if you want to stay youthful follow these suggestions:
1. Keep busy. Too much leisure causes the mind to stagnate and the body to deteriorate.
2. Have hobbies. Select activities that give you a complete diversion from your regular work.
3. Maintain friendships. Everyone has a need for the companionship and respect of friends.
4. Set goals and have ambitions. You are never too old nor too young to plan.
5. Eat regular, well-balanced meals. Do not overeat, Likewise, avoid crash or fad diets.
6. Allow yourself "think" time. Don't put yourself on so tight a schedule that you do not have time for yourself.
7. Keep physically fit. Establish a regular program of moderate exercise.
8. Maintain good posture. Keep your chest out, stomach in, back straight and chin up.
9. Get regular health examinations. Practice preventive care.
Life is precious and well worth preserving. Retain that spirit of youth, by maintaining good health.
This article was published in the West Lincoln Review. I read it while visiting my mother who is now 94 years old. I was very impressed with the tips and feel we could profit from them.
Muriel McKnight.
The two-line title — "YOUTH IS A FEELING" / "NOT AN AGE" — is easy to lose its second line and the page number to noise ("*0 YOUTH IS A FEELING"); set out here restored, along with "Too mich leisure" (much).
Page 11 — WHY NOT USE PYRAMID POWER TO KEEP YOUR SWIVEL AND UTILITY KNIVES SHARP?
WHY NOT USE PYRAMID POWER TO KEEP YOUR SWIVEL AND UTILITY KNIVES SHARP?
To prevent disappointment one must first of all point out that a model pyramid cannot act as a sharpener, but only as a regerator, i.e. it would not make a dull knife sharp, but will prevent a sharp knife from getting dull for a considerable time with moderate use.
In countries behind the Iron Curtain where razor blades are more valuable and electric shavers rare, home-made model pyramids are widely used and users claim to have achieved from 100 to 240 shaves from one blade.
For the sceptics among you I would like to add that a model of the Cheops pyramid made of plastic sheeting to be used to prolong the sharpness of raxor blades was patented in 1959 in Czechoslovakia by Karl Drbal.
The patent application, first submitted in 1949, remained pending for almost 10 years. During this time the inventor was called upon not only to prove the effectiveness of the device but also to provide an acceptable explanation of its effectiveness. The model submitted had a base line of 12.5 cm., but the patent covered any model where the base line equals the height of the pyramid multiplied by Pi/2 i.e. 1.57079.
To accommodate several blades a larger pyramid than Drbal's model would be required. Depending on the material used it could have a base line from 9 to 12 inches.
In order to use a model pyramid effectively the following 6 conditions must be met.
1. The pyramid must be constructed from dielectric material of even thickness and consistency. Pressed cardboard, natural wood, and plastic sheeting are suitable. Plywood, corrugated cardboard or metal sheeting would not work.
2. The pyramid must have certain proportions, but can vary in size. A simple way of constructing a Cheops type pyramid model is as follows:
(a) Draw a straight line and mark off on it the desired length of the base.
(b) Using a protractor draw angles of 61° at both ends facing each other.
(c) Prolong these lines until they cross and cut out the resulting triangle.
(d) You would need 4 identical triangles and they could be glued together with tape.
(e) To carry the pyramid around easily it should be placed on a piece of cardboard or other suitable material a few inches larger than the base of the pyramid.
For an easy method of constructing a pyramid in one piece consult p. 187-
188 of Pyramid Power, by Max Toth and G. Nielsen.
3. The pyramid must be correctly aligned so that 2 of its base lines run exactly North-South according to a good compass.
This page's "must" is easy to misread as "most"/"mist" five times running (a systematic fault, corrected throughout page 11 and into page 12), and the patent's formula is easy to lose entirely ("multiplied by" had nothing after it in a straight reading) — set out here as "Pi/2 i.e. 1.57079"; the page types the word Pi over the 2. The book's authors are printed "Max Toth and G. Nielsen". The page number is easy to misread as "21" for "11".
Page 12
4. The blades must be placed on a platform (block of wood or cardboard construction) at one third of the height of the pyramid from the base up and as close to the center as possible. The cutting edges of the blades must also run North-South.
5. The pyramid should not be placed too close to walls, electric devices
(such as T.V.) and larger metal masses (such as a stove). Meteorological disturbances can influence the effectiveness of the pyramid.
6. For optimum results a seven day conditioning period is recommended.
A newly sharpened blade should be placed inside the pyramid in the prescribed position for a week before use and returned to it after each work session.
Many other unusual and mythical powers have lately been attributed to pyramids. These often exaggerated claims make even proven effects of the pyramid shape suspect. Therefore, seeing is believing and good luck with your experiments.
Lydia A. Vincent.
When making a design on a coaster, key fob, turtle pins, or any small article trace the design onto old X-ray film. It can be used over many times before a new one is needed to replace it. (Great when making quantities such as above. )
M. McKnight.