
An issue of the Society’s newsletter, transcribed from the original.
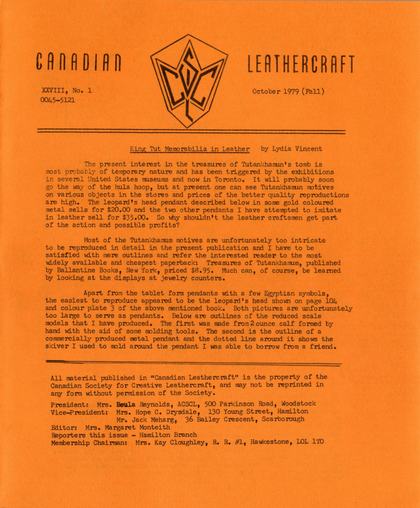
(13 pages, 1.9 MB)
the full-resolution scan, 33 MB, for close research
Page 1 — King Tut Memorabilia in Leather
Canadian Leathercraft
XXVIII, No. 1 October 1979 (Fall)
King Tut Memorabilia in Leather by Lydia Vincent
The present interest in the treasures of Tutankhamun's tomb is most probably of temporary nature and has been triggered by the exhibitions in several United States museums and now in Toronto. It will probably soon go the way of the hula hoop, but at present one can see Tutankhamun motives on various objects in the stores and prices of the better quality reproductions are high. The leopard's head pendant described below in some gold coloured metal sells for $20.00 and the two other pendants I have attempted to imitate in leather sell for $35.00. So why shouldn't the leather craftsmen get part of the action and possible profits?
Most of the Tutankhamum motives are unfortunately too intricate to be reproduced in detail in the present publication and I have to be satisfied with mere outlines and refer the interested reader to the most widely available and cheapest paperback: Treasures of Tutankhamum, published by Ballantine Books, New York, priced $8.95. Much can, of course, be learned by looking at the displays at jewelry counters.
Apart from the tablet form pendants with a few Egyptian symbols, the easiest to reproduce appeared to be the leopard's head shown on page 104 and colour plate 3 of the above mentioned book. Both pictures are unfortunately too large to serve as pendants. Below are outlines of the reduced scale models that I have produced. The first was made from2ounce calf formed by hand with the aid of some molding tools. The second is the outline of a commercially produced metal pendant and the dotted line around it shows the skiver I used to mold around the pendant I was able to borrow from a friend.
The page is typed on plain stock with nothing printed under the text. The Pharaoh's name is spelled two ways on it and both are kept: "Tutankhamun" in the opening sentence and at "Tutankhamun motives on various objects", and "Tutankhamum" at "Most of the Tutankhamum motives" and in the book title "Treasures of Tutankhamum".
All material published in "Canadian Leathercraft" is the property of the Canadian Society for Creative Leathercraft, and may not be reprinted in any form without permission of the Society.
The executive list prints on six lines — President, Vice-President (two names, the second without repeating the label), Editor, Reporters and Membership Chairman — set out below in that order.
President: Mrs. Beula Reynolds, ACSCL, 500 Parkinson Road, Woodstock
Vice-President: Mrs. Hope C. Drysdale, 130 Young Street, Hamilton
Mr. Jack Meharg, 36 Bailey Crescent, Scarborough
Editor: Mrs. Margaret Monteith
Reporters this issue — Hamilton Branch
Membership Chairman: Mrs. Kay Cloughley, R. R. #1, Hawkestone, L0L 1T0
Page 2
INSERT FOR CANADIAN LEATHERCRAFT - XXVIII. No 1 October 1979
This page should be inserted as page la,
I am sorry about the omission,
I used a cut-out piece of natural skiver, soaked it under a tap and dried it only slightly by pressing it for a moment between a folded paper towel. Then I centered it on the head and pressed it without too much stretching with my fingers so as to bring out the features clearly. I folded the excess of the skiver over the edge of the pendant making small cuts where required. Then I let it dry completely at room temperature—this takes several hours and is best left overnight. It is important not to stretch the leather too much. Otherwise it will detach itself from the depressed areas when shrinking and the details will be lost. When dry I sprayed the item twice with Spray Lac. When completely dry I peeled it off the head carefully and sealed the inner surface. For this I used unwanted nail polish, but presume any lacquer or varnish applied with a small brush would do as well. As in all cases two moderate applications are better than one heavy one. Once the lacquer was dry I filled the cavity with Polyfilla. It is important to get it well into the protruding areas of the head before adding the rest of the mixture. During my first effort the leopard's nose wrinkled somewhat when I began painting it. It is also important not to overfill the cavity and not press hard, for at this point it is still easy to distort the features. During the filling the head should be supported on a soft surface, such as a piece of fine textured foam rubber. After the filling the head should be checked for possible distortions, for at this point it might still be possible to correct them. Then the filling should be allowed to dry completely. For the second final filling it is much less troublesome to use Wood Putty (available in stores selling decoupage supplies). It spreads more evenly and dries quickly so it is much easier to produce an even surface for gluing on the backing using CIL household cement or Bond all-purpose cement N0E 5Z7 (which I used) or possibly Barge. At this point one should not forget to insert a loop for hanging the pendant. I used a 3/4" wide strip of 2 oz. leather skived at the ends.
To produce a shiny gold surface I used Rub'n Buff. It can be applied with a finger or medium-soft short—haired brush. If it is too dry as it comes from the tube it can be softened with a few drops of turpentine, and rubbed well to an even consistency before application. One should use turpentine sparingly for it lengthens the drying time and lessens the shine achieved after buffing. Rub'n Buff covers all colours completely and resists paints. To outline the eyes and nose of the leopard I had to use a fine felt— pointed marker. On my later versions I protected the eyes and nose of the animal with sticky tape pieces before applying the Spray Lack and Rub'n Buff. After adding the blue lines I made the necessary corrections in gold with a 000 brush.
Page 3
Strip for hanging pendant
Contrary to my expectations it took me less time to produce the first than the second, but of course it is mich flatter and less detailed than the latter.
I describe the method used to produce the second in detail because it can be used for the reproduction of a variety of small items, jewelry, dolls' faces, interesting tops for leather covered bottles etc. A The pendant outlined above is the easiest to do in a modified form.
It is represented on p. 138 and on colour plate 16 of the book. The sharp points at the ends of the wing are difficult to produce and can do damage to clothing when worn. On versions from thicker leather I omitted also the ankh sign between the wings and claws of the bird. The wings are divided into 3 main sections and their width can be adjusted to fit the stamping tools the craftsman has. To speed up work one should choose a tool to stamp in the middle section first and adjust the width of this strip to fit it. I used F 120 on some and F 914R and L on others, but several of the smaller veiners would be suitable. They could also be used for the inner strip where I used F119. For the outer section of the wing one could use the swivel cutter, but for a quicker job I applied 2998 except for the lowest part, so as not to cut through the ankh sign.
Page 4
I used A 104 and A 105 to give texture to the triangular section above the bird's legs, F 119 for the legs and F 913L and R for the claws. Any medium-sized mulefoot is suitable for texturing the body of the bird and a small seeder for the eye.
As to colouring one can either follow the rich colour plates of the book or the more subdued tones as seen on many jewelry counters. My favourite is a green, blue and gold version with the sun disk over the bird's head in gold.
P.S. It does not matter if the tool marks on the outer strips of the wings overlap the border line, for this overlap will be cut off.
(Here the pendant is drawn — a bird with outspread wings — with the stamping tools for each part lettered round it by hand.)
Lettered on the drawing:
S931 or 932
Some mulefoot
A104 & A105
Some veiner
hole for hanging
F113 R & L
F120
Some veiner
swivel Knife or Z 998
C 868 or F119
F118 R & L
S843 or S866 ¼" punch
F120
The pendant outlined above is printed in colour on plate 14 of the book. The wings of the bird are divided into a greater number of fields. This leaves the craftsman much scope in choosing stamping tools. Some suggestions are given above.
When the stamping is completed the texture seems in itself rich enough and I did not colour this version. I only used Rub'n Buff applied with a finger over natural leather or dark green or blue leather dye.
Another pendant with the winged scarab beetle in the center, as seen on jewelry counters is most attractive (part of the design on p. 137) and is well worth trying to reproduce in leather, but so far I have not found the time to do it.
Page 5 — Leather Carving
Leather Carving — June Somerville
Leather carving is a beautiful and enjoyable way of decorating leather. It can be used on such a wide variety of articles and only a few basic tools are required. Also, there are endless numbers of designs already created which can be used as they are, or adapted to the need required, or used as an inspiration for one's own creative ability.
Leather for carving must be of "vegetable" tannage. This tannage absorbs moisture readily, allowing you to mold and form the leather easily and carve, stamp and dye. The skins of bovine animals (cows, calves etc.) provide most of the leather for carving.
Before you can carve leather you have to moisten it. When you wet the leather, the fibers will swell and soften. Vegetable tanned leather when properly moistened is like modeling clay. You can mold it, model and shape it.
The process of moistening the leather is known as casing. This is accomplished by simply rubbing a damp (not soaking wet) sponge over the flesh side as evenly as possibles Then, turn the leather over and dampen the grain side (carving surface). When working with thinner leather, it is a good idea to adhere your leather to cardboard. In this situation you would only dampen the grain sides When the leather begins to return to its natural colour, begin carving.
Basic Tools
A piece of marble is necessary to place the leather on when carving. Next, a mallet and a good swivel knife are a most, plus a strop for sharpening the knife, also a rouge board.
Keep a sponge handy for moistening the leather, for it will dry out as you are working and it is necessary to keep the leather damp but not squishy wet.
Pear shader — The pear shader is a pear-shaped tool for making a three dimensional and life-like effect in the design. The tool "shades" or "contours" areas outlined by the swivel knife. The shading face of the tool is rounded on all sides so that sharp or blunt edges will not mar the leather.
The shading should conform to the general shape of the design. The shader is "walked" to depress areas away from cut lines, shaping flower petals, leaves, etc. The shading operation burnishes the leather to a ricky dark contrasting colour. "Walking" is done by moving the shader about 1/16" as it springs up after being hit by the mallet. Use less force as the shading fades out.
My favourite pear shader is #209 to indent all leaves and petals (not stems). This pear shader has vertical lines, which my teacher (Don McKinnon) insisted were the the way the lines of a petal in a real flower went—and I agree. There are plain pear shaders, ones with horizontal lines, diagonal lines, criss-cross etc, which are a matter of individual choice.
Page 6
Camouflage - Use the camouflage tool to decorate flower centers, stems, petals, etc. to texture areas of a pattern so as to add to its beauty and the flow of the design.
There are many varieties, sizes and shapes of this stamping tool. I admit this is one tool I splurge on, although it is not necessary. First #433, and for smaller flowers #431, for stems #425. Always walk the tool and work away from you very lightly, diminishing the impressions as the tool travels up or down the design.
In the design of a flower, a line is marked to outline the seeds in the center. Do not cut this line. Place a large camouflage that fits this line and stamp. For this purpose I keep three sizes on hand, #453, #454 and #455.
Bevel - The purpose of the beveller is to bring the design into bold relief, creating a three-dimensional effect. Bevel one side of a line only, and insert the sharp end of the tool. Bevel on the outside or top of a curve, and both sides of stems. "Walk" this tool also.
Ordinarily I use #701, #702 and sometimes #936 for small spots. There are many smooth bevellers used in figure carving.
Vein - The veiner is used for adding veins to leaves or other special effects. Strike the veiner squarely with the mallet (no "walking" here) on the outside of a curve, with the tool tilted toward the cut. This gives a deeper impression along the line and lighter on the outside. Depending on the size of the design, I use #405 and # 708.
Seeds - The seeder is used for making the seeds in the flower center. Outline the area with a large camouflage tool that fits the pattern marking, then start stamping the outer row of seeds first, keeping within the outline, gradually fill in the area. A valuable hint I learned is--tilt the top of the tool forward, do not stamp straight. The tilting gives a delightful third dimension effect characteristic of a flower center. There are a number of seeders, but I find I use #705 the most.
Background - The purpose of the background tool is to matt down the background areas within and around the design. Backgrounding is one of the most important steps in leathercraft because it makes your design stand out in bold relief. Hold the background tool straight up and down, perpendicular to the work and "walk" it. Make the backgrounding as even as possible and avoid going over the same spot too much. Do the backgrounding when the leather is a bit on the dry side--just tan colour. #105 and #104 are good background tools. Another interesting one is #102 along with #102½.
Other tools
A mulefoot #850 can be used to "end" a line as well as give it direction. Only one, maybe three impressions are needed and strike the tool so that the impressions diminish.
To indent ends of lines in a flower, I like Hackbarth #709.
Page 7 — C.N.E. 1979
Finish Cuts = These are the decorative lines made with the swivel knife the very last thing of all. They are in the flower petals, leaves, and scrolls. Make the deep impression at the beginning of the line, then curve and diminish toward the end—never cut a straight line (see markings in your pattern). Order of Carving
Craftsmen will differ in the order of carving, but I have reasons for, and prefer the following over along with others who are much more skilled than I. That is: trace design, using #59 stylus, cut, pear shade, camaflouge, bevel, vein, seeds, other decorative tools, and finally the finish cuts with the swivel knife.
The stamping should be strong enough so that the design can be seen from the wrong side, of some of the tools.
This is a brief summary of the regular carving techniques, aimed at giving assistance to the beginner. Have fun — much fun — and don't be afraid, remember PRACTICE MAKES PERFECT,
References: Stylecraft — text book #38
Gene Noland, Alphabets for the Leather Craftsman.
Ce. Ne BE. 1979 Hope C. Drysdale
Arts and Crafts Bldg.
The C. Ne E. sale as usual was a great success and I would personally like to thank Gertrude Hilder of Nova Scotia for submitting her articles to be sold. Come on you "Way out members at large" lets have more of you participate in next years sale. If you need information just write me.
Twenty five people sent in articles for sale and this gave the Guild a gross profit of $1,435.94 slightly up over last year but we do need more members participating.
START NOW ON YOUR SALE ARTICLES.
Page 8
Better Living Bldg.
Carol McLean (fellow) won the Chatelaine Award with her outstanding box designed from a Rock she had picked up.
Winners in the other classes are as follows.
| Class 210 - 1 | Carol McLean | Box |
| Ruth Haig | Shoe | |
| Hope Drysdale | Book Cover | |
| Class 211 - 1 | Gertrude Hilder | Gloves |
| Hope Drysdale | Gloves | |
| Josephine Beaucage | Mitts | |
| Class 212 - | Ruth Haig | Belt |
| Margaret Monteith | Belt | |
| Carol McLean | Belt | |
| Class 213 - L | Art Morris | Quiver Case |
| Dave Elliott | Hand Bag | |
| Josephine Beaucage | Suede Bag | |
| Class 214 1 | Ruth Haig | Pocket Secretary |
| Hope Drysdale | Wallet | |
| Class 215 1 | Hope Drysdale | Jug |
| Carol McLean | Sculpture | |
| Ruth Haig | Dice Cup | |
| Class 216 1 | Carol McLean | Pin and Earring Set |
| Margaret Monteith | Lily Pin |
Class 461 —- 1 Here Cummings (Sask.) Whip
2 Gertrude Hilder (N.S.) Gloves
| 3 Art Morris (Ont.) | Stool |
| Class 42h 21 A. Bruce | Wallet |
| 2 T. Cole | Moccasins |
| 3 A. Moieiro | Belt |
The last class 42) is the hospital class and I have mentioned it mainly because the 1st prize wallet was so beautifully carved.
Page 9 — REBINDING A BIBLE
REBINDING A BIBLE
Three slips stand on this otherwise clean page and all three are kept as the page has them: "colating" for collating, the accent in "repairéd", and the sentence "If the book is all repaired." which the page breaks off at the full stop.
When you first glance at an old book or bible your first impression is, it would be impossible to repair it. But I hope to give you some simple instructions on how to bring back to its original usefulness again and be almost as good as news
The first thing to do when the cover is all broken up, is to take it off, and renew it. To do this cut through the mull which is the cloth backing and also the endpapers at the hinge on the inside of cover and take it off. Now put the book in a press with the spine up above the edge of press about three quarters of an inch. Clean the spine. Old glue must be removed—to do this take some cooked flour paste real soupy, and put it on the spine with a brush. This is better than water, as it will not discolour paper or leave water spots. Water can get in between the folds of sections and cause trouble. Leave it for a few minutes to soften the old glue, then scrape clean. It sometimes takes several applications.
If you do not have a press, take two boards larger than the book, and use a screw clamp. Put the book between the boards and press with this, until you get something better.
Check and see how much repairing is necessary. If pages are torn and wrinkled real bad, a good way is to dampen them and take out the wrinkles. Then take 3M transparent tape, three quarter inch width, and make any repairs necessary Long pieces of tape are hard to apply, so take off a strip the length you need and put the edge on a piece of thin steel or something similar. A ruler might do. Place it where you want to repair, press down tape carefully, then take away steel piece carefully—you will be surprised, you can make repairs without any wrinkles. Always remember that tape is impossible to lift without tearing the paper if you get it on wrong. If you do not need tape three quarter inch wide, put it on the edge of the steel piece half way and cut it with a pair of scissors, along the edge of steel and use a narrower piece. Tears in a page, bad edges and corners can be repaired this way. If a corner is missing, or a big piece is out, take a piece of paper as near the colour of the old book as possible and cut out a piece to the shape and size required and put tape on both sides and trim.
If pages are out, and all repairéd, before you sew the sections together make sure everything is in order, as to where it was originally—chapters, numbers of each page etc. which is called colating. Sections are several folds one goes inside the other and makes up the section. If you go by the number on each page it is easy.
If the book is all repaired. The sections which are out must be attached to the other sections by sewing. Sewing can be done, by sewing on tapes, cords or use a lockstitch which does not require a sewing frame and is very satisfactory on a bible.
Page 10
Lay down the part of the book which does not need repairing on a table. Then lay the first section on it that is to be attached to it. Open the book to the centre of the first section where you intend to attach this first repaired section. The procedure you will use is — take a fairly stout linen thread of book binders quality, not cotton as it is not strong enough. Use a needle for this size thread, blunt the point a bit, now proceed in the section at the first hole at the head, of the part of book that is together, leave about three inches of thread out and tie it to a tooth pick or something and come out the tail, do not worry about the other holes yet. Now mark where the other holes should be and take an awl making a hole from the inside out at each place the thread goes through. Now where the thread comes out at the tail take it up to the first hole of the section you are sewing on, take it inside and over to the second hole and out, now take a small crochet hook and pull out thread from inside of the front sections of book you are repairing and this forms a loop on the outside, pass thread through it and up inside same sections you came out of and continue this same way to the end. Now bring thread out where you started and tie it to the end you left out when starting. This same procedure is continued until all sections are sewn together. But at the end of the other sections, before laying on the next section make a kettle stitch to tie it, so it will not loosen up. But do not sew too tight or you will have trouble in rounding and backing. Sometimes for strength, when you are starting, go in a section or two further in the book for strength, and then lay on the first section and start sewing.
Your next step is to put the book in the press spine up and put some flexible glue on it, when tacky take out and shape the spine on a table by putting foredge to you. Place the thumb on the book and the fingers on the foredge and tap lightly on the edge of the spine. Then turn it over and do the same on the other side and round back this way. Then put it in the press and use backing boards to finish. When the book is dry, and still in the press cut some mull or cloth that is satisfactory, leaving it about two inches shorter on each end. That is say the book is eight inches long, make it six inches, and have it extend around two inches on the endpaper each side. It would be around six inches by five and one quarter, glue this to the spine. Now put the head bands on—you can get commercial ones or make your own by taking cloth and folding it over a thick string at the fold and gluing it together. Then cut it to the size you need and put one on at the head and tail or you can sew headbands on yourself with silk or rayon embroidery thread.
Next comes a hollow back, measure the length and width of spine. Say it is eight inches by inch and a quarter, cut a piece of brown wrapping paper fairly strong eight by five inches, this is folded three times, make a line an inch and a quarter in from the edge and fold on this line toward the centre, now take larger side and fold back over this to the edge and glue, then fold back again to the same side you started from and it should be exactly right then glue, this will have three thicknesses on the top and one sticks to the spine of the book, leaving a hollow, glue this to the book spine. It will come right up to the headbands and be just the width of the spine, when it is dry make a slit on each side of the hollow back, on each end, three quarters of an inch long and turn up slightly.
Page 11
-10 =
Now you are ready to make up the endpapers, measure the size of the page and double it, because it is to be folded. Also make it one quarter inch larger all around for trimming. You will need six of these. First take two of these and with flour paste, or similar glue, before folding, glue your black paper or leather skiver to one side of each of these. Make it a bit larger all around for easier working. One half of these folded sheets is pasted to the cover when finished. To make up the endpapers fold in half, black on the inside, now lay this one on another folded paper, which is paper to paper and glue the two pages together, now you have three in one. Take the other folded one and put around the three in one piece, and the half that comes on the cover is called a waste sheet. Cut it off at about two inches. Make it the same length as the ml, this is for strength. It and the mull will be finally glued to the endpapers, as soon as they are on the book, now make up the other endpaper. If you wish you can omit the extra double sheet, with the waste sheet. It is fairly strong without it. Lay the made up endpapers on the book up to the hinge, turn book over making sure it does not slip, now carefully mark both ends and foredge, then take a steel ruler that will not slip and cut these to size of page. Now lay them up to the hinge and glue at the fold around one quarter inch. They should be the same size as the other pages now. To sew the endpapers in you will see how they have been done before and do the same. Where you go through the endpapers the thread can be covered up by sticking the endpapers together around one quarter inch.
The next step is a cover for the bible, to obtain the proper size take a tape measure and put it around the bible, from foredge to foredge, mark down this measurement. Next measure the length, now you have the size, only you will need to add one and three eight inches all around for turn in. This should when completed give you one half inch which is double thickness. This projection is called squares and you will have also three eight inch that goes under your endpaper.
Cut your cover from some good wallet weight morocco, immerse this in warm water, and lay it out with a weight on it until dry. It will be mach easier to work with. It is now firm and easier to skive the edges, before skiving find the centre where the spine will be going and draw a line. Now measure each side of this line, and draw two lines one on each side. This should be the width of the book spine, now draw two more lines one quarter inch from the last lines you draw, which is where the hinge will be. Next draw lines all around the edge of cover one and three eighth inch in from the edge. This is where you will be skiving and it is for the turn in. Take a marble or glass and place cover on this and skive this edge, use a french skiving knife or whatever you wish but make sure it is paper thin on the corners and not so thin for the rest. Now your Cover is ready to put on the bible, put flexible glue on the Cover where the spine will be going, if necessary put a little on the book spine use your ow judgement, press these together and let dry. Close the bible and the leather should extend one and three eight inch beyond the pages all around. Sometimes it stretches a little in skiving, especially if you use a spoke shave in skiving, which I use for speed. I finish up with the knife. One thing that is a help is skive the very edge first all around about three sixteenth inch in from the edge. Then do the other skiving to measure for turn in. If there is no stretch in the leather, just draw a line on the inside of Cover which should be three eight inch under where the endpaper will come to when pasted down, you will have one half inch double squares that is the projection
Page 12
...and three eighth inch under the endpaper. You will just put glue on the three eighth inch that goes under the endpapers. This leaves the double part nice and flexible. If leather is stretched measure with the book closed one inch out from edge of endpapers and mark here and draw a line all around the book and fold on this line and omit the other line.
Turn in the head and tail first, do not put any glue on corners yet. Make sure it is nicely tucked under the headbands at each end, and over the slit piece of hollow back, do one end and proceed to the other. Next turn in the fore edges. When you have this done, fold in your corners, dampen them first then take a twenty five cent coin and shove under and fold a nice round corner. Make your folds, then take out the coin, put glue on and fold again to the same shape as near as possible, now your corners are finished.
The next step is paste down the endpapers, put paste on the inside of the Cover on all places the endpapers will touch except hinge when you put the papers down hold the book closed as nearly as possible and it should fall into its proper place. Rub it each way with your hand and make sure it is well stuck and no wrinkles. Put a piece of wax paper between it and close, do the other side the same.
The bible will want some kind of decoration when dry. It looks very good with a line on the cover about one quarter inch in from the edge, that is in from the projection. The corners should not be square but rounded— take a stiff piece of cardboard, and make a suitable rounded corner pattern. The procedure is dampen the leather and put the lines in omitting the corners, then put them in afterwards. Next do the other side and carry this line over the spine at each end. One line meets the other as it goes over the spine. The spine should have double lines across it. Make up a paper pattern and arrange where you want these lines. They dress up the spine and put that added touch to it. Tape this pattern to the spine and go over it with a hot tool or a modeler. I use a hot wheel and it looks very good. The next step is titling. This is done with gold foil and put on hot, using type, or a hot electric pen. Now that your bible is finished it should look good and give you hours of enjoyment.
C. Redman.
Page 13
The following article on the care of footwear was taken from the London Free Press this fall. – Margaret Monteith
Caring for your winter footwear
Panorama
with Alice Linden
An Order of Canada to anyone producing a convincing argument that going barefoot in winter benefits both soul and sole! Until then, be wise and lavish special attention on boots and shoes which will carry you through The Long White. You will not only be protecting a costly investment, but also assure yourself of maximum comfort.
If you have shopped in recent weeks, you may still be reeling from the shock of current costs. London retailers estimate prices for leather products have increased by 25 to 30 per cent since spring, the biggest jump in one season that some can remember.
Since you will be on the “paying” end of this record increase, it is in your own best interest to make sure you get the best return on your purchase. Retailers have a number of helpful suggestions.
Asked what advice she would give to anyone setting out to buy shoes or boots, the manager of a downtown branch of a large national chain replied without hesitation: “Shop around.” Filled in, this means: Decide first specificially what you want your shoes or boots to do for you. Are they for dress-up, work or play? This decided, weigh the differences, in price, appearance and wearability, between leather and various man-made materials.
There are arguments both for and against leather and synthetics. One man in the trade points out, for example, that leather is more comfortable and more fashionable, but more expensive and vulnerable to water and slush.
The cost of winter boots, whichever type you choose, will likely set you back on your heels so, to get greatest satisfaction, ask store personnel for pointers on construction features, virtues and drawbacks, care and possibility of making repairs in the future. Enquire, too, how long a wear-life you might reasonably expect them to have. High prices do not automatically promise tough performance, and completely waterproof boots are not nearly as common as many shoppers suppose.
Ask for guidance as to the best protective materials — then use them. Retailers agree that the present generation seems shy about using polishing materials as often as our parents did.
Most-frequent advice is that new leather boots or shoes should be sprayed with a water-resisting material, then polished with a wax-based polish.
This only gets your purchase ready for wear. Ruby Osten, president of The Shoe Shoppe Limited, which also operates Ruby Shoes stores, recommends that after each wearing, shoes should be wiped with a dry cloth, to remove dust and dirt, and receive a fresh application of spray and polish on any marks or stains.
Brush suede with a stiff suede brush, to get rid of dust and bring up the nap. Use a matching color of suede renew on worn spots.
Retailers speak as a chorus when they warn against drying suede or leather near direct heat. Rapid drying robs the leather of its natural oils, setting the stage for cracking, the manager of the women’s department of Rowland Hill Ltd., warns. Better, they say, to brush off salt stains or mud at once, and leave the footwear to dry naturally. Then polish again.
Repair costs are climbing, but it is still economical to treat run-down footwear to new heels or soles if it is otherwise in good condition. Arrange for the repairs, however, before the “down-at-heel” condition passes the point of being repairable. When ordering new soles, keep in mind that man-made products are more durable than leather, because they are less porous, Osten advises.
Stuff shoe toes with paper or insert properly-sized shoe trees, and store shoes in a cool, dry place, preferably in their original boxes. You can save time later by labelling the box ends. Try to keep unboxed shoes off the floor unless you have a dust-free menage.
Handbags of leather and suede need much the same treatment. When stored, bags should be positioned so clasps and trim do not leave marks on adjoining bags.
Just in case anyone might think calls for extra care for winter footwear are unnecessary hoop-la, give heed to two items from the weather office’s records for last winter: London received its first “winter snow” Nov. 28, and hung on to it until March 1. During that period we tripped, slipped, slid, slushed, slogged and, once or twice beneath our breath, perhaps even swore our way through 184.4 centimetres of snow in one form or another.
Is anybody really ready for ‘barefoot?’