
An issue of the Society’s newsletter, transcribed from the original.
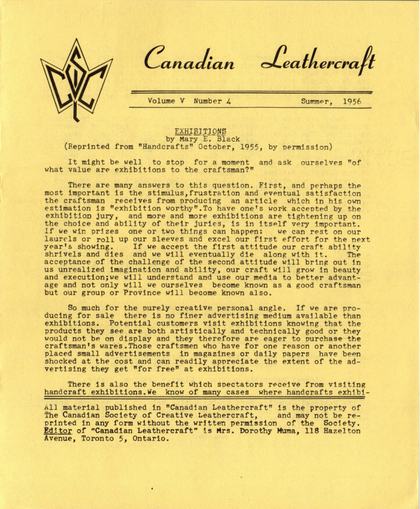
(12 pages, 2.3 MB)
the full-resolution scan, 32 MB, for close research
Page 1 — EXHIBITIONS
Canadian Leathercraft
Volume V Number 4 Summer, 1956
[The masthead alongside this line is the Society's maple-leaf monogram in a decorative script; it prints no additional text of its own.]
EXHIBITIONS by Mary E. Black
(Reprinted from "Handcrafts" October, 1955, by permission) It might be well to stop for a moment and ask ourselves "of what value are exhibitions to the craftsman?"
There are many answers to this question. First, and perhaps the most important is the stimulus,frustration and eventual satisfaction the craftsman receives from producing an article which in his own estimation is "exhibition worthy".To have one's work accepted by the exhibition jury, and more and more exhibitions are tightening up on the choice and ability of their juries, is in itself very important. If we win prizes one or two things can happen: we can rest on our laurels or roll up our sleeves and excel our first effort for the next year's showing. If we accept the first attitude our craft ability shrivels and dies and we will eventually die along with it. The acceptance of the challenge of the second attitude will bring out in us unrealized imagination and ability, our craft will grow in beauty and execution;we will understand and use our media to better advantage and not only will we ourselves become known as a good craftsman but our group or Province will become known also.
So much for the purely creative personal angle. If we are producing for sale there is no finer advertising medium available than exhibitions. Potential customers visit exhibitions knowing that the products they see are both artistically and technically good or they would not be on display and they therefore are eager to purchase the craftsman's wares.Those craftsmen who have for one reason or another placed small advertisements in magazines or daily papers have been shocked at the cost and can readily appreciate the extent of the advertising they get "for free" at exhibitions.
There is also the benefit which spectators receive from visiting handcraft exhibitions.We know of many cases where handcrafts exhibi-
[The article runs on past the Society's notice below: "handcrafts exhibi-" continues at the top of page 2, "tions have been instrumental in awakening an appreciation of beauty…"]
All material published in "Canadian Leathercraft" is the property of The Canadian Society of Creative Leathercraft, and may not be reprinted in any form without the written permission of the Society. Editor of "Canadian Leathercraft" is Mrs. Dorothy Muma, 118 Hazelton Avenue, Toronto 5, Ontario.
Page 2 — FALL SALE OF LEATHERCRAFT; PRIZES WON BY FELLOWS
tions have been instrumental in awakening an appreciation of beauty as expressed through a beautifully polished piece of woodcarving; a Simple but satisfying ceramic pot; a softly draped piece of hand weaving or a simply set, carefully polished agate. Again an answer to the problem of the utilization of spare time has been found and steps are taken to find an instructor and purchase supplies and tools and another craftsman is born.
There are some exhibitions which are held yearly which craftsmen should keep in mind, because as you know time has a habit of sneaking up on one. The Canadian National is held yearly, in Toronto, usually opening late in August with a deadline for entries the last of July. Work may be entered directly under the open categories or through the Canadian Handicrafts Guild. The Guild screens all entries shown in their section. The Pacific National is held about the same time as the Canadian National, at Vancouver The Canadian Society of Creative Leathercraft hold a combination exhibition and workshop each year which is largely attended. Then there are of course the annual County Exhibitions and those held by various local and Provincial guilds. International exhibitions open to Canadian craftsmen are scheduled from time to time.
FALL SALE OF LEATHERCRAFT
Don't forget to work this summer for the Fall Sale of Work by C.S.C.L. members at the Canadian Handicrafts Guild Store, Toronto, which is scheduled for late November or early December, 1956. Check your Winter Bulletin, 1955, Page 6, for reports on last year's sale and suggestions for the 1956 sale.
PRIZES WON BY FELLOWS
Congratulations to three of our Fellows,who were awarded prizes at the Canadian Handicrafts Guild 50th Anniversary Exhibition, February, 1956, in Montreal, Que., as follows:
Leather - General: First Prize - Endel Ruberg, Montreal.
Second Prize - Reta Larmour, Toronto.
Gloves: Honorable Mention - Clarice Packham, Weston. This Exhibition was part of the Golden Anniversary celebration of the National Canadian Handicrafts Guild, held at the National Headquarters and was designed to show the best handicrafts this country can produce. These awards enhance still further the reputation C.S.C.L. is building for fine leathercraftsmanship.
Page 3 — HAND-SEWING Part II
HAND-SEWING by Don MacKinnon
Part II
1. Mark your sewing lines, back far enough from the edges so the holes will not tear through the leather. Proper space between edges and sewing line can add greatly to the decorative effect.
2. On heavy leather articles which will have hard usage, to save wear and tear on the thread,cut a groove on the sewing line with a very fine groover or race,to sink the stitch level with the surface of the leather.
3. Mark your stitching holes.
4. Punch the holes with your awl. These may be punched in two ways:
(a) Make the long points of the diamond lie straight on the stitching line.
(b) Make the long points of the diamond lie at about a 45-degree angle from the stitching line. This angular. punch makes a stronger and more decorative stitch if done evenly.
To make these stitches the same width back as front the awl must go through absolutely perpendicular to the leather. This takes some practice.
5. Use a length of thread consistent with ease of sewing,and not too long to be awkward.However when possible complete a unit of sewing with a single thread to avoid joining.
6. Thread a needle on each end of the length of thread. Put one needle through the first awl hole, draw it up and get the two lengths of thread even.
7. Sew towards yourself, with the grain side of the leather to your right hand.
8. Clear the awl hole with your right hand needle, withdraw that needle and follow up with your left hand needle. This is to ensure that there is plenty of room for your left hand needle to go through from the flesh side. Pull the left hand needle and thread through to its full length.
9. Go through now with the right hand needle. Decide now which thread you are going to have high. It does not matter so long as you have each stitch exactly the same as the previous one. If your right hand needle is going to be below the left hand needle, when you tighten the stitch, pull your left hand thread up with the right hand, and the right hand thread down with the left hand. An experienced harness maker would put the two needles through at the
Page 4
same time, crossing them properly in the hole, one above the other, but this takes a good deal of practice.Failure to observe the above rule gives you an uneven, unattractive type of stitch. 10. Tighten the stitches snugly, not too tight, not too loose.Keep the tension exactly the same on each stitch. Watch that the leather does not pucker.
With machine stitching, you get exactly the same tension for every stitch,irrespective of the denseness of the leather,and there is a tendency to strain the thread. In hand sewing, each stitch has the right tension required by the particular point in the leather density, and there will be no great strain on the thread,making the whole much longer wearing.
11. If you need to re-thread your needles, back stitch one or two stitches and continue on, cutting the hanging ends of the previous thread close to the material, after they have been brought up to tension.
12. When you reach the last awl hole in your stitching, whip the thread over the end of the sewing line, and back stitch two holes.
13. If desired, when sewing is completed,the stitches may be overrun with the overstitch wheel to set up absolute uniformity, but this must be done with exceedingly great care,otherwise you may run off the stitching line or fray the thread. The tool most be held absolutely perpendicular to the sewing in this operation, which presses the thread down into the stitching holes.
LOCK STITCH: To make your sewing more secure, a lock stitch may be used. To do this, take a turn of the right thread over the left needle after it is through the awl hole, clockwise, and a turn of the left thread over the right needle to the left or contra-clockwise. This will make a knot between the layers of leather.
Edges: Particular attention must be given to finishing the edges of handsewn articles. There is no lacing to cover up the flaws. The cut edges of the leather must be clear and sharp,and cemented exactly together before sewing. When sewing is completed, dye the raw edges the appropriate color, if the project is dyed, otherwise leave natural.Apply edge dressing or beeswax,and rub rapidly to create heat, until all the loose fibres are tied down and the edges are smooth and burnished. If there are spaces between the cemented edges
(which there should not be if they are properly sewn) dampen the leather and mold together with your finishing tool, or they may be filled with beeswax. Fine sandpaper will remove any surplus cement which will prevent the dye from penetrating, or leaves a variation in color on natural edges. Use coarse duck, a smooth wooden handle, a bone folder, or other polishing instrument for burnishing. Excellent sewing may lose its effect if raw edges mar the finished product.
Page 5 — REPORTS OF BRANCHES; NOTICE
If you have not yet explored the field of hand sewing, and have been content with lacing, you have a new experience awaiting you. Bear in mind that sewing is much more durable than lacing, since there is not the wear and friction on it, that there is on laced edges. Men particularly like the smooth feel and operation of hand sewn articles. Wallets and pocket secretaries, for example, slip easily in and out of pockets without catching, and have a more masculine appearance. Try a little experimenting with this technique, and I am sure you will be delighted with the results.
REPORTS OF BRANCHES
The London Leathercrafters reported that a good proportion of their members contributed to the sale held by C.S.C.L. last fall.They have conducted a booth at the Western Fair Sportsmen's show, and supplied judges for local Fair Boards.
The Toronto Leathercraft Guild has 72 members and hold combined business and demonstration meetings monthly. Demonstrators have included Mrs. Nora Huyck, Robert Muma, and Mrs. Anne Hook.
Although the Timmins group is not officially organized, it is a very active group and actually covers much more territory than just Timmins.
In Guelph there is no officially affiliated group, but 17 leathercrafters meet regularly and have conducted a demonstration meeting. - They are considering affiliation.
In Peterborough, Don and May MacKinnon and Ralph and Reta Larmour were guests of Miss Gladys Mortimer and her classes of 45 girls on April 11, 1956. Dr. Larmour gave a talk on designing and coloring for leathercraft, illustrating his remarks with colored slides chosen from the articles made by C.S.C.L. members. Don MacKinnon demonstrated leather carving. Miss Mortimer has a most enthusiastic group of craftsmen studying with her, and following the program, several were sufficiently interested to become members of C.S.C.L.
NOTICE
MUMART STUDIOS OF CREATIVE LEATHERCRAFT
announce their re-location in the Avenue Road-Davenport district at 118 Hazelton Avenue
Toronto 5, Ontario Phone: WA 1-1003
Open House -- September 19th and 20th Afternoon and Evening
Page 6 — DEMONSTRATIONS at THE ASSEMBLY
DEMONSTRATIONS at THE ASSEMBLY
All the participating guilds gave demonstrations at the Third
International Assembly in Detroit, and below are some of the highlights of these demonstrations.
The Frontier LeatherArt Guild of Buffalo demonstrated carving of forest scenes, pansy designs and leather jewellery, along with assembly of earrings and cufflinks. The Detroit Leathercrafters emphasized keeping the knife blade sharp, and demonstrated the use of the bevelling tool.
Ruthmary A. Koegler of Flint, Mich., demonstrated "Leather In Water Colors". Some of her suggestions are: Never use green. right out of the pan; green and brown together will dull to a grass shade. The ground is not a smooth color. Pine trees combine green and blues and by using a drier brush trees can be shaded deeper. Tree trunks are more grey-black than brown. When deep shades are wished, wet the leather with a water-filled brush; for lighter shades, use paint on the brush. For sky effects, use a large brush quickly, laying in the large areas first, as one water color will cover up another. Apply lacquer over the picture when finished coloring. Mrs. Koegler's bag carved only with the knife cuts to varying depths, was one of the most original methods shown at the Assembly.
Bob Hartman of Detroit Leathercrafters gave a demonstration of braided handles, and referred to various books on the subject. He demonstrated how to make a braided handle over a piece of clothesline. To thicken a handle, a length of skiver is wound around the rope and cemented to it.
Flint Leathercraft Guild demonstrated the various stages involved in making a handbag from carving to assembly. Endel Ruberg of Montreal demonstrated the Esthonian technique of color and mentioned that he uses a lacquer spray on his finished work, using heavy spray on light colors and light spray on the dark.
On the Sunday, May 13th, Bernard Wolff demonstrated high relief embossing and we hope to have a detailed article on this technique by Mr. Wolff in a later issue. Clarice Packham of Toronto demonstrated glovemaking, and Reta Larmour and Sadie Roebuck of Toronto demonstrated purse framing. There were also demonstrations of Saddle stitching by Raymond Cherry, and carving and stamping by Larry DeRosia and Bob Hartman of Detroit. Anthony Genco of Rochester gave a demonstration of braiding and has promised to try to write an article on this for a future Bulletin.
Paul Payne of Wayne University spoke and showed slides on Design, the keynote being simplicity. He gave suggestions as to combining metal and leather in various belt designs, and ideas on using hair calf.
Page 7 — CSCL FALL EXHIBITION; "LEATHERWORKERS' DIRECTORY"
Demonstrations were also given by Robert Muma of Toronto on embossing, and by Nora Huyck of Toronto on covering boxes. Fred Brown of 'Toronto covered closely Raymond Cherry's demonstrations of saddle stitching and below is his report:
Raymond Cherry, well-known author of "General Leathercraft" and "General Plastics", and teacher at Lockport High School, Lockport,I11l gave two most informative and interesting demonstrations of saddle stitching, starting with the making of hand-laid waxed thread, for which he recommends #3 flax thread waxed and twisted into a five-cord thread for general use. The complete technique was carefully explained, well demonstrated, and many helpful hints passed out. Mr. Cherry's use of a standard hand drill for twisting the thread was unique but most practical, as was his use of an electric drill for making the stitching holes in heavy leather, the drill being slightly larger than needle to be used. The lock and double-lock stitches were recommended where added strength is required and these were well demonstrated and illustrated with diagrams.
Another interesting feature was the adaptation of a butt joint with the holes being drilled on an angle rather than a mitred joint. Mr. Cherry stressed the strength of this joint and pointed out that it did away with the tendency to buckle caused by the skiving of the edges for a mitred joint. Finally, Mr. Cherry showed the technique of edge finishing, using a grooved hardwood stick and canvas with Garnett Edge Dressing. Questions from the audience were answered in detail. Our thanks to Mr. Raymond Cherry for a most outstanding demonstration.
CSCL FALL EXHIBITION
The CSCL will present a leathercraft display with colored slides and demonstrations at Ryerson Institute of Technology, Toronto, on Friday and Saturday, October 26th and 27th. The first Canadian Salon of Leathercraft, composed of pieces chosen from the best examples submitted, will be a feature. Other articles will be divided to illustrate the various stages of progress as follows: (1) One year's experience; (2) Two year's experience; and (3) Advanced. These categories make the display available to all CSCL members. Please submit your best articles for this display. More detailed information will be published in the fall Bulletin, but this is an advance notice.
"LEATHERWORKERS' DIRECTORY"
The Rochester Leathercraft Guild has compiled a Directory of leathercraft supply houses, teachers and designs. Although not yet entirely complete, this Directory will be found to be a valuable guide for leatherworkers. Both Canadian and American information is supplied. Copies are obtainable at 50¢ each by writing to Anthony Genco, 74 Fulton Avenue, Rochester 6, N.Y., U.S.A. Special quantity rates are available.
Page 8 — MEMORY HOLDS THE DOOR ON THIRD INTERNATIONAL EXHIBITS
MEMORY HOLDS THE DOOR ON THIRD INTERNATIONAL EXHIBITS
By Helen Wheaton
Being Canadian, after registration, we made for the CSCL exhibit and after Oh'ing and Ah'ting generally, started around the hall to observe other exhibits.
Immediately our eyes were caught by the amazing display of Bernard Wolff's work in repousse -- high relief tooling. By this method Mr. Wolff works up very complicated scenes in picture form and heraldic type designs on book covers. They show marvelous workmanship and certainly an original and unusual technique. Along with this, several pieces of Melba Fisher's outstanding work helped to make the Detroit Guild's exhibit one of the focal points of the show.
Along the way we came on a picture of "Christ" done on leather in which the coloring seemed to be very well done. There was also a bowling ball bag, with pin and ball design and I believe had very good saddle stitching as well. In the corner was Rochester, where we greeted old friends, and while I know they had a good display of leathercraft, there is no particular item that stands out in my memory at the moment.
After visiting the commercial exhibits where we again admired Al Stohlman's horse with silver mountings, we continued and at the first exhibit were interested in saddle-stitched camera kit bags. At the Chicago exhibit, I believe it was, we looked at the construction of hand-carved sandals--one shoe was sliced through to show the various layers and Supports of the shoe.
There were some very good-looking black tooled bags done by the Windsor Leathercrafters, and while there were some interesting types of bags, no new items seemed to be included.
And so, back to the CSCL exhibit, which we began to examine more minutely, 'the item which took my eye was a desk set of natural Burmese or Chinese Pig Skin by Don MacKinnon. The work was decorated only by lines which did not obscure the beauty of the grain. A mask of draped natural leather, mounted on wood, attracted a lot of comment and it was either liked or disliked very much according to taste for primitive art. Two items in stuffed animals brought smiles and loving thoughts to most observers, a black and white terrier dog and a brown deer with fluffy tail, a specialty of Hilda Vaile of London. The other new and outstanding articles were moulded and stitched leather jugs and moulded trays by Robert Muma.
In looking back, it would appear that a very good standard of leathercraft had been maintained, and the CSCL exhibit particularly showed a definite trend away from the elaborate scroll and floral decoration associated with most leathercraft heretofore.
Page 9 — BOOK ENDS
BOOK ENDS
By Clara Cavanagh
Laced Book Ends
Book end making is one of the most successful class projects and offers wide scope for individual design ideas.
This method should be simple and easy to follow: Get all materials together first:
(1) Choose your metal frame, the shape you like best..
(2) Exterior leather - tooling or carving weight.
(3) Lining leather - plus darex if light weight lining is used.
(4) Padding - tailors' wadding or glaced quilt bat.
(5) Lacing.
(6) Cardboard.
Step I: (a) Place metal frame on cardboard, draw pencil line all around. Draw line for bend.
(b) Remove frame, measure and mark dots 1/4" out from the line already drawn. (See diagram 1) Between points A and B, make dots 3/8" out from line. (This much extra is needed to go around bend.
(c) Cut along dotted line. This is your pattern. For each pair of book ends, use this cardboard pattern and cut: (1) 2 exterior leather.
2) 2 lining leather and 2 darex (Cut lining and darex 1/4" shorter than pattern)
(See diagram 2)
(3) Padding - Cut 3 different sizes, each 1/4" smaller (padding goes only on outside front of book end) (See diagram 3)
Step II: Exterior leather (a) Decorate and finish as desired.
(b) Skive all around edges on flesh side.
(c) On flesh side mark place for bend, gouge out, then dampen slightly and bend.
Lining and darex (a) If heavy lining is used, skive edges.
(b) If light leather lining is used, skive darex on smooth side all around edges. Mark darex on bend, cut halfway through and bend.
Step III, or method of Assembly:
1) Cement darex to inside of frame, having skived side of darex next to frame. (Darex will protrude 1/4" beyond frame)
[This article is illustrated throughout with numbered diagrams beside the instructions (referenced in the text as "See diagram 1", etc.); scattered fragments of the diagrams' own captions had bled into the running text at the column breaks around them and are removed here, since the diagrams are described in the instructions themselves.]
Page 10
(2) Place frame with darex on over edge of table (the edge of table makes a good solid place to work) (See diagram 4)
3) Cement padding in place on outside of frame. 4) Put a coat of cement on exterior leather, also on bottom part of frame.
(5) Cement exterior leather to frame by cementing the bends together first, bottoms next, then over padding, frame and darex. Exterior leather and darex should extend 1/4" beyond metal frame for lacing (See diagram 5)
6) Cement lining to darex.
7) Punch holes and lace.
FILIGREE BOOK ENDS: (1) Cut 2 pieces of lining same size as front of frames. (I prefer the lining and leather behind the filigree to be the same)
(2) Cement each of these lining pieces on the flesh side of exterior leather just after you have finished gouging and bending, and proceed with the same method of assembly as above.
Unlaced Book Ends
Get materials together as for laced book ends and follow same instructions except for changes in steps mentioned below:
Step I: (a) Cut cardboard pattern 3/8" to 1/2" larger than frame for exterior leather.
(b) Cut cardboard pattern same size as frames for lining and darex.
Step II: After you have decorated and finished exterior leather, use cardboard pattern and mark exact size of frame on flesh side, gouge out, then skive very thinly from gouge to edge of leather.
Darex should be skived on rough side all around edges. Edges of lining leather should be skived well.
Step III: Cement smooth side of darex to frame. (Darex should be same size as frame.)
Before putting cement on exterior leather, it should be dampened slightly on flesh side along the gouge and out toward edge (this helps the leather to bend and shape over edge of frame)
Cement exterior leather to frame as in laced instructions.
Your gouged section should come to edge of frame and curve over it, letting finely skived edges of exterior leather cement down on inside of frame on skived edges of darex. (See diagram 6) Cement on lining.
Page 11 — A LEATHERCRAFTSMAN'S LIBRARY
A LEATHERCRAFTSMAN'S LIBRARY
[The title prints a clean space between "A" and "LEATHERCRAFTSMAN'S"; read here as an underscore, the same fault seen on other all-caps titles across the archive, and restored.]
The craftsman in any field needs reference books, but where to start collecting these is often a problem. Even with a fully qualified instructor, the craftsman finds it necessary to refer to books from time to time either for further inspiration or to refresh his mind on some particular technique.
The wide variety of publications available will probably prove confusing to the craftsman just beginning his library, but with careful investigation, he will be able to build up a collection of reference books which will be both useful and inspiring. Most books on leathercraft are comparatively inexpensive, too.
For beginners in leathercraft, books of instruction are probably what will be required first, and there are many good ones available giving details of the basic techniques. Most instructors can give their pupils a list of such books. For advanced craftsmen, books are available on many techniques which they may not have tried before and which will open up a new horizon for them.
Books can be obtained on various aspects of leathercraft, including the history and manufacture of leather, various leathercraft techniques such as tooling, construction, carving, dying, etc., and these should be kept in mind when building up your library to ensure broadest possible scope in subject matter.
We wonder if readers of this Bulletin would help us compile a bibliography of some of the dozens of books available on leathercraft which would be useful to all members of our Society. If you will send us a list of the books which you have or know about, the Editor will be glad to compile them in a classified list which could be made available to all our members. A note as to the general content of the book would be helpful in classifying them if this can be included, but let us have the names and authors at least. Don't hesitate to send in names of books which seem to be popular. Some people may find them new. Let us have your list soon. Send it to the Editor at 118 Hazelton Avenue, Toronto 5, Ontario.
HANDICRAFT LEATHERS AND SUPPLIES
Fine Assortment of Beautiful Leathers
Largest Range of Leathercraft Tools and Accessories
All inclusive Specialized Leathercraft Catalogue
Experienced Personalized Service
THE BIRT SADDLERY CO. LTD. 519 Main Street Winnipeg 2, Manitoba
Page 12
Garnett — Craft Leather Dyes and Finishes
16 colors keyed to color originality. Choose your color or create a new one.
Six antiques for mellow aged effects: Golden Tan, Havana Brown, Mahogany, Chestnut Brown, Rouge, Forest Green.
Ten toning dyes for fine color harmonies: Yellow, Blue, Tan, Orange, Light Blue, Middle (Walnut) Brown, Scarlet, Green, Black, Dark (Chocolate) Brown.
Polish coat for satin-smooth, water-resistant finish. Edge dressing and inlay background dye for that final professional touch.
Ask for the Garnett Instruction Manual at your hobby supply store. Dealers write for information to: Garnett Company, 1 Hannaford Street, Toronto, Phone OXford 4587.
Clarke & Clarke Leathers
...provides a valuable service for you. For information write to: Clarke & Clarke Leathers, Barrie, Ontario. Branches: Montreal (636 Dorchester St. W.), Toronto (523 Mt. Pleasant Rd.).
[This page carries two advertisements: Garnett leather dyes, and Clarke & Clarke Leathers. No names on this page.]