
An issue of the Society’s newsletter, transcribed from the original.
(8 pages, 1.4 MB)
the full-resolution scan, 23 MB, for close research
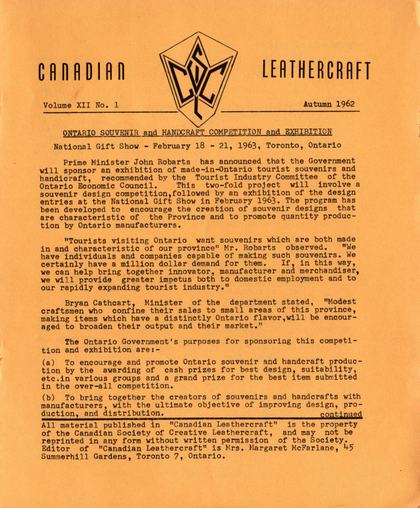
Page 1 — ONTARIO SOUVENIR and HANDCRAFT COMPETITION and EXHIBITION
Canadian Leathercraft
Volume XII No. 1 Autumn 1962
ONTARIO SOUVENIR and HANDCRAFT COMPETITION and EXHIBITION National Gift Show - February 18 - 21, 1963, Toronto, Ontario Prime Minister John Robarts has announced that the Government will sponsor an exhibition of made-in-Ontario tourist souvenirs and handicraft, recommended by the Tourist Industry Committee of the Ontario Economic Council. This two-fold project will involve a souvenir design competition,followed by an exhibition of the design entries at the National Gift Show in February 1963. The program has been developed to encourage the creation of souvenir designs that are characteristic of the Province and to promote quantity production by Ontario manufacturers.
"Tourists visiting Ontario want souvenirs which are both made in and characteristic of our province" Mr. Robarts observed. "We have individuals and companies capable of making such souvenirs. We certainly have a million dollar demand for them. If, in this way, we can help bring together innovator, manufacturer and merchandiser, we will provide greater impetus both to domestic employment and to our rapidly expanding tourist industry."
Bryan Cathcart, Minister of the department stated, "Modest craftsmen who confine their sales to small areas of this province, making items which have a distinctly Ontario flavor,will be encouraged to broaden their output and their market."
The Ontario Government's purposes for sponsoring this competition and exhibition are:-
(a) To encourage and promote Ontario souvenir and handcraft production by the awarding of cash prizes for best design, suitability, etc.in various groups and a grand prize for the best item submitted in the over-all competition.
(b) To bring together the creators of souvenirs and handcrafts with manufacturers, with the ultimate objective of improving design, production, and distribution. continued
All material published in "Canadian Leathercraft" is the property of the Canadian Society of Creative Leathercraft, and may not be reprinted in any form without written permission of the Society. Editor of "Canadian Leathercraft" is Mrs. Margaret McFarlane, 45 Summerhill Gardens, Toronto 7, Ontario.
Page 2
Rules of Competition:
The contest is open to all residents of the Province of Ontario. A contestant may enter an unlimited number of entries.
Copies of designs and ideas now on the commercial market are not acceptable.
New and original designs for items now on the market are acceptable.
Entries should be in the form of a visual concept (drawing or actual example) and/or a descriptive concept.
Entries will remain the property of the contestant, but may be retained for promotional publication and display purposes.
Contestant will deal directly with manufacturer in the event that a manufacturer is interested in procuring contestant's design. Until such time as a suitable arrangement is facilitated between the creator and the manufacturer, the design will remain the exclusive property of the contestant.
Prizes will be awarded on the recommendation of a judging panel of five consisting of:
2 designers
1 manufacturer
1 retailer
1 consumer
The judging panel's decision is final.
Method of Judging:
Consideration by the judges will be given to the following:-
Suitability as a Souvenir.
Suitability to purpose for which the item is designed. Suitability for quantity production by manufacturers or cottage industries.
Market acceptance.
Degree of local identification.
If in the opinion of the judging panel, no entry qualifies for a prize in any of the suggested categories,no prize will be awarded. In addition to the prize winning designs, a number of entries will be given Honourable Mention and others will be recommended for inclusion in the exhibition.
Closing date for entries JANUARY 31st, 1963.
Contest Awards:- $500.00 - Grand Prize
TEN - $100.00 - First Prizes
Note: This seems to be a great step in the right direction by the Ontario Government. Our Society has long recognized that some such measures were needed to stimulate a higher standard of mede-in-Ontario souvenirs. Associates and Fellows of C.S.C.L. will receive questionaires from the Committee in due course. Other members interested please contact:
Ontario Souvenir Promotion Committee,
Room 405,
67 College Street. Toronto, Ontario.
Page 3 — PRIZE LIST — CANADIAN HANDICRAFTS GUILD DIVISION OF THE C.N.E.
[The prize list on this page is a four-column table — class and donor at the left, place and prize money in the middle, winner and article at the right. Read straight across instead of column by column, the entries run together, welding the class descriptions to the wrong winners and turning the prize money into "$15 CoN." and "#15". It is set out below in the order the columns are meant to be read. The picture of the page above is the original, untouched.]
PRIZE LIST — CANADIAN HANDICRAFTS GUILD DIVISION OF THE C.N.E.
BEST LEATHERCRAFT ENTRY IN SHOW.                  $50 cash       Mr. Endel Ruberg
  Donated by F.W. Woolworth Co. Ltd.                                 (Album)
  And Silver Medal donated by President of C.H.G.

BEST ORIGINAL ENTRY, based upon a New            $35 cash       Mrs. Anne Hook
  Approach to Leathercraft in any one or                          (Gavel & anvil)
  more of the following features; function,
  design, coloring, construction.
  Donor anonymous

MOULDED LEATHER, best form and design.            $25 cash       Mrs. Clara Cavanagh
  Donated by Women's Committee, C.H.G.                             (Tray)

DECORATED LEATHER, tooled, carved,           1st  $25 C.N.      Mr. Gunars Buss
  lino-cut, etc. Donated by Tandy Leather                          (Album)
  Co. of Canada Ltd. Barrie, Ont.            2nd  $15 C.N.      Mr. Janis Zalitis
                                                                   (Album)

UNDECORATED LEATHER, contrasting             1st  $25 C.N.      Mrs. Sadie Roebuck
  leathers, lacing, stitching, coloring,                           (Purse)
  etc. Donor anonymous                       2nd  $15 C.N.      Miss Clarice Packham
                                                                   (Gloves)

ANY LEATHER ENTRY, but winner must never          $25            Not awarded
  have won a prize in any major Canadian
  Leathercraft competition before.
  Donated by Canadian Handicrafts Guild.

HONOURABLE MENTION  -  Leather Covered Box                      Mrs. Nora Huyck
        "        "   -  Smoking Stand                            Mrs. Sadie Roebuck
        "        "   -  Telephone Book Cover                     Mr. Endel Ruberg
DEMONSTRATORS: Miss Helen Anderson, Longford Mills; Mrs. Clara
Cavanagh, Barrie; Mr. Fred Brown, Islington; Mr. Jim Courneya, Hannon; Mrs. Irva Ford, Hamilton; Mrs. Jean Newton,Toronto; Miss Clarice Packham, Weston; Mrs. Sadie Roebuck, Toronto; Mr. Endel Ruberg, Montreal; Miss Olivia Smith, Toronto; Mr. Janis Zalitis, Tor.
More space was allowed to Handicrafts Demonstrations this year which was just as well as there were more people constantly around the demonstrations than ever before. Many people were disappointed at the sparse showing of articles on display and it is hoped that a year there will be enough space to show a majority of items chosen.
Page 4 — C. N. E. COMPETITIONS 1962 - LEATHERCRAFT; HAMILTON
C. N. E. COMPETITIONS 1962 - LEATHERCRAFT
| Tooled Leather article, | (1) | Mr. A. Shynal |
| Commercial Design | (2) | Mrs. Lillian Neelands |
| (3) | Miss Vera Samson | |
| Tooled Leather article, | (1) | Mrs. Gladys Miles |
| Original Design | (2) | Mrs. Clara Cavanagh |
| (3) | Miss Olivia Smith | |
| Carved Leather article, | (1) | Mrs. Lillian Neelands |
| Commercial Design | (2) | Mr. Robert Henry |
| (3) | Mr. Arne Maki | |
| Carved Leather article, | (1) | Mrs. Jessie Little |
| Original Design | (2) | Mrs. Gunars Buss |
| (3) | Mrs. Hazel Stanford | |
| Non-tooled Leather article | (1) | Mrs. Lillian Neelands (CHATELAINE AWARD) |
| (2) | Mrs. Sadie Roebuck | |
| (3) | Mrs. Norma Barry | |
| Leather Gloves, fancy | (1) | Mrs. Hazel Stanford |
| (2) | Mrs. T. Terry | |
| (3) | Miss Dorothy Proctor | |
| Leather Gloves, plain | (1) | Miss Dorothy Proctor |
| (2) | Mrs. Harry Hodgetts | |
| (3) | Mrs. Rhea Woosey |
HAMILTON
Hamilton held workshop meetings twice a month throughout the summer, averaging about twenty members each meeting. These workshops were very enjoyable and kept everyone in touch with each other.
"There are three kinds of success for the practicing craftsman. There is the inner success through the process of creation. There is the outward recognition through official awards, and there is the critical acclaim of fellow craftsmen."
From John Gilmore's "Portrait of a Craftsman"
Canadian Art, March/April, 1961
[In this table, the "Tooled Leather article, Commercial Design" first-place cell had been left empty, restored to "Mr. A. Shynal"; "Mr. Arne Make" reads "Mr. Arne Maki"; and the table's own last two rows ("Leather Gloves, plain", 2nd and 3rd) had fallen out of the table as stray paragraphs reading "Mrs. Rhea Wolsey" — rejoined as table rows and corrected to "Mrs. Rhea Woosey", the page's own spelling.]
Page 5 — BELT MAKING
BELT MAKING
By Irva Ford, F.C.S.C.L.
The custom of making and wearing belts is many centuries old.
Whether you make a tailored man's belt, a heavy gun belt, a child's belt or even a lady's contour belt, the principles involved are always the same. The following procedure has proven very satisfactory and may be of value to you when practising this interesting craft. Selection of Leather
The selection of the leather cannot be over emphasized if top quality, long lasting belts are to be produced. As you know, the best and firmest part of the hide is the BACK of the hide where the fibres are tighter and more closely knit. The butt, or tail, which is the firmer end of the hide, should be used for the BILLET (the end of the belt with the holes-opposite the buckle end) because it is constantly used in buckling and unbuckling and is further weakened by punching holes in it for the buckle tongue. If in doubt as to which end of the belt is the firmer, turn the ends over and the ore with the looser fibres will readily show more wrinkles-use this for the buckle end. If you are cutting your own belts remember that the very end of the butt or tail end of the hide, for just an inch or two, should be cut off. This is understandable as this area was subjected to more movement when the animal was alive.
Weight of Leather
For men's dress belts use 6-7 oz. leather but for good serviceable men's belts with stamping or deep carving I prefer 8-9 oz. leather. The original leather looks very stiff and thick. However, after the edges have been bevelled and the stamping completed it looks much finer and becomes very pliable and yet has enough body to withstand a lifetime of constant use. Gun belts and work belts could be made from 9-10 0z.leather. Ladies prefer lighter belts from 4-7oz. leather since their belts are generally worn only for a decoration. Contour belts should not be made of lighter material than 34-4 oz. leather or the edges may curl.
Casing
Wash belting gently in warm water using detergent or pure soap (Ivory or Castile). Rinse and lay the belt flat to partially dry. When the natural colour of the leather begins to appear, it is ready for use. As you work surface moisture may be added occasionally if dry spots appear. If leather is too wet, knife cuts will close and stamping impressions will not appear deep and brown. If it is too dry stamping impressions will not be deep enough. When moisture content in leather is "just right" work fast for best results.
Length Measurement
A waist size can best be taken from an old belt. Measure from the end of the buckle tongue to the hole most worn. (The hole most used should be the centre hole of the new belt) To this waist size add 8 to 10 inches (6" over-lap on the billet end and 2" to 4" turnover on the buckle end, depending upon the width and number of keepers used) If the belt is to be tapered begin tapering 22" from
Page 6
fold at buckle end and 2¾" from centre hole at billet end. If two keepers are used, allow an extra inch at buckle end. When belts are carved or stamped they are likely to stretch, so when buying a ready-made belt strip, one could buy a slightly shorter strip than your actual measurement.
Procedure of Work
After the width, length and thickness of the béit have been determined and the leather has been cased, proceed as follows:- 1. Shape the billet end of belt. This may be rounded or wedge shaped but not extremely pointed. 2. Bevel all 4 edges the full length of belt.
3. "Rub down" the belt with a coarse towel. 4. Skive 4+ to 8 inches of buckle end of leather to about one half the thickness. Whether you skive 4, 6 or 8 inches depends upon the turn over needed to accommodate various widths and numbers of keepers.
5, At this stage.I prefer to punch the slot for the buckle tongue and the holes for the domes because the leather is damp and more easily punched than after the belt is stamped. The slot may be cut (a) by using a 2" bag or drive punch or (b) by folding the leather and punching a ny round hole about 3/8" from fold. Cut out slot with a sharp knife.
[Two diagrams sit between steps 5 and 6, lettered (a) and (b): (a) a knife cutting out the slot for the buckle tongue, (b) the leather folded with a round hole punched about 3/8" from the fold, its measurements marked along the edge.]
6. If a stamped design is being used, plan the pattern carefully on a scrap of belting and determine exactly how wide a border you require.
7. When width of border has been decided, mark the edge with a pair of dividers from billet end to the place on the belt where the skiving starts.Then cut deeply along the line with a swivel knife, sliding the end of little finger along edge of belt as a further guide. If, however, you feel timid about cutting this edge, an edge cutter may be used or simply tool the edge deeply with a single or double edge creaser.
8. Bevel with a push beveller along the cut. Simply place the longer side of the tool in the cut and push or pull. A fine bevel is produced in a few seconds. Of course, a regular beveller and a rawhide mallet may be used instead of a push beveller but it is a slower process.
9. There is no set rule for stamping procedure. For speed, use one tool over the entire length of belt before changing to the next tool. With the second tool again stamp full length. But
Page 7
here's a tip: if you stamp a design down the centre of the belt, place the belt at a right angle to edge of table so that you can watch that the space is equal on both sides of your tool. For stamping border edges place the belt parallel to the edge of work table. Terminate the pattern where the skiving starts at buckle end of belt.
10. Punch 5 holes in billet end; the middle hole should be 6" from the end. Holes are usually ¾" to 1" apart. The size of the hole is determined by the size of the buckle tongue.
11. Dye or antique belt as you desire.
12. Apply edge dressing to back and edges to make them very smooth. Allow to dry, rub back with bone folder and edges with a lignumvitae circle edge slicker or a piece of coarse canvas. Continue to apply edge dressing and rub down until the loose fibres disappear and the surface is smooth and shiny.
13. Polish coat may be used on front of belt.
14. Install snaps or rivets and then the keeper and buckle. Fasten the snaps and the belt is finished.
Keepers
Metal keepers are satisfactory but if you want your belt to have an entirely hand-crafted appearance, the keeper should be made of leather too. Cut a strip of 3½ or 4 oz. cowhide 5/16" wide and long enough to make several keepers. Bevel the edges and burnish them. Allow twice the width of the billet end of belt plus 4 times the thickness of belt for each keeper. Cut off the keeper and with an awl punch 2 holes in each end. Join the two ends with needle and strong waxed thread. Push wet keeper on to a tapered hardwood stick to the point where the stick is twice the thickness of the belt.
Tap edges of keeper with mallet.
Crease edges with #2 edge creaser. Add a design if you wish. Allow the keeper to dry on the stick. To remove the keeper from the stick give it a quick push with the edge of a ruler and it will slide off.
Tools used for Belt Making
1. Draw gauge (if cutting own strips)
2. Rule or straight edge to make a straight edge on leather before cutting strips.
3. Cutting knife.
4. Skiving tool.
5. Edge beveller.
6. Dividers.
7. Swivel knife.
8. Push beveller or craft tool beveller and mallet.
9. Revolving punch.
10. Edge Creaser (optional).
11. Dome setter and domes or rivet setter and rivets.
12. Slot punch (optional).
13. Circle edge slicker or piece of canvas.
14. Carving tools (optional)
15. Hardwood stick for making keepers.
[The tool list is printed in two columns — 1 to 7 beside 8 to 13, with 14 and 15 below them — and is set out here in its numbered order.]
Page 8 — C.S.C.L. Exhibit at the Pacific National Exhibition
C.S.C.L. Exhibit at the Pacific National Exhibition
Mr. Norman C. M. Collingwood, Manager of the Craft and Hobby Show at the Pacific National Exhibition in Vancouver, British Columbia, invited the C.S.C.L. to send an exhibit to this Exhibition which was held from August 19th to September 4th, 1962.
It was most gratifying to have 14 members respond to this invitation. Forty articles were sent. Our C.S.C.L. Exhibit was awarded the bronze medal. This is the top award for leather.
A letter of congratulations and thanks was received by Mrs.Irva Ford, convener of the exhibit committee, from Mr. Collingwood in which he also stated that our display, which was viewed by more than 150,000 persons, was the object of many fine comments by both the judges and visitors.
As well as the bronze medal for our display six individual members were awarded prizes for their articles as follows:
Mr. Fred Brown, Toronto - Guest Book
Mrs. Clara Cavanagh, Barrie - Picture Frame Mrs. Nora Huyck, Toronto - Inlaid Covered Box,Leather
Mrs. Nora Huyck, Toronto - Bound Book
Mr. Frank Torry, Hamilton -
Mr. Janis Zalitis, Toronto - Writing Case
We are pleased to have you come in and choose from our wide selection of Quality Leathers and Accessories. If not convenient, phone or write:
284 King Street West
Toronto 2B, Canada
EMpire 3-5206
AN ALL-CANADIAN COMPANY SERVING CANADIANS SINCE 1913
[Frank Torry's prize is listed with no item named — the page itself prints "Mr. Frank Torry, Hamilton -" with nothing after the dash, a gap in the original typesetting, not a transcription drop.]