
An issue of the Society’s newsletter, transcribed from the original.
(12 pages, 1.5 MB)
the full-resolution scan, 29 MB, for close research
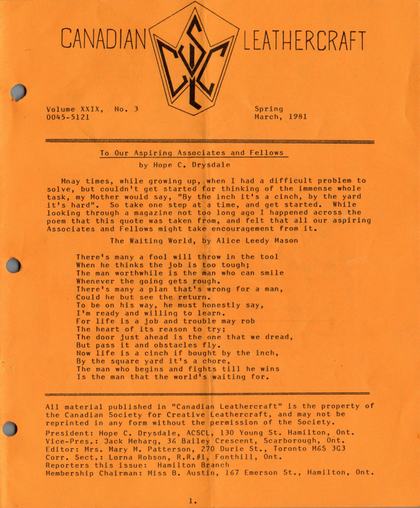
Page 1 — To Our Aspiring Associates and Fellows
| CANADIAN | LEATHERCRAFT |
| Volume XXIX, No. 3 | Spring |
| 0045-5121 | March, 1981 |
To Our Aspiring Associates and Fellows by Hope C. Drysdale
Many times, while growing up, when I had a difficult problem to solve, but couldn't get started for thinking of the immense whole task, my Mother would say, "By the inch it's a cinch, by the yard it's hard". So take one step at a time, and get started. While looking through a magazine not too long ago I happened across the poem that this quote was taken from, and felt that all our aspiring Associates and Fellows might take encouragement from it.
The Waiting World, by Alice Leedy Mason
There's many a fool will throw in the tool When he thinks the job is too tough;
The man worthwhile is the man who can smile Whenever the going gets rough.
There's many a plan that's wrong for a man, Could he but see the return.
To be on his way, he must honestly say, I'm ready and willing to learn. For life is a job and trouble may rob The heart of its reason to try; The door just ahead is the one that we dread, But pass it and obstacles fly.
Now life is a cinch if bought by the inch, By the square yard it's a chore,
The man who begins and fights till he wins Is the man that the world's waiting for.
All material published in "Canadian Leathercraft" is the property of the Canadian Society for Creative Leathercraft, and may not be reprinted in any form without the permission of the Society.
President: Hope C. Drysdale, ACSCL, 130 Young St. Hamilton, Ont.
Vice-Pres.: Jack Meharg, 36 Bailey Crescent, Scarborough, Ont.
Editor: Mrs. Mary M. Patterson, 270 Durie St., Toronto M6S 3G3 Corr. Sect.: Lorna Robson, R.R.#1, Fonthill, Ont. Reporters this issue: Hamilton Branch
Membership Chairman: Miss B. Austin, 167 Emerson St., Hamilton, Ont.
Page 2 — TIPS AND HINTS
TIPS AND HINTS by Bea Austin
The eight tips below were printed with their numbers running down the margin; where the transcript pulled the numbers loose from their tips, they have been put back with the tip they belong to.
1. Neat Lac the edges of your cardboard patterns - you will find them easier to use and they will last much longer.
2. You can use heavy scrap leather to make numbers for your house. They can be carved- dyed, etc. Best size is 2½". They can be cut in squares, or round, or other shapes... (cut them out)... and they can be placed one above the other or side by side.
3. For carrying your swivel knife and not letting the edge become dulled, cut a piece of leather about 2" long, fold it in half, then glue, sew, or fasten it with scotch tape over the blade.
4. Wax your lacing to prevent it losing its shape or becoming thin from constant strain of being drawn through the holes. Lexol is another good product to use on lacing.
5. To sharpen your adjustable gouge or other grooving tools, rub buffing compound on a piece of string and draw it through between the cutting prongs.
6. To use belt scraps- cut into little rectangles 1" X 2" and then make dominoes from them. You can use a #706 craftool seeder for the dots, which can be dotted with white dye or model aeroplane dope.
7. You can take pieces of wire and make a hanger to hold your pieces of scrap leather which you have punched with a hole so that they can be threaded onto the wire hanger. They are readily available when you want a piece of scrap for dye-testing strips, or for pattern-design testing. A separate one can be made to hold belt ends.
8. Rub a little vaseline around your bottle tops and you will find them easier to unscrew-. glue bottles, dye bottles etc.
Page 3 — INDIAN BUCKSKIN
9. The common nail clipper is a handy tool for quickly rounding off lacing corners on small, lightweight leather projects - and for real power, try toenail clippers.
10. Use curtain rods to keep spools of lacing on. Put up the rod at a convenient height for your work table, just the same way it is installed for holding curtains. The lacing spools can be put on and taken off with no trouble, and they are up and out of the way. The same idea can be used for your roll of tracing film.
FOOTNOTE
He who works with his hands is a Labourer, He who works with his hands and head is a Craftsman, He who works with his hands, head and heart is an Artist, He who works with his hands, head, heart and feet is a Salesman.
INDIAN BUCKSKIN - submitted from research by Winne Comfort
To make buckskin in Indian life required a great deal of labour.
No materials or tools were used that were not at hand almost anywhere in the wilderness.
The various modes of making buckskin followed about a similar course of work --- (1.) soaking (2) unhairing and defleshing (3) alternately soaking, partly drying and pulling and stretching until sufficiently pliable (4) smoking in wood smoke which rendered it more durable as well as improving the appearance.
A log trough answered for a vessel for soaking skins in clear water until the hair and grain would slip. The skin was then put on a peeled log and the hair and flesh was removed with the use of a sharpened rib or stone.
The brain contents of the deer, along with some grease, was made into a paste in hot water and applied warm to the skin, which was then allowed to partly dry. Following this, the skin was pulled, twisted and stretched in every direction to loosen
Page 4 — HAMILTON BRANCH ANNUAL ELECTION REPORT
the fibres. The hands alone were used for this process, unless the skin was pulled over the edge of a sharpened stump as well for extra loosening action. The expenditure of a great deal of elbow grease brought the skin to a state of flexibility only slightly less than that of a piece of cloth.
The smoking was done on a frame of sticks over a slow-burning ' fire with little heat but plenty of smoke.
Well made buckskin is as soft as chamois leather, but far stronger and warmer than cloth. Also, it provides protection from briars and burrs.
HAMILTON BRANCH ANNUAL ELECTION REPORT
The March meeting of the Hamilton Branch of the C.S.C.L. featured the annual election and induction of their new slate of officers for the upcoming year.
Hamilton has always made a major production of this event, and would like to share with other branches and members of the C.S.C.L. the inspirational charge with which Lillian Beech installed the Officers and charged the members as well.
Lillian appealed to the rank and file members to realize that continual renewal of their organization is the business of each member. These following considerations may help you do your part.
(1) Keep in mind the purpose of your organization.
(2) Live up to your duties of membership.
(3) Think for yourself.
(4) Promote a spirit of teamwork.
(5) Seek the best interests of everybody.
(6) Do your "homework" for each meeting.
(7) Give credit where credit is due.
(8) Don't dodge thankless jobs that must be done.
(9) Keep expenses under control.
(10) Become part of the answer- Not the problem.
The prayer: Let me realize, Lord, that I will gain from organizations in proportion as I give to them.
- Lillian Beech -
Page 5 — WHO'S WHO IN LEATHERCRAFT: MURIEL McKNIGHT
WHO'S WHO IN LEATHERCRAFT MURIEL McKNIGHT by Hope Drysdale
Mrs. Jack McKnight is a grandmother with four sons and four grandchildren. As an excellent supporter of the Hamilton Branch she has held office ever since joining the Guild. She has been President, Secretary, Exhibition and Programme. Convenor during her years with the group, as well as being on the Executive Council, C.S.C.L. for approximately five years. Muriel has held the position of Publicity Chairperson for the past three years, and has succeeded in having the C.S.C.L. mentioned in "Make It With Leather" twice.
Muriel started her Leathercraft studies in 1963, spending seven years at Westdale Secondary School studying with the late Irva Ford. In 1965 she joined the C.S.C.L., and by 1969 she was able to attain the status of Associate, receiving the highest marks for the year, thus qualifying to receive the Zalitis Pin.
In 1970, Muriel started teaching Summer School with the Hamilton Board of Education, educating others in the craft of leatherwork, a programme she continued until the end of 1978, She has also taught Senior Citizens groups including one at Caledonia. Another project was teaching Evening classes for Adults at Delta Secondary School in Hamilton, as well as managing to find the opportunity to conduct private lessons in her home for a number of years.
Muriel has attended workshops with the C.S.C.L. Also amongst her many credits is her work as a student of design (a twenty week course) at Mohawk College, a day course, plus numerous weekend workshops at Mohawk, and a week-long course in the craft at the Haliburton School of Fine Arts. These have all contributed to her skill, leading to her success in attaining many ribbons for her fine work. As early as 1968 she won a Salon ribbon for her entry of a Jewellery Box at the International.
Page 6 — MAN'S MOST ANCIENT FABRIC
Hamilton Branch has been fortunate in having Muriel's work help in the winning of the Weston Trophy several times. Also amongst her achievements are a number of award-winning articles being displayed at the C.N.E. in Toronto, and she has also had work accepted into most of the bi-annual Exhibitions.
Another facet of Muriel McKnight's talent is her prize-winning crochet work that has been displayed at the C.N.E. She has had crochet and knitting Evening Classes at Orchard Park, Stoney Creek, and Adult Day Classes at George R. Allan School in Hamilton for over five years.
As a member of the Artisans Guild, and of the Hamilton Regional Arts Council, Muriel is truly a valued member of the C.S.C.L.
MAN'S MOST ANCIENT FABRIC by Winnie Comfort.
Leather has long been one of the most important and useful materials known to mankind. Our Stone Age ancestors probably made garments of animal hides and skins at least 25,000 years ago. Amongst pictures carved in stone 5000 years ago by the Egyptians are some showing leather dressers at work. The New York Museum of Art has a pair of Egyptian leather sandals on display that are more than 3,300 years old.
There is, in Cairo Museum an Egyptian queen's funeral tent of gazelle hides, which was made in 1100 B.C. A cloak of white antelope leather,also of Egyptian origin, created over 4000 years ago, is on display in the Boston Museum of Fine Arts.
Tooled book bindings, wall coverings, and shields made in the Middle Ages have retained their beautiful appearance, even after the passage of centuries. Early Britons made their boats of leather. In Rome, leather served as money at times, and leather shoes of different types indicated the rank of the wearer,
A Roman Recipe for Tanning Hides:
"Hides are tanned by using bark, gallnuts, sumac and lotus",
Gallnuts are caused by insects laying eggs on the leaves and buds of oak trees. These eggs produce a growth which yields a high percentage of tannic acid. Gallnuts are still used in one type of tanning process.
Page 7 — ANNUAL MEETING
North American Indians practised two tanning methods- vegetable and oil tanning. The Inuit relied on oil tanning because of the availability of fish as an oil source. The ancient Chinese used a third method of curing the hides, using a mixture of mud and alum salts. The Hebrews first used oak bark for tanning leather some several thousand years before Christ.
Colonists coming to America brought oak-bark tanning methods from England along with them. The first leather maker to arrive in the New World was a man called Experience Miller, who landed at Plymouth in the year 1623.
The early leather makers simply dug holes in the ground and walled them with planking. In these pits the hides were covered with oak bark and left for at least six months.
Samuel Parker, in 1809, invented a machine that could split hides to any desired thickness. Until then, it took one man a full day's labour to divide four hides. Now he could split one hundred hides in the same length of time.
From these rough beginnings grew the scientific processes of modern leather manufacture which we now know. WORKSHOP TIPS FROM THE QUESTION BOX... C.S.C.L.
ANNUAL MEETING
A panel consisting of Mrs. Jean Hunter, Mrs. Nora Huyck,
Mr Fred Brown, Mrs. Clara Cavanagh, chaired by Mrs. Helen Wheaton, Chairman of the Fellows, answered a number of queries, and Helen Wheaton sends these tips along to us.
Question: What glue or cement do you use to fasten a pin back,
Since CIL Household Cement is no longer available? Answer: The general consensus of opinion was that LePages
Household Cement,or LePages Leather Cement was good. Question: How do you avoid difficulties with X-Ray plate stiffener? Answer: Norbert Stephen advises that you must make sure that there is no acetate in the material or the cement used. Question: Where do you buy pigtex gloving leather?
Answer: Again by N. Stephen... write to the Chamber of Commerce,
Gloversville, New York, U.S.A.
Page 8
Although we will be reporting on the C.S.C.L. Annual of May 1st,1981 in the next issue, we could not resist including the following brief speech that was presented at the Annual by Chairman of Fellows, Helen Wheaton.......
In the beginning, about 1950, there was a group of people who worked in leather. These people said: Let there be a Leathercraft Society!
AND- C.S.C.L. was born,
AND- It was good.
Then it was felt by the group that Standards should be set up.
AND- The Associate and Fellow Standards were set.
AND- The first Associate and Fellow members were elected. AND- It was good.
In 1953, the Americans invaded the Canadian Society for Creative Leathercraft.
AND- The Americans saw that what the Canadians were doing was good,
AND- They said: Let there be an International Assembly of Leathercraftsmen.
AND- The INTERNATIONAL ASSEMBLY OF LEATHERCRAFTSMEN
(I.A.L.C.) was born. Mr. Robert Dengler being the father, (or Godfather, if you prefer.)
AND- It was good.
The Advisory Board of I.A.L.C. met,
AND- They said: Let there be an award given in recognition of Excellence in Design.
AND- The SALON award was born, and awarded at future assemblies.
AND- It was good.
Page 9
It was then seen that there were a great many articles excellent in Craftsmanship but were not original in concept. So it was said: Let us have an award for these excellently crafted pieces.
AND- The Craftsman Award was born.
AND- It was good.
In 1956 or 1957, the Weston Leather Crafters decided to close operations and they donated their remaining funds to the C.S.C.L.
AND- To give the Branches of the Society something to work for, the Weston Trophy was born.
AND- It was good.
The practice of giving out these Awards has continued over the years to this day.
AND- It is seen to be good.
TWENTY-FIVE YEARS AGO From the Editor's Desk Some things never seem to change - others we noticed in the Spring 1956 Bulletin are vastly different. Which of these sounds familiar?
Membership reminders were sent out to deliquent members, but few of them answered The Editor asks for more support from the members in mailing in articles, suggestions, tips, etc.... more members could have easily attained Fellow or Associate standing if they had taken the time to make articles for submission. Of course! they all do! But some things have changed drastically; for example:
A new book on leather carving by F.O. Baird was reviewed, with special mention being made that this "Design Artistry" book is in keeping with modern trends in design.... although we occasionally see small amounts of carving in our leather shows, it is now the exception in most pieces we call "modern design", as modern usually means starkly simple nowadays. How times change!
Page 10 — THE MAKING AND COVERING OF CARDBOARD BOXES
THE MAKING AND COVERING OF CARDBOARD BOXES by Frank L. Torry
A covered cardboard box is an asset when giving your leather articles as gifts. The following describes the construction and covering of boxes.
MATERIALS REQUIRED
CARDBOARD - For small boxes, use a 15 point cardboard which will hold such smaller articles as key cases, wallets, coasters, etc. For larger items 18 to 24 point is better. The larger the item the thicker the board should be. (Note: 15 point is 15 thousandths of an inch, 18 point is 18 thousandths of an inch, etc. ).
COVERING PAPER- Gift wrapping paper is ideal. Use paper with an all-over design, and avoid paper that has the design in straight lines or in squares. Do not use a paper with a high gloss finish.
PASTE- An ordinary wallpaper paste is required. After trying several products, I have found that Elmer's F.C.200 adhesive is the best.
METHOD OF CONSTRUCTION
Measure the article for which the box is being made.
Do not crowd the article in the box.
Figure 1 (opposite page), shows the layout, with "L" marked for the length, "W" for the width, and "H" for the height. On the good side of the cardboard, outline as shown, cut the box out, and score along the dotted lines. Figure 2 indicates how the paper is cut. Place the box blank on the wrong side of the paper and draw the outline as shown by the dotted lines. Add extra paper for corner tabs and "turn-in" for top of all sides, as indicated by solid lines, then cut out.
Page 11
TO PREPARE BOX FOR COVERING
Form box by bending sides up and join the corners using thin gummed paper. Make sure the corners are neat, and there should be no open cracks. (Gummed paper can be purchased at most stationery stores,- Grand and Toy have an excellent pad of it.) Paste the paper and place box in central correct position, then turn up the sides of the paper with the tabs first. Turn in end tabs, fold the paper over the top edges of sides, and down inside, making sure that there are no wrinkles. Follow the same procedure for the end paper, making sure that the.corners are smoothly neat.
COVER
The cover for the box should be 3/32nds of an inch larger in both length and width. For easier opening, make the sides of the cover about 2/3 the height of the box.
FIGURE #2
HEXAGON BOXES (See pattern next page)
Figure 3: Set the compass a little wider than half the size of the box required. Draw circle and divide the circle into six parts using the same setting on the compass. Draw in lines making the hexagon shape. (I find that it is best to draw this on a piece of scrap first, and check to make sure of the size.) Reset compass for outer circle to obtain height of sides and draw in sides of box.
Page 12
(Hexagon boxes continued)
Figure 4: This shows how the paper is cut. Note: alternate Sides have tabs for corners. Form box by turning up sides, and glueing corners with gummed paper. Paste paper, and place box in correct central position and turn up sides with tabs first, then turn up other sides making sure that there are no wrinkles and that the tops are turned in neatly and smoothly.
COVER FOR HEXAGON BOX
Set the compass one-sixteenth of an inch larger than setting for box. Draw circle and divide the circle into six parts using the same setting on the compass. Draw in lines making the hexagon shape. Reset compass for outer circle to obtain height of sides and draw in sides. For easier opening, make the sides of the cover about 2/3rds the height of the box.
/ /
Our guest writers this issue were Hamilton Branch. Our Summer'81 issue will be reporting on the Annual, with Norland Branch and the Members-at-large as co-reporters,