
An issue of the Society’s newsletter, transcribed from the original.
(12 pages, 2.0 MB)
the full-resolution scan, 29 MB, for close research
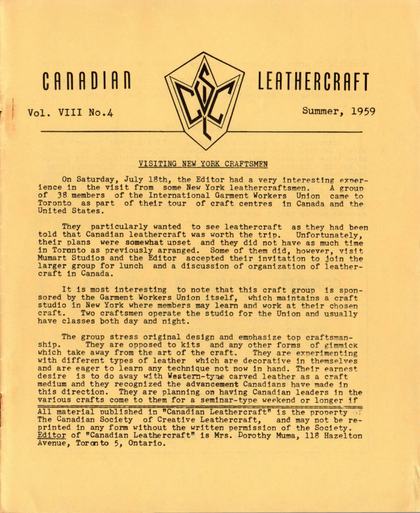
Page 1 — VISITING NEW YORK CRAFTSMEN
Canadian Leathercraft
Vol. VIII No.4 Summer, 1959
VISITING NEW YORK CRAFTSMEN
On Saturday, July 18th, the Editor had a very interesting experience in the visit from some New York leathercraftsmen. A group of 38 members of the International Garment Workers Union came to Toronto as part of their tour of craft centres in Canada and the United States.
They particularly wanted to see leathercraft as they had been told that Canadian leathercraft was worth the trip. Unfortunately, their plans were somewhat upset and they did not have as much time in Toronto as previously arranged. Some of them did, however, visit Mumart Studios and the Editor accepted their invitation to join the larger group for lunch and a discussion of organization of leathercraft in Canada.
It is most interesting to note that this craft group is sponsored by the Garment Workers Union itself, which maintains a craft studio in New York where members may learn and work at their chosen craft. Two craftsmen operate the studio for the Union and usually have classes both day and night.
The group stress original design and emphasize top craftsmanship. They are opposed to kits and any other forms of gimmick which take away from the art of the craft. They are experimenting with different types of leather which are decorative in themselves and are eager to learn any technique not now in hand. Their earnest desire is to do away with Western-type carved leather as a craft medium and they recognized the advancement Canadians have made in this direction. They are planning. on having Canadian leaders in the various crafts come to them for a seminar-type weekend or longer if
All material published in "Canadian Leathercraft" is the property The Canadian Society of Creative Leathercraft, and may not be reprinted in any form without the written permission of the Society. Editor of "Canadian Leathercraft" is Mrs. Dorothy Muma, 118 Hazelton Avenue, Toronto 5, Ontario.
Page 2 — SHARKSKIN LEATHER
possible in order to learn as much as possible about Canadian crafts.
We welcome this example of striving craftsmen particularly because to our mind it indicates a trend in the right direction-- towards making leathercraft an art rather than just a hobby.
SHARKSKIN LEATHER
According to an article appearing in "The Leather Trades' Review", London, there are some 235 known species of shark, but long experience has shown that only 10-12 species are suitable for leather making purposes. These include the tiger, leopard, dusky, brown, surf sand bar,blacktip, mackerel, hammerhead, sawfish, nurse, Japanese ray and Morocco sharks. The tiger, leopard and nurse sharks are taken in greatest quantity and are most valuable. The tiger-shark leather brings the highest price among the leathers made from shark. It is popular for men's high grade shoes and waist belts and demand exceeds supply many times over.
COMPLETE SUPPLIES FOR LEATHERCRAFT
Aluminum Etching, Copper Tooling and Copper Enamelling Purse Framing — Patterns, Tools and Frames Qualified Technician in charge
We are not a "Mail Order Catalogue" House — We sell : Top Grade Materials only.
Mail & Phone Orders Given Prompt Attention Centrally Located
CAPITAL FINDINGS & LEATHER LIMITED 580 King Street West, Toronto 2B
Phone EM. 3-8563
OUR SPECIALTY:
ALL KINDS OF SPECIAL & FANCY LEATHERS
Page 3 — MAKING ARTICLES FOR SALE
MAKING ARTICLES FOR SALE by Nora Huyck, F.C.S.C.L.
This article is being written to help those who may ask--What can I do to improve my work? The usual answer, of course, is practice and lots of it. Practise the various skills until you can do them easily and well.
There are a few things to watch when you are finishing an article for sale. The finishing of edges can quite often spoil a project which started off very well. Edges are usually finished in one of three ways:
(1) The most common is a laced edge. The purpose of lacing is to hold the article together,but since it shows, it also forms part of the general design. The two most common stitches are the whip stitch and the double buttonhole stitch. If you are using a whin stitch, the cut edges are apt to show between the stitches.A ragged cutting-out job will be quite obvious. If the article is dark in colour, the cut edge is apt to show through rather light and therefore should be dyed the same colour as the outside of the article. If the edges are ragged and fuzzy,they should be trimmed off evenly and perhaps edge dressed before lacing.
The double buttonhole stitch will usually cover a cut edge if the article was properly skived before assembly. If the cut edge does show,make it as inconspicuous as possible by dying it to match the rest of the article. Do trim off any unevenness before starting to punch the article for lacing. The main fault still seems to be in the rounding of corners. Before punching, round the corners by placing a dime on the corner and snipping off the extra leather.Then it is quite in order to go twice through two or even three of the holes on the rounded corner,in order to keep the stitches from looking as though they had to stretch too far to reach the next hole.It is especially on the front of handbags that we still find craftsmen trying to lace around a 90° angle. You can't round the corner with a dime here, but you can snip off the corner before punching. Then put the corner stitch on a slant. When the top of the gusset was laced, the last stitch should have been far enough back from the edge to allow space for this slit.
The lacing chosen should be part of the design-either blending with the color of the article or producing a desired contrast. Likewise, the width of the lacing, the spacing of the stitches and the distance of the stitches from the edge must all be considered.Don't use dark brown lacing on everything just because you happen to have a big spool of it,or don't use coarse lacing just because it is faster. If you have laced something heavy which needed to have the slits more than one-eighth of an inch from the edge,please reset the punch when you start something finer like a wallet or a change purse.
Page 4
(2) Cut edges are very often poorly finished -- in fact, unless the edge is laced, it seems to be the thing to ignore it. A handbag with a good design, well assembled and neatly laced, can be ruined because the edges of the strap are unfinished, This happens all too often. If it is not laced or turned, then it must be treated as a cu edge.
Edges on thicker leather, belts, straps,etc., should be bevelled Sop and bottom to take away the sharpness and give a slightly rounded appearance. The excuse often heard -- I wanted the square look -\is just an excuse for not bothering to take the time to finish the\article properly. There are very few occasions when the sharp rectangular look is desirable in leather. A line along the edge made by an edge creaser or a tracer adds something to the finish of a handbag strap.
The edges sometimes need to be coloured to blend or contrast with the rest of the article.Then they must be rubbed up until they are smooth. There are several ways to do this, but all of them require some exertion on the part of the craftsman.
Cut edges on thin leather need attention too.A wallet interior made of parts just as they were cut from the hide looks like a poor little orphan who needs some loving care.In the first place the edges are sometimes ragged due to careless cutting or a dull knife. Trim off any unevenness and rub down any fuzziness. Then especially with morocco, the cut edge often presents a rather objectionable white line. If this happens, take time to dye the edges. It will only take a few minutes. A line creased close to the edge with a tracer or a heated edge creaser makes a neat finish.In other words, it looks as though a little care went into its construction.
Edges that are saddle stitched or handstitched come under this section. After stitching, they must be treated as a cut edge. As for the stitching itself,do practise some before you make things to offer for sale. Have you tried saddle stitching or hand stitching? It is not difficult and when well done,it presents a really professional looking article.
The third edge is the turned edge.It also gives a professional look and also only if well done. The leather to be turned over and cemented to the other side of the cover of a book, or of a bookend, must be skived thin enough to present a smooth appearance when covered with the lining leather. It is especially important at the corners, whether they are round or square. Why not practise turning a few edges? If you.have a sharp knife, it is quite easy.
The construction fault most common is poor skiving.If sufficient skiving isn't done on pieces to be cemented together at the edge before lacing, the result will be a bulky thick edge hard to cover. Articles can be skived too much -- in which case the leather is weakened and will soon tear out. This doesn't happen too often, but it is possible to skive too much. How much to skive? -- enough to make a neat edge, then. stop.
Page 5
The usual faults with carving are lack of depth in cutting the original outline, poor pear shading, shallow or puckered bevelling, background which isn't carried right to the edge of the area to be backgrounded and rectangular scratches in place of smoothly curved decorative cuts.
Lack of depth in cutting may come from not trying to cut deeply enough -- usually however, it is the result of cutting on soggy leather in which the cuts close up again as the leather dries,leather which wasn't properly cased, or a dull knife. Pear shading is usually used to take away the flatness of a leaf or petal. The shape or outline of the tool should not be obvious as it so often is. The tool should be moved back and forth over the area to be shaded and in most cases should not touch the edge of the petal or leaf. Shallow bevelling is usually the result of poor cutting = 1¢ is difficult to bevel deeper than the cut, and it is hard to make the beveller follow the shallow cut. The puckers usually come from moving the tool too quickly along the line to be bevelled or trying to use a small beveller when a larger one should have been used.
The backgrounding should give the impression of an area which is behind or below the design. That part of the leather is actually lower than the surrounding leather. The effect is lost completely if the backgrounding isn't carried right to the edge of the leaf, petal, stem, etc. As for the decorative cuts, control of the knife is essential and that takes practice and lots of it. Please don't say -- I did it that way because I wanted to create such an effect if what you really mean is that you hadn't practiced enough to acquire the skill necessary to do it properly -- because your work will tell what you mean.
The faults with tooling are much the same -- the lines are not tooled sufficiently deeply to make the design stand out. You often have to go over a line several times to get it deep enough. It must be done slowly and carefully. The modeller achieves the same effect as the beveller does in carving.The usual fault is in not modelling right up to the line. A tooled line shows on leather as a hollow with two sides. The modelling tool starts in the hollow and removes one side of the line. The same applies to the background whether stippled or depressed. It should be taken right into the hollow.
In other words, when the design is finished, you should not be conscious of any lines, only of the design.
Finally,the person buying a handcrafted article is looking for something he can't buy in a store. For that reason, those articles such as wallets, change purses, etc,, which are made of undecorated leather must be superbly made.There are such things for sale in the stores and at a very nominal price. Therefore, if you offer one of these for sale, it must be exceptionally well done.
Page 6 — FIFTH INTERNATIONAL ASSEMBLY
FIFTH INTERNATIONAL ASSEMBLY
Another International Assembly of Leathercraftsmen has come and gone and those who were there this year found it as usual both interesting and informative. The host guild was Flint Leathercraft Guild and the place was the Durant Hotel in Flint, Mich., the dates May 2 and 3.
A varied program had been laid out with something going on all the time. Displays of work were shown by six participating guilds, with one guest exhibit from Salt Lake. Demonstrations were featured all day Saturday and Sunday morning. Saturday evening was devoted to a banquet and speakers. Commercial exhibits were fewer this year and were a rather minor part of the weekend.
Displays
The overall impression of the Guild exhibits was that the Salt Lake display stood out because it was the only one in which totally carved leather was featured. Other guilds have gone far towards the use of leather for leather's sake with little or no decoration. Looking back to the first Assembly, they seem to have come a long way in this direction, and CSCL now has much stiffer competition.
Both Michigan Leather Artisans and Detroit Leathercrafters showed bags designed by Frick, with a total of 8 of the same shape in the two exhibits. Although these bags were well done, showing uncarved leather,fewer of them would have had the same effect without the monotony. Other features of the Michigan Leather Artisans display were the leather gameboard and playing pieces, very well done; and the natural-looking leather flowers. Detroit showed an unfinished coffee table top in process by Bernard Wolff which was very interesting from a technical point of view.
Eastern Leather Guild from Rochester also suffered from some monotony. in the extensive display of braided pocket secretaries. This is a very interesting technique,but two or three would probably have served the purpose. A very good piece in this exhibit was the carved plaque of prayerful hands by Lincoln Osborne.
Frontier LeatherArts Guild display was a little disappointing. They do not seem to have lived up to former indications, in that their use of color has not advanced. One picture was especially bad, the leather being completely obscured by dyes and enamels, and the whole effect could probably have been just as easily achieved with sculptured paper.
Flint Guild displayed a variety of pieces, featuring bookbind-
Page 7
ing, leather portraits and golf bag. It was difficult to pick out any outstanding pieces, because the whole display seemed to be on the same level, better than previous displays.
Taken as a whole,the Canadian display showed more advance than the others, and there is no doubt that C.S.C.L. has led the way. Having a Board of Selection go over entries before display tends to raise the calibre of the display and sorts out mediocre work before exhibition.
Salon
Taking -the Salon as a whole, it was disappointing. There were few pieces actually of Salon quality. A more rigid pre-selection on the part of the participating Guilds might have improved this. Two Honor Awards were given,one to Liz Freriks of Michigan Leather Artisans, for her modern handbag in natural leather with Chinese motif in brown on the flap, using a no-stitch,no-lace assembly technique. The other Honor Award went to Dorothea Slater, also of Michigan Leather Artisans, for her chessboard and fitted box of leather.Honorable Mentions were awarded to the following: Nora Huyck, CSCL - over-shoulder bookcover for bird book in dark brown; Wavel Smith, Detroit - stitched tote bag; Margaret Hazzard,CSCL - covered box in dark brown with semi-precious stone inlaid on top; Anthony Genco, Rochester - Doodle Page case with woven lacing decoration; Thelma Greenman - softly-draped belt in natural leather; Robert Muma, CSCL leather bound book in rust calf with gold tooled decoration;Shirley Austin - stamped bowling bag.
General Salon pieces included magazine binder with braided decoration; hat,bag and shoes set in black and white leather;binder for Canadian Leathercraft with CSCL crests; handbag with Estonian design; black morocco wallet; blotter pad in 3D tooling;green handbag inspired by Jack-In-The-Pulpit;covered box in dark green with small design;bird-book cover;gun case with figure carving;covered bottle; box covered in brown with snakeskin top; carved bowling bag; framed handbag; small album cover in dark brown; tote bag.
Demonstrations
Demonstrations were continuous from 10 a.m. to 4:00 p.m. on Saturday, and from 10 a.m. to 12 noon on Sunday, actually overlapping the noon hour considerably. There was plenty of room for watching the demonstrations, and many chairs available, which made for comfortable watching.
Among demonstrations given were Rosary making; belt assembly; figure carving tools; high relief tooling; tooling and embossing;
Page 8 — C.S.C.L. EXECUTIVE 1959-60
decorative cuts and carving:no-stitch, no-lace handbag construction; flower making (2 different demonstrations); spray dyeing; lace cutting; 3D tooling; design; glove making; background tools.
Registrations numbered over 325, with representatives from all over Michigan, Rochester,Buffalo, Ohio, Texas, Wisconsin, Colorado. Missouri, California, Illinois, and many points in Canada, including Regina, Toronto, Hamilton, London, Petrolia, Barrie, Welland.
Next Assembly
It was decided to hold the Assembly annually again, and the next host Guild will be Frontier LeatherArts Guild. Tentative dates are May 28 and 29, 1960, at the Hotel Statler in Buffalo. The 1961 Assembly was invited to Canada, exact time and location to be announced later.
Frontier Guild is already well on with their plans and anyone Who attended the First International will remember what a good time they had in Buffalo. The 1960 Assembly promises to be well worth attending,so make an appointment now to be at the Sixth International Assembly of Leathercraftsmen in Buffalo, in May, 1960.
C.S.C.L, EXECUTIVE 1959-60
PRESIDENT: Fred Brown, 9 Nashland Ave., Islington
The President's name is printed Fred Brown; the capital F is faint on the page
VICE-PRESIDENT: Harold Wilson, 400 Charlton Ave. W., Hamilton.
TREASURER: Mrs. Gladys Miles, 573 Greenwood Ave., Toronto 6.
CORRESPONDING SECRETARY: Miss Viola Harris, 47 Snowdon Ave., Toronto
RECORDING SECRETARY: Mrs. Dorothea Sirman, 71 Sherwood Ave., Toronto
EXECUTIVE COUNCIL:
Publicity: Miss Olivia Smith, 32 Mountview Ave., Toronto 9.
Exhibitions: Mrs. Nora Huyck, 96 Hounslow Ave., Willowdale
Membership: Miss Winifred Coombs, 73 Coady Ave., Toronto 8.
Editorial: Mrs. Dorothy Muma, 118 Hazelton Ave., Toronto 5.
Canadian Handicrafts Guild Liaison: Mrs. Reta Larmour, 2649 Bloor St. W., Apt. 307, Toronto 18.
Public Relations: Cecil Roebuck, 224 Winona Dr.,Toronto 10.
Teaching Standards: Robert Muma, 118 Hazelton Ave., Toronto 5.
Programme Convenor: Richard Sirman, 71 Sherwood Ave., Toronto 12
Members at Large: Dr. Ralph Larmour, Toronto; Mrs. Anne Hook, Toronto;
                  Mrs. Jessie Little, Snelgrove; Mrs. Irva Ford,
                  Hamilton; Harold Frost, Wallaceburg; Clyde Johnson, Mimico; Miss
                  Ann Small, Toronto; Miss Kay Yasunaka, Barrie; Mae McKinnon, Toronto
Ex-Officio: President of Branches; Regional Representatives.
Page 9 — APPLIQUE BRAIDING ON BELTS
APPLIQUE BRAIDING ON BELTS
By Members of the Woodgreen Centre Girls Craft Dept. Here's a project that is fun for all! And easy too! A pleasure for old and young alike--and simple to make.
You require few tools for this project. All that is required is an edge creaser, rectangular nib to fit a Maun punch,a #5 wheel spacer and an awl, all of which may be obtained at any hobby craft store. You may use either 1/2", 3/4" or 1" belt. 5 yards of lacing is required for each colour used in the braid -- 5/64 lacing for a thin belt or 3/32 lacing to give a little heavier effect.
Procedure--Dye the leather belt before starting to lace. Then edge crease following this, using the #5 spacer along the line formed by the edge creaser, which will mark the places where holes should be punched for braiding. It is very important that there should be the same number of punched holes on either side of the belt.
edge creaser
DIAGRAM I
edge creaser
It is suggested that you leave 3" at the buckle end and 4 to 4 1/2" for. billet end, untouched.
I THONG BRAIDING
From the wrong or reverse side of the belt, bring lace up through hole marked "A" on diagram, then cross over to "B" on the opposite side, go down through "B" and back up.on this same side through "C". Cross over to "E", go down through "E" and up through "D", cross over to "F", go down through "F" and up through "B". (At this point we have gone through "B" twice.) Cross over to "G", go down through "G" and up through "E", Cross over to "H", go down through "H" and up through "F", By continuing in this manner you will be going through each hole twice.
DIAGRAM II — I Thong
| Right side of Belt | Wrong side of Belt |
|---|---|
| C - - A | - - |
| B - - D | - - |
| F - - E | - - |
| H - - G | - - |
This diagram key is printed as four rows across two columns, "Right side of Belt" and "Wrong side of Belt", and is set out that way here.
[A stray underscore is not part of the printed text: "end, untouched. I_ THONG" is set out here as "end, untouched. I THONG"; "- A I_ Thong" is set out here as "- A I Thong".]
Page 10
3 THONG BRAIDING
You may use 2 thongs of the same colour and 1 thong of another colour. Or, 3 different colours. But, 5 yards of each is required. 3 holes should be punched at the point where the braiding begins, with holes punched evenly down both sides of the belt.
Starting with "B" lace come up through the back of the belt and cross over the #3 hole on left side. With "C" lace come up through back of belt cross over to #4 hole. With "A" lace come up through back of belt cross over to the right side under "B" lace over "C" lace and down through 3rd or c hole on right hand side of belt. Bring this thong up through "b" and over "A" lace (referred to hereafter as "its own part") and cross over to hole #5. Bring "B" up through hole #2 over "its own part" under "C" over "A" and down through hole "d". Bring "C" back up through hole #3 over its own parts under "A" and down through hole "e", Bring "A" through hole 4 over its own part down through hole "f",
Continue working the thongs from one side of the belt to the other for desired length of braiding.
DIAGRAM III — 3 Thong
| Right side of Belt (columns A, B, C) | Wrong side of Belt | |
|---|---|---|
| 1 | - - - a | - - - |
| 2 | - - b | - - |
| 3 | - - c | - - |
| 4 | - - d | - - |
| 5 | - - e | - - |
| 6 | - - f | - - |
[This key table shows six rows of lacing positions for the 3 Thong pattern; each dash marks a thong passing at that point, matched to a lettered hole on the belt's wrong side.]
5 THONG BRAIDING
Five different colours may be used or 3 of one colour and 2 of another, or any combination of colours. 5 yards of each is required. 5 holes should be punched at beginning of braiding and holes punched evenly down both sides.
Starting with "A" lace from back to front of belt, cross over and down through hole "d" on righthand side of belt.
"B" lace from back to front, down through "C" hole on righthand side.
"C" lace from back to front, over "A" and "B" lace, down through hole #3 on lefthand side.
"D" lace from back to front, under "B" and "A" lace, down through hole #5 on lefthand side.
"E" lace from back to front, under "B" and "A" lace, down through hole #5 on lefthand side.
"c" lace, bring up through hole #2 on lefthand side, over its own part and under "D" and "E" down through hole "e" on the righthand side.
Page 11
"D" lace up through hole #3 on lefthand side, over its own part, under "E" down through hole "F",
"E" lace up through hole #4 on lefthand side, over its own part, "B" lace up through hole "b" over its own part, under 2 thongs and over 2 thongs to hole #6 on lefthand side.
Continue to work thongs from one side of belt to the other, each goes up through the hole above then down over its own part, under the next two thongs and over the next two thongs and so on.
| Right side of Belt | Wrong side of Belt |
|---|---|
| A B C D E | |
| 1 - - - - a | - - - - - |
| 2 - - b | |
| 3 - - c | |
| 4 - - d | |
| 5 - - e | |
| 6 - - f | |
| 7 - - g |
DIAGRAM IV — 5 Thong
you'll find "everything" in leathercraft at TANDY'S conveniently located in downtown
TORONTO at 107 KING STREET EAST
at King and Church
3 blocks from YONGE ST., 5 blocks from SIMPSON'S
LEATHERCRAFT CATALOG #83 — Leaders in Leather. New leather projects for all the family: bag kits, BABY MOK'S (page 10), pre-punched kits — billfolds, key cases, coin purses (pages 10–19).
ALWAYS LOOK TO TANDY FOR LEATHERCRAFT
KITS, SUPPLIES and LEATHER at LOW PRICES
PLUS • TEACHER AIDS • MOVIE CLASSES
WRITE FOR FREE CATALOG
Tandy Leather Company of Canada Limited — Est. 1919
TANDY LEATHER COMPANY OF CANADA LIMITED
107 King Street E., Toronto — EM. 2-4383
Page 12
Leather
Dyes
and
Finishes
For the Leathercraftsman:
Antiques - Toning Dyes
Polish Coat
Edge Dressing
Inlay-Background Dye
Leather Cleaner & Polish Remover
All at your hobby supply store
CANADIAN DISTRIBUTOR:
LEWISCRAFT
284 King St. West, Toronto, EM. 3-5206
OUR 1958-59 CATALOGUE, featuring a Complete Line of Quality Leathers, Accessories and Tools — plus a Full Range of Arts and Crafts Supplies, will be sent without charge to C.S.C.L. Members upon request. Write for your catalogue today:
FOR LEATHERCRAFT IT'S LEWISCRAFT
284 King Street, West
Toronto 3 Canada
AN ALL-CANADIAN COMPANY SERVING CANADIANS SINCE 1913