
An issue of the Society’s newsletter, transcribed from the original.
(12 pages, 1.9 MB)
the full-resolution scan, 32 MB, for close research
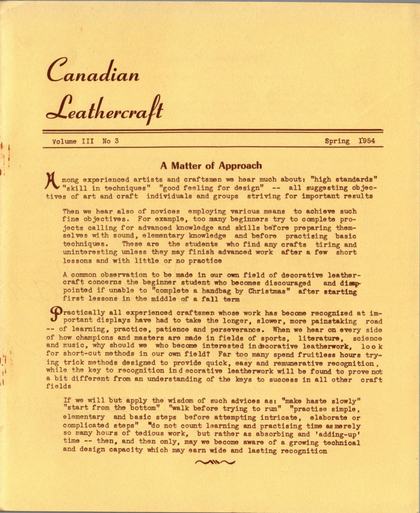
Page 1 — A Matter of Approach
Canadian
Leathercraft
Volume III No 3 Spring 1954
A Matter of Approach
Among experienced artists and craftsmen we hear much about: "high standards" "skill in techniques" "good feeling for design" -- all suggesting objectives of art and craft individuals and groups striving for important results Then we hear also of novices employing various means to achieve such fine objectives. For example, too many beginners try to complete projects calling for advanced knowledge and skills before preparing themselves with sound, elementary knowledge and before practising basic techniques. These are the students who find any crafts tiring and uninteresting unless they may finish advanced work after a few short lessons and with little or no practice
A common observation to be made in our own field of decorative leathercraft concerns the beginner student who becomes discouraged and disappointed if unable to "complete a handbag by Christmas" after starting first lessons in the middle of a fall term
Practically all experienced craftsmen whose work has become recognized at important displays have had to take the longer, slower, more painstaking road -- of learning, practice, patience and perseverance. When we hear on every side of how champions and masters are made in fields of sports, literature, science and music, why should we who become interested in decorative leatherwork, look for short-cut methods in our own field? Far too many spend fruitless hours trying trick methods designed to provide quick, easy and remunerative recognition, while the key to recognition in decorative leatherwork will be found to prove not a bit different from an understanding of the keys to success in all other craft fields
If we will but apply the wisdom of such advices as: "make haste slowly" "start from the bottom" "walk before trying to run" "practise simple, elementary and basic steps before attempting intricate, elaborate or complicated steps" "do not count learning and practising time as merely so many hours of tedious work, but rather as absorbing and "adding-up' time -- then, and then only, may we become aware of a growing technical and design capacity which may earn wide and lasting recognition
[This opening article prints two of its five paragraphs with a large ornamental first letter — an "A" for "Among," a "P" for "Practically"; the other three open in plain type. A small printer's flourish below the last paragraph, not text, is left out here.]
Page 2 — Fifth Annual Meeting of the Canadian Society of Creative Leathercraft
Fifth Annual Meeting of the Canadian Society of Creative Leathercraft DATE - Saturday, June 5th, 1954
PLACE - Ryerson Institute of Technology - Auditorium
50 Gould Street - Toronto (free parking on premises)
PROGRAM
Item Time Topic
1 - am 9:15 + Registration (please arrive promptly)
2 = 9:30 - 10:30 - Colored Slides of Contemporary Canadian Leathercraft 3 - 10:30 - 12:15 - Business Meeting - Election of Officers
Please come prepared to add your voice to discussions and decisions on matters of importance to your Society
4 - 12:15 - 1:15 - Luncheon - §1.00 - including Registration Fee (served by caterers on premises)
- Travelling Exhibition on view in Library
This year's outstanding educational display exhibits numerous "in-process" techniques for leathercraftsmen
5 - 1:30 = 3:30 - Demonstrations by experts in:: saddle-stitching, swivel-knife sharpening, (bring along your own swivel cutters), skiving, attaching belt buckles and keepers, leather-covered domes, framing a purse, with new type metal frames, bookbinding corners (skived, turned and cemented) leather-covered boxes, glove making
6 - 3:30 - 4:30 - Panel discussions -- question and answer period
- Review of the Travelling Exhibition
After 4:30 members of the TE Exhibition Committee will remain on hand in the Library to answer questions of visitors interested in various exhibits
Leathercraft Consultation Service - Members are invited to bring along their latest examples of leathercraft projects -- for review, comparison or criticism as desired
PLEASE NOTE - Members and friends planning to attend the Fifth Annual Meeting : of CSCL are urged to obtain and send in a completed "attendance advice form" to the Secretary before May 25th -- such advice required to assist committee planning for facilities and caterers
[Item 3 of the program prints as "3" with "Election," not "S"/"flection"; item 5's start time prints as "1:30", not "1:50".]
Page 3 — Making Steerhide Moccasins
Making Steerhide Moccasins by Edith Roscoe
Here is an interesting "Adventure-in-Doing." In our group we make moccasins for the whole family -- mother, father, children -- all to the same general pattern. This is a good way of using pieces of steerhide that are too scratched or marred for making purses and other larger projects
This type of leather is pliable and long-wearing. The pattern suggested makes use of fairly small sections of leather and can be made to fit any foot-size from a tracing made from wearer's own low-heeled shoe. Shear ling insole and cuff may be cemented lightly into place, and removed for washing. If you do not have steerhide on hand, moccasins to this plan are very attractive and wear well when made from suede splits, which are low in price and come in brilliant colors
PROCEDURE
Pattern
1) Make tracing on brown paper, around sole of shoe, pencil held vertically. Allow 1/4 inch all around for seams, (1) 2) Cut pattern of vamp -- shield-shaped
(1)
Dimensions shown are for ladies' medium size. Children's should be smaller; men's larger. Vamp pattern should be about same size as tracing of toe of shoe (2)
VAMP
3) Pattern for moccasin UPPER -- as shown 3) Just a long strip, tapering from 12" at toe to 24" at heel -- about 13" long for ladie's; men's longer; children's shorter v} UPPER
CONSTRUCTION 13"
1) Decorate vamp in any desired manner -- sections of tooling or carving cowhide may be used for these. Cement a leather lining on back of vamp after decoration. (The illustration shows carved and colored pine-cones, in two shades of brown with green pine needles)
On other moccasins we have made (in colored suede splits) we used a decorative stamp around edge (leaving 1/4" margin for lacing) -- and a central motif stamped or carved to represent Indian bead-work. This was colored with MONGOL pencil dyes in bright colors to represent the bead motifs
2) Cut out soles -- from scrap carving cowhide, or heavy steerhide. Two soles for each foot. Cement together, grain sides out.
[The article is by Edith Roscoe, the Society’s Secretary and this bulletin’s regular contributor on moccasin-making; her name is set in clean type under the heading. Under PROCEDURE the article prints a short "Pattern" list, numbered from 1, and below it in the same column a "Construction" list, also numbered from 1; the pen-and-ink pattern diagrams sit beside the first of the two.]
Page 4
3) Join heel sections of UPPER - with criss-cross lacing
- with straight lacing
, (4)
- with saddle-stitching
4) Form flange, or ridge, at lower edge of UPPER -- flange to sole (holding along edge with clamps) and bringing sections together at middle of toe, trim off any excess length, and join at toe, as at heel. and starting in middle of heel-back, cement this first with brown paper pattern to be sure UPPER section is plenty long enough to require trimming at toe when in place 5) Punch through flange and edge of sole together for lacing or saddle stitching 5) After stitching we dampened the UPPER leather very slightly, put moccasin on carefully over 'gs heavy sock, and molded it into instep and VE around foot for contour; slip foot out carefully and allow to dry in shape
6) Punch holes around edge of vamp, spacing evenly. (Holes may also be punched in UPPER, in decorative pattern, for ventilation with shearling insole) 7) Punch holes along top edge of UPPER (starting at join at toe) to correspond with holes punched in vamp. Holes on UPPER should be very slightly farther apart on UPPER, to bring it in place under vamp 6) Lace and pull firmly in place, starting at centre of toe section and working either way. Fasten off firmly 8) Cut thong of steerhide (3/8" wide) to go around heel section. Punch large holes, or make slits, to pull thong through and up and around foot to make heel firm. Sew in place at each end, with heavy linen thread 7) Sew this into place along top / edge of UPPER, with saddle stitching. Dampen and & fold down over raw edge of UPPER
9) Cuff - cut cuff of steerhide about 2}" wide, and long enough to go right around heel to yamp, to cover thong. (Cut paper pattern first) Shred lower 13" of cuff into equal strips, for Indian effect 7) Sew this into place along top edge of UPPER
SHEARLING LINING
Insole section - cut insole of shearling about 1/2" larger around toe section than sole - slit at 1" intervals. When pushed into moccasins, the slits allow it to extend slightly up, and around inside for softness on toes (8)
Page 5 — A Sincere THANK YOU
Cuff Section - cut cuff pattern about 4 inches by 53 inches, two sections for each foot. Overcast with linen thread at heel Overcast to shearling insole around heel-section (9) Place lining inside moccasin with few dabs of leather cement on bottom of insole, and on sides, just sufficient to hold in place. May be pulled out for washing, and replaced
FINISHING
1) A section of firm cowhide was cemented inside heel of moccasin, before shearling lining was inserted - curved from UPPER edge to sole, to give extra firmness
2) Rubber heel lifts (purchased) were cemented in place for comfort - to avoid a too-flat feeling
If necessary, for closer fit, a band of broad elastic may be sewn from side to side, under vamp, for children
3) Bow of braided lacing was stitched in place for trim
4) Antiques - moccasins were antiqued all over with Garnett Golden Tan
Antique, and finished with several coats of Polish Coat We HOPE YOU WILL ENJOY MAKING YOUR OWN CUSTOM DESIGNED MOCCASINS We found them a lot of fun
A Sincere THANK YOU
With annual meeting time all but upon us, new officers will soon be conducting the numerous and important affairs of our Society
As a Charter Member and first President of CSCL during its formative years, may I thank all fellow executive officers and members who have contributed so much to the tasks of developing our Society through its experimental stages of growth -- from a small charter group of 17 members to a national-scope society of some 300 members, as well as a growing number of members among friendly American decorative leathercrafters
As Editor of our quarterly, illustrated bulletin, may I thank also the many Society members and friends who have co-operated to make Canadian leathercraft" a useful periodical for our field and, according to report, a rather outstanding little journal among craft-interested groups
The job of preparing "CL", though intensely interesting to me as your Editor, must now reluctantly be given up - in order to devote more time to several growing business interests, which include: an enlarged leathercraft studios and supplies service; a crafts gift shop; a new "Knife Shop" venture in Ottawa, and real estate interests involving our own renovated office building
As it may prove possible, continued services will be offered our Society at all times
Goodby, and again Thank You
Deane H. Russell
The line "WE HOPE YOU WILL ENJOY MAKING YOUR OWN CUSTOM DESIGNED MOCCASINS" closes the moccasin article above it and is not the heading of the farewell letter, whose own heading is "A Sincere THANK YOU". Its closing is a signature reading "Deane H. Russell" in script — the departing Editor and the Society's first President
Page 6 — SECOND CANADIAN INTERNATIONAL HOBBY AND HOMECRAFT SHOW
SECOND CANADIAN INTERNATIONAL HOBBY AND HOMECRAFT SHOW COLISEUM, CNE GROUNDS, TORONTO, FEBRUARY 5-13, 1954
Our Society's display was again a major success, thanks to the energy enthusiasm and plain hard work of over 100 members, both from Toronto and out-of-town. Continuous demonstrations, the public preference poll and the sales booth, kept our section in a constant state of activity
The variety of constructions and the general high quality of the exhibition articles - all of original design -- emphasized the great advance made in the craft since the organization of the CSCL
The sales booth, an innovation this year, did surprisingly well. A good proportion of the 300 articles made by CSCL members were sold, with the smaller, less expensive pieces moving quickly
The Public Preference Poll again induced spectators to study the exhibition articles critically. The results of the Poll are as follow:
Large Articles
1) Carved chest by Don MacKinnon, Toronto - also polled highest number of votes
2) Carved brief case by Don MacKinnon
3) Carved overnight case by Don MacKinnon
4) Footstool with carved top, by Reta Larmour, Toronto
5) Hat box, grained leather with stamped decoration, by Edith Roscoe, Weston
6) Lamp base and rawhide shade by Ernest Kohler, Weston
Small Articles
1) "Pine Cone" photo folder by Edith Roscoe, Weston
2) Rouge carved bedroom slippers by Margaret Richardson, Ottawa
3) Boudoir clock case by Robert Shaw, Toronto
4) Guest Book by Endel Ruberg, Montreal
5) Binoculars, covered with tooled leather, by Robert Muma, Toronto
6) Book cover, by Elizabeth Prince, Toronto
The lucky draw purse - a beautiful original in mission grain steerhide finished in soft Golden Tan, donated by Margaret Richardson, was won by Miss Marion Johnson, a bacteriologist in the Toronto General Hospital, whose hobby is pottery
[The Large Articles poll results skipped straight from item 2 to item 4; item 3, "Carved overnight case by Don MacKinnon," is restored from the printed page. The show's dates (February 5-13, not 5-15) and the number of members' articles sold (300, not 500) are also corrected against the printed page.]
Page 7 — Canadian Originals in Leather
Canadian Originals in Leather
"Canadian Originals in Leather" -- the second travelling exhibition prepared by CSCL members, commenced its tour March 1, 1954. It contains 90 articles by 33 member craftsmen. All the articles are of original design, and have been selected to illustrate particular points of design, technique, construction, coloring and craftsmanship. Several of the articles were shown in the Canadian Crafts Exhibition of the Toronto Art Gallery, October, 1953, and in various 1953 Canadian exhibitions
Educational projects illustrating decorative and construction techniques are an important new feature of the present exhibition, and offer practical help to the leathercraftsman. There is a layout by Robert Muma which is in itself a short course on Tooling and Coloring Techniques. Carving techniques are illustrated by Don MacKinnon; purse linings and pockets by Margaret Richardson; gusset construction by Irene Surgenor; wallet interiors by the London Leather Carvers' Guild; and belt techniques by Deane Russell
This Exhibition has already been shown to the Simcoe County Arts and Crafts Association at Barrie, the Kirkland Lake Leathercraft Group, the Iroquois Falls High School, the Timmins section of the CSCL and the Galt YWCA. It was on display for three weeks in the Art Gallery of the London Public Library. Dr and Mrs Larmour attended the London opening, where they showed color slides of C SCL leather projects
Showings have been arranged at Pretrolia, Chatham, Brockville, the Pacific National Exhibition in Vancouver in August, and at the annual convention of the Ontario Recreation Association in Peterborough, where Peterborough CSCL members will be in charge
The original prints "Pretrolia" for the Ontario town of Petrolia; kept as printed. "Convention" is printed broken across the line, "con-" / "vention".
"Canadian Originals in Leather" is available - until the spring of 1955 - to any organized, responsible art or craft group in Canada, or to any CSCL member who can make suitable arrangements. Requests for information or bookings should be addressed to Mrs Reta Larmour, Chairman, Exhibitions Committee, 59 High Park Boulevard, Toronto 3, Ontario
"Canadian Handmades in leather", the first Travelling Exhibition of the Society, was enthusiastically received wherever it was shown during the year and a half it was on tour. Comments on the new display encourage members to feel they have made considerable progress towards achieving their objectives of developing a distinctive leathercraft design movement, which may in the course of time be recognized as "Canadian"
Page 8 — "Splatter" Technique as used by Ann Hook
"Splatter" Technique as used by Ann Hook
This is an artistic method of applying color when a stippled effect, or a two-or-more-tone effect is desired, or when it is desired to decorate for enrichment only. This art method was popular in mid-Victorian days, and is very suitable for use on leather
The equipment required is as follows:
- a piece of wire screening (an old wire flyswatter will do)
- a stencil brush, or better still, an old toothbrush
- Garnett leather dyes
- a dish for each color used
- plenty of newspapers
- soap and water
Before attempting to splatter color on leather, experiment on light brown paper (this is reasonably similar to the color of natural cowhide) cut to the shape of the article
Pour a quantity of dye into a dish, hold the wire horizontally 3 or 4 inches above the brown paper, dip the brush sparingly in the dye, and draw it lightly over the wire. A fine spray will go through onto paper -- if the brush is overloaded, blobs will go through. Try spraying lightly at one side of the paper and heavily at the other, giving a half-way tone in the middle. Experiment with holding the wire at a slight angle, to direct a heavier spray toward outer edges
Then wash the wire and brush with soap and water until no dye is left in them (or use a separate wire and brush for each color). For clean color, it is important to use clean equipment.
Now take another color of dye and reverse the procedure, spraying heavily where it is already lightly sprayed, and vice-versa. Have fun trying color combinations until you have acquired a facility in the use of the wire and brush
This technique is very successful alone, but when it is combined with design, it is more effective to splatter the background only. The color is applied to the design in the usual way, and then the design is masked out. This can be done by using masking tape, or by using tracing paper cut to the required shape and held down by paper weights, coins or any small weights or pinned with FINE needlepoints into cuts - NEVER use thumb tacks or pins -- these would be too coarse and would damage the leather
Following is the procedure by which I made my camera-case: All parts using outside leather were cut, including gussets, straps, and a piece from which to cut tabs, allowing a margin for possible shrinkage. The design was completed and masked out with tracing paper. It was decided to splatter in two colors - scarlet and green with the green predominating. In other words, each panel to be framed in green, merging gradually to the scarlet in the middle of the panel. The dyes used were Garnett toning dyes
This article prints four of its paragraphs with a large ornamental first letter, as on this issue's opening page — "This," "Pour," "Now" and "Following"
Page 9
CASE
The body of the case was now laid on a sheet of blank paper, under which was spread a well opened Flap out newspaper; the blank paper was marked to show where the folds would occur, and the masks of tracing paper carefully fastened down with fine needlepoints:
Then the scarlet was sprayed in the middle areas of front, back and flap, and also top and bottom. No effort was made to protect the sides from the spray, but only the middles were concentrated on. Gussets were handled in the same way, also tabs. With straps, the spray was directed more heavily to one side, leaving the other lightly sprayed. Same procedure used on backs of straps
No effort was made to cover leather densely, but rather to get a half-and-half effect
By this time, body of case was ready for the next step. To save time, I used a fresh piece of screen and a fresh brush, and holding the screen over the leather, tilted it at a slight angle to direct the spray toward the outside edge of the leather. I went all around the outside edge in this manner, then, using the guide marks which showed where leather would fold, I sprayed up and down along folds. No attempt was made to protect middle areas from the green, but spray was not concentrated toward them
a hand-lettered diagram of the case pieces (CASE, flap, top, back, bottom, front, tabs, gussets, straps) sits beside this column
Outer edges of gussets were treated in the same way, and also tabs. With straps, sides where lightest sprayed with scarlet, were now sprayed heavily with green. This was later repeated on strap backs
The whole project was now carefully checked, to make very certain that all parts had been given the same treatment, and that spraying was in good balance, i.e. each panel when folded, would show a border of rich dark green, thinning off as it went in, to show green-and-red at the half-way, and red in the middle
Since the middle was not heavily sprayed, this gave a three-color effect: scarlet, green, and the color of the leather
The project was then carefully set away until the next day. ON NO ACCOUNT - EVER TOUCH THE LEATHER WITH ANYTHING WHATSOEVER after spraying has been done, until it has dried overnight. It would be quite in order to dry the first color overnight before applying second or subsequent colors, but the same thing holds true -- the last color on should "be dried overnight before the leather is handled
The following day, I gave all parts a good coat of Garnett Antique Golden Tan -- this gives a unity to colors and enriches them. They were then polished in the usual way, and assembled
Page 10 — American Leathercrafters Visit CSCL Exhibit; Canadians Return Visit of American Friends
10
American Leathercrafters Visit CSCL Exhibit
President RC Dengler, along with 17 officers and members of the Eastern " Leathercraft Guild, with headquarters in Rochester, N Y, made a special weekend trip to Toronto to see the CSCL exhibit at the Hobby Show. A joint meeting with the CSCL executive was held at the home of Dr and Mrs Larmour, where plans were discussed for occasional joint meetings of American and Canadian craftsmen
The American visitors were much impressed with the quality of Canadian leatherwork, particularly in design and coloring. Several of the group joined the CSCL and expressed particular interest in receiving copies of our bulletin "Canadian Leathercraft" A return visit has been arranged in Rochester for the weekend of April 23rd Hamilton Meeting
Over 125 enthusiastic leathercraftsmen attended a meeting recently in Hamilton, to see Dr Larmour's color slides. Don MacKinnon and Dorothy Muma gave demonstrations of dyeing and coloring
Canadians Return Visit of American Friends
Sixteen Toronto and London CSCL members paid a return weekend visit to the Eastern Leather Guild in Rochester, N Y, April 23
President Bob Dengler and his committee had arranged a most stimulating and interesting program. We were guests of the Rochester Museum on Friday evening, when Dr Larmour showed his color slides of CSCL leather articles, to some 175 leathercrafters from Niagara Falls, NY, Buffalo, Syracuse, Jamestown and several other places as well as Rochester. Demonstrations were given by Ralph Larmour, Margaret Jennings and Don MacKinnon. The facilities offered the group, in the use of this splendid auditorium, projection equipment, craft room and kitchen, were much admired by the Canadians. The Assistant Curator of the Museum was particularly interested, since the attendance was the largest in the history of the Museum for a4 single hobby
Saturday morning was spent on a specially conducted tour of the Hickok Belt Factory, where we could follow intelligently and step by step, the mass production of leather belts and metal accessories
In the evening a dinner was held, attended by probably seventy-five people, followed by a "leathercraft" gathering at the home of Bob Dengler. Memberships in the Eastern Leather Guild were presented to Margaret Jennings, Don and May MacKinnon and Ralph and Reta Larmour. Our CSCL membership list already includes a number of their group
Our second international meeting was such a complete success, that we hope to arrange further joint meetings. The friendships formed at these gatherings made us feel more strongly than ever that there is more to leathercraft than just working with leather
[Two words dropped in the same sentence here: "copies of our bulletin," and "A return visit has been arranged" was missing its opening "A."]
Page 11
LEWISCRAFT HAS MOVED TO ITS NEW HOME - 284 KING ST. WEST TORONTO, ONT.
We extend a cordial invitation to all our leathercraft friends to come in and see our new, spacious and comfortable showroom where fine leathers and quality leathercraft supplies play a major part
Remember - Our Address Is Now -
284 KING STREET WEST, TORONTO, ONT. (One Block West of the Royal Alexandra Theatre)
To Canadian Leathercraftsmen
YOU ARE CORDIALLY INVITED TO WRITE OR VISIT OUR STUDIOS TO DISCUSS YOUR INTERESTS AND NEEDS IN DECORATIVE LEATHERCRAFT
FINE CRAFT LEATHERS —- SELECTED LEATHERWORKING
TOOLS AND ACCESSORIES
"a leathercraft service by leathercraft specialists"
Ottawa Valley Leathercraft Studios 116 O'CONNOR STREET
OTTAWA — ONTARIO WRITE FOR CATALOG
The studio's slogan is set in script between a matching pair of quotation marks and entirely in lower case — "a leathercraft service by leathercraft specialists"
Page 12 — CSCL Executive
GARNETT LEATHER DYES
Designed specifically for craft leathers — favored by Canada's leading craftsmen — easy to apply — gentle on leather
GARNETT ANTIQUES—Golden Tan, Chestnut Brown, Havana Brown, Rouge GARNETT TONING DYES—Scarlet, Blue, Green, Yellow, Orange, Tan, Middle Brown,
Dark Brown, Light Blue
All Garnett Dyes mix with each other. Mix your own colors for unique effects
NEW REVISED GARNETT INSTRUCTION MANUAL describing the dyeing method in detail is available at your hobby supply store. Ask for one
Dealers write for information fo:
GARNETT COMPANY
442 SPADINA AVENUE - TORONTO
ROBERT MUMA
Announces Courses in Leathercraft as follow:
Elementary Course, Secondary Course
Advanced and Teachers' Courses including Theory, Tooling Techniques, Color, Construction, Finishing and an introduction to Carving
Enrol early
MUMART STUDIOS of Creative Leathercraft, 62 McGill Street, Toronto, Ont.
For Beauty, Distinction, Durability — nothing can replace Genuine Leather
Over 12 years of serving Canada's craftsmen with world's finest leathers
Yours for Leathercraft Success — Bedford Fine Leathers Ltd., 578 Seymour St., Vancouver, B.C.
Handicraft Leathers and Supplies:
Fine Assortment of Beautiful Leathers
Complete range of Leathercraft Tools and Accessories
Comprehensive Detailed 64 Page Catalogue with 24 Page Supplement
Experienced Personalized Service
THE BIRT SADDLERY CO. LTD. The Leather Goods House
519 Main Street — Winnipeg, Manitoba
Canadian Leathercraft
Published quarterly by the Canadian Society of Creative Leathercraft as an educational service to decorative leathercraftsmen
Subscriptions to "Canadian Leathercraft" and General Membership in Society — $2.00 annually
Sustaining, Associate and Fellow Membership standing upon qualification. For information write: Chairman, Membership Committee Advertising Rates — for information write: Chairman Advertising Committee
CSCL Executive
President and Editor "Canadian Leathercraft"    Secretary, Mrs Edith Roscoe, 191 King Street, Weston
   Deane H Russell, 116 O'Connor St, Ottawa     Treasurer, Mrs Dorothy Muma, 62 McGill Street, Toronto
Committe Chairmen: Membership, Mrs Nora Lloyd, 15 Kelway Blvd, Toronto
                    Advertising, Arthur Burgess, 134 William Street, London
                    Exhibitions, Mrs Reta Larmour, 59 High Park Blvd, Toronto
This page prints two separate advertisements side by side — Robert Muma's courses on the left, Bedford Fine Leathers Ltd. on the right; both ads are set out separately here. "Committe Chairmen" is printed exactly so, the Society's own spelling, kept as printed.