
An issue of the Society’s newsletter, transcribed from the original.
(16 pages, 2.8 MB)
the full-resolution scan, 44 MB, for close research
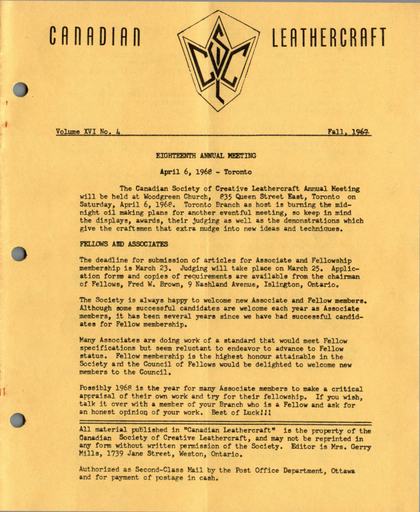
Page 1 — EIGHTEENTH ANNUAL MEETING; FELLOWS AND ASSOCIATES
Canadian Leathercraft
Volume XVI No. 4 Fall, 1967
EIGHTEENTH ANNUAL MEETING
April 6, 1968 - Toronto
The Canadian Society of Creative Leathercraft Annual Meeting will be held at Woodgreen Church, 835 Queen Street East, Toronto on Saturday, April 6, 1968. Toronto Branch as host is burning the midnight oil making plans for another eventful meeting, so keep in mind the displays, awards, their judging as well as the demonstrations which give the craftsmen that extra nudge into new ideas and techniques.
FELLOWS AND ASSOCIATES
The deadline for submission of articles for Associate and Fellowship membership is March 23, Judging will take place on March 25. Application forms and copies of requirements are available from the chairman of Fellows, Fred W. Brown, 9 Nashland Avenue, Islington, Ontario.
The Society is always happy to welcome new Associate and Fellow members. Although some successful candidates are welcome each year as Associate members, it has been several years since we have had successful candidates for Fellow membership.
Many Associates are doing work of a standard that would meet Fellow specifications but seem reluctant to endeavor to advance to Fellow status. Fellow membership is the highest honour attainable in the Society and the Council of Fellows would be delighted to welcome new members to the Council.
Possibly 1968 is the year for many Associate members to make a critical appraisal of their own work and try for their fellowship. If you wish, talk it over with a member of your Branch who is a Fellow and ask for an honest opinion of your work. Best of Luck!!!
All material published in "Canadian Leathercraft" is the property of the Canadian Society of Creative Leathercraft, and may not be reprinted in any form without written permission of the Society.
Editor is Mrs. Gerry Mills, 1739 Jane Street, Weston, Ontario.
Authorized as Second-Class Mail by the Post Office Department, Ottawa and for payment of postage in cash.
Page 2 — JUDGES REMARK'S — CNE CRAFTS (1967); PRIZE WINNERS * C N E 1967
JUDGES REMARK'S — CNE CRAFTS (1967)
Joseph Trippetti, Director of the League of New Hampshire Arts and Crafts, Concord, New Hampshire was the judge of leather entries submitted to the 1967 Canadian National Exhibition. The following are Mr. Trippetti's remarks:
Inroads made by exhibition demands celebrating Canada's Centennial Year apparently reduced overall entries to the Canadian Handicrafts Guild's competition at the Canadian National Exhibition.
Noticeably absent were in-depth entries in woodcarving, enamels, leather, metalwork and the choice for exhibition quality pieces was not great. Pottery and weaving were definitely on the strongest side, which generally seems true in most competitions, with good variety in technique and style.
Competency is probably the best overall description for the pieces submitted and accepted; technical know-how is definitely not lacking or a serious problem.
Most important, though, are the ingredients I found absent - vitality, inquisitiveness, adventure. There is a "ho-hum" feeling about the show which surprises me because in my previous visits to Toronto the vitality of the Craft movement was apparent and strong.
There are definitely good pieces in the exhibition, no doubt about that,, but it is as if a tranquilizer has taken effect and, hopefully, the period will pass over quickly.
PRIZE WINNERS * C N E 1967
The $50 prize donated by the F.W. Woolworth Co. Ltd. for the Best Leather entry was won by Daphne Lingwood, Caledon East for her fascinating necklace. This necklace is one of the articles chosen for the Travelling Exhibition.
A new twist in leather covered bottles was presented by Janis Zalitis of Toronto for which he won the $25 Credit Note donated by Tandy Leather Co. By using tooling and dyeing, he obtained a most unique effect. Congratulations to both members!
As Mr. Trippetti remarked above, the leather work submitted to the CNE in 1967 was in most cases below standard and there was a considerable drop in the number of articles submitted.
As leathercrafters we are well aware that our work is a craft and we want the whole world to know it! We must therefore put forth a greater effort to up-grade our workmanship and not be content to do work with that "ho-hum" attitude. Granted many articles were picked for the Travelling Exhibition but there are over 150 members so we have no excuse, We slipped and slipped badly at the 1967 CNE but there is still time to pull up our socks and show the world just what we can do with leather in 1968.
[The sentence "There are definitely good pieces in the exhibition, no doubt about that, but it is as if a tranquilizer has taken effect" runs on as one sentence in print; a stray colon that had broken it in two here is removed.]
Page 3 — TABLES OF STANDARDS FOR TEACHERS OF LEATHERCRAFT
TABLES OF STANDARDS FOR TEACHERS OF LEATHERCRAFT KNOWLEDGE & CRAFTSMANSHIP
GRADE "C" (Elementary) - One who is proficient in basic construction and finishing methods and has some knowledge of tooling or carving.
GRADE "B" (Intermediate) - One with (1) a certain minimum knowledge of leathers, tools and handling of such. (2) a certain minimum knowledge of, and ability in, construction and finishing; and either tooling or carving. (3) a minimum of 3 years experience in leathercraft techniques. Associate and Fellow membership in the CSCL will automatically establish applicant in this category. Credentials should specify "Teacher of Leathercraft, Grade "B" (or specify Tooling or Carving).
GRADE "A" Professional Status - One with (1) a wide general knowledge of leathers, tools and handling of such. (2) a wide general knowledge and skill in tooling, carving, colour and construction techniques. (3) a minimum of 5 years experience in leathercraft techniques. (4) a minimum of 3 years experience in teaching leathercraft, Credentials should read "Teacher of Leathercraft, Grade "A", Outstanding skills may be indicated for Specialist's rating in either "A" or "B",
TEACHING ABILITY
The CSCL shall not be responsible for guaranteeing any individual's teaching ability. This shall be vouched for by his own record of experience listed on his credentials with references which can be investigated personally by any interested party. Grade A or B applicant's rating will be established by the Board of Selection of the CSCL from representative samples of work submitted by the applicant to demonstrate the degree of excellence and range of his leathercraft skills. Associate and Fellow members whose work has already been appraised by this committee need only submit the completed application form for their rating and credentials as above. A Grade C certificate will be issued to all qualified applicants until they have sent in work for appraisal,
Page 4 — THIRTEENTH INTERNATIONAL ASSEMBLY; DID YOU KNOW?
This rating is subject to review and change at request of the applicant on the basis of new experience or training, or information not supplied on the original application form, or demonstrated in the submitted work.
THIRTEENTH INTERNATIONAL ASSEMBLY
The Park Plaza Hotel, Toronto was the setting for the 13th Assembly of the International Assembly of Leathercraftsmen. Registration and display set-ups started a busy week-end on the evening of May 5 with Asocial hour giving everyone a break and an opportunity to renew old acquaintenances and welcome visitors.
Walter Sunahara of the Ontario Department of Education Community Programs conducted a workshop on "DESIGN" to open the Saturday morning program. With the aid of illustrations and projections, many new concepts on design were suggested and how it may be adapted to leather. Also, in the morning, Helen Wheaton, London demonstrated to an eager group, the art of saddle stitching.
During the afternoon, Huldy Gutekunst's workshop on "DESIGN DISCOVERY" kept everyone busy with a completely different concept of design with ideas galore. At the same time, Walter Mickey was demonstrating knife sharpening and care of tools and there is no excuse now for dull knives amount the leathercrafters.
The lovely banquet in the evening allowed members to relax after the busy day. Entertainment was by "les Ceintures Flechees", a French-Canadian group whose folk singing had a refreshing new twist to some familiar tunes. Robert Muma gave the judges remarks which are found in the bulletin and the Salon and Craftsmen awards were made. A general meeting followed conducted by Fred Brown with numerous items of business discussed.
Sunday morning, a Mocassin workshop conducted by Jean Newton was well attended and at least one moccasin was assembled before lunch and Assembly breakup.
Another International Assembly came to a close with many craftsmen returning home notebooks bulging with new ideas and happily exhausted from a full weekend of examining exhibits, watching demonstrations and cramming workshops. Exhaused but excitingly enthused with new-found ideas and plans for future leather projects.
DID YOU KNOW?
That very attractive cover on your itinerary at the International Assembly was designed by Hilda Darbyshire of Barrie and assisted by the Barrie Branch members, colored and assembled the folders. It was a huge task but most effective and appreciated.
Page 5 — I.A.L.C. LEATHER CRAFT SALON 1967
I.A.L.C. LEATHER CRAFT SALON 1967
By Robert Muma F.C.S.C.L.
This morning, in selecting the leather pieces for the Salon, we discharged our duties as judges. We can't expect everyone to be pleased with these results, so this evening I feel as though our roles may be somewhat reversed with my "partner in crime" and I on trial and you the judges demanding some justification for what we have done. If I guess correctly, you want to know why we selected this, and why not that. You want to know what standards we use. What do we look for? If you ere unsuccessful this year, how can you make it next year, and so on.
Judging is a personal selection. Every person chooses quality in the light of his own prejudices; and these are nurtured in our individual experience and training. Two of us made the selections this morning, providing an interplay of two points of view in which each was supported or modified by the other. I wish to express my appreciation for the very capable assistance I had from Mrs. Huldy Gutekunst of the Frontier Leather Art Guild in this work.
In general we found (a) considerable repetition in projects and of techniques, style and quality by former Salon winners. This is critical because, regardless of it, we could select the dozen or so best pieces and each year have a Salon monotonously similar to those before: (b) A lack of quality work in colour. Today's emphasis in every phase of our living is on colour, yet most of the worthy pieces in our show were in monochrome tones of brown.
WE LOOK FOR:the most outstanding pieces, i.e. finest craftsmanship combined with creativity in leather, Each piece must be unique. We should not have to search through every piece on display to find them. They should call to us in their simplicity. They should be self-evident pieces of excellence.
Good craftsmanship of course. It is the basis of all fine art. We take it for granted. We also look for function in leather art. It is a part of fine craftsmanship and means the article should efficiently serve the purpose for which it was made,
Craftsmanship, function and design - - but in all these combined WE LOOK FOR SIMFLICITY. Many pieces seem intended to stagger us:
- with their size.
- with intricate and all-over carving.
- with the amount and complexity of lacing and whatever embellishments can be applied to make a SHOW PIECE but which, in effect, actually destroys the character of the leather itself.
Of course it is conceivable that a great deal of fine workmanship can in its total effect be that of simplicity; but usually these pieces are eligible for a craftsman's award rather than a Salon ribbon,
[The heading at the top of the page is printed “I.A.L.C. LEATHER CRAFT SALON 1967”. “WE LOOK FOR SIMFLICITY”, which is what the page prints, is set in capitals and underlined but stands mid-sentence, not as a heading. A hand-corrected “T” above the line before “oday’s emphasis” is the page’s own fix for a dropped capital; set out here as “Today’s”.]
Page 6
WE LOOK FOR SOMETHING NEW
(1) New Techniques - sometimes make a classic piece of work in their own right.
(2) New Design - i.e. contemporary design, if it complies with the basic requirements of good taste. You have two workshops here this week end dealing with design.
(3) New Concepts - i.e. new ways of using leather. Here is a whole field for research and experiment.
Leathercraft is still a FRONTIER for the exploring mind and hand of the craftsman, and I'd like to suggest briefly a few ways of opening this frontier further:
* Try to get away from thinking in terms of a leathercraft catalogue.
* Be a pioneer.
* Think of leather in relation to your hands and what they can do with it; and then look for the tools and accessories you need to effect it.
* Look for and experiment with new and exotic leathers, native leathers, combined leathers.
* Learn to make your own patterns.
* Investigate and experiment with other adhesives.
* Use lacing as little as possible. Consider for instance the feasibility of making a handbag by simply pasting together! Look for NEW IDEAS:- in moulded leather. There are two kinds (1) wet leather which is moulded to shape and hardened by heating and (2) leather which is pasted in layers around a form as the English and Italian craftsmen do so well.
- in Rawhide. Here is a very cheap raw material used so effectively and extensively by the primitive cultures of man. We seem to have lost the interest and skills to use it successfully.
- inlay, onlay and gold leaf are all highly creative, yet seldom explored fields by the leathercraftsman.
- bookbinding, although a whole craft in itself, never-the-less offers a perfect medium for displaying leather decorative techniques of all kinds.
Page 7 — SALON AWARDS 1967
- leather awards, leather medals, leather placques, anything in leather personalized with blind or gold tooled lettering.
- COLCUR is the keynote of all modern design and decoration, indoors and out. Yet we were struck this morning by the poverty of colour in the leather items entered for display.
- from other cultures, especially the older and more primitive peoples who rely on leather so much and have developed distinctive skills in it. Look into the leather craft cultures of India, Arabia, various parts of Africa, South America, the North American Indians and the Eskimos, etc. You will find that most museums have a good selection of indigenous leather work from many parts of the world, but unfortunately they are seldom brought out of storage. Maybe we could encourage these public custodians to arrange special displays of leather craftsmanship in all its forms from far and wide.
SALON AWARDS 1967
Nan Astley (CSCL) Maple Leaf Plaque. A cleverly designed and executed rectangular plaque with rolled edges so that it can be hung with a cord from any one of the four sides. Very tastefully dyed and antiqued.
Fred Brown (CSCL) Desk Set: (1) a functionally and aesthetically contoured blotter pad with simple but effective 3-D embossing. (2) a paper tray in moulded leather, dyed with exquisitely finished edges. (3) small brown box - - a fine example of simplicity of design and superb tooling technique.
Clara Cavanagh (CSCL) A large, embossed and stylized reclining nude, accented in shadow tones of brown. Very striking and popular. The conversation piece of the show! It seems strange how far behind the other crafts we have lagged in using the human figure in some form for leather decoration. Yet what more suitable medium could there be for this than leather!
Eleanor Coutts (CSCL) Viking Ship in combined leather and driftwood on a fabric ground and framed in leather.
Joy Findlay (CSCL) Letter Caddy. Pleasing design. Good workmanship, combining the use of blue and red grained leathers. One of the few pieces in the show displaying any real colour except the inevitable brown "leather tones".
["COLCUR" (the page's own spelling, printed in full capitals to open its own line, as the other two items in this list of examples are). The page itself misprints "plaques" as "placques" in the line above, kept here as printed.]
Page 8 — I.A.L.C. SALON GOLDEN BOOK
Irva Ford (CSCL) Centennial Pen Stand. A finely crafted and very useful adaptation of the Centennial motif.
Huldy Gutekunst (FLAG) (1) Sandals styled and molded to individual fit.
Flawless craftsmanship. (2) Combining leather decoration on a hand made pewter box. (3) Combining a distinctive string decorated piece of leather on an antique wood box.
Daphne Lingwood (CSCL) (1) Wall Hanging, a fine piece of leather art in cut and molded calf. (2) Centennial Necklace. The most exquisite piece of all. A masterful adaptation of the Expo 67 Brotherhood of Man theme in cut and dyed leather pieces strung into a circular necklace,
Clarice Packham (CSCL) gloves - exhibiting her usual high quality of workmanship in this field.
Rhea Patterson (FLAG) Bracelet - a novel and pleasing effort.
Olivia Smith (CSCL) (1) Belt with hand made silver buckle. Tailored elegance.
(2) Leather Coasters. Not a new item or technique, ut quite outstanding in design and appeal. We couldn't resist them.
Robert Muma (CSCL) JIALC Salon Golden Book. This book was made on commission and was not entered for competition, but was selected independently to receive an award. It is described below:
I.A.L.C. SALON
GOLDEN BOOK
By Robert Muma F.C.S.C.L.
This book is intended to keep a permanent record of each year's winners of the Salon Award of the International Assembly of Leather Craftsmen.
The book is bound in the world famous Oasis-Niger Goatskin which is native tanned in Nigeria from a reddish brown species of Egyptian goat. It is exported to England where it is re-tanned and dyed to specifications of the Printing Industries Research Association (P.I.R.A.) to resist atmospheric decay.
Three different pieces (different colours) of leather have been used here. And the decoration is in both blind (heated tools only) and gold tooling. The former being done with at least twelve different shapes of heated tools called "pallets" and "gouges".
The head bands on the book are hand sewn with pure silk thread. These are the decorative as well as re-inforcing bands at the head and tail of the spine. The book itself was hand sewn with linen thread on linen cords, After binding, the leather has been further protected against sulfur dioxide by an application of a 7% solution of Potassium lactate and finished with a treatment of British Museum Leather Preservative,: ©
Page 9 — TRAVELLING EXHIBITION * 1967
TRAVELLING EXHIBITION * 1967
Community Programs Division of the Ontario Department of Education opened the "Ontario Crafts - Leather Today" at the Guild Shop on October 2, 1967 officiated by Mr. I.M. Johnston, Assistant Deputy Minister of the Ontario Department of Education on behalf of the Community Programs Division.
The articles displayed were selected by the Canadian Guild of Crafts (Ontario) assisted by a grant from the Community Programs Division. Displayed in attractive cases, these articles will travel across Canada during 1968 as part of the Canadian Society of Creative Leathercraft Centennial Project.
The following articles in the Exhibition and the craftsmen are as follows:
Desk Set - Fred Brown Tray - Fred Brown Box, moulded - Fred Brown Tote Bag - Clara Cavanagh Shoe Horn, Long - Clara Cavanagh Bottle, 2-tone brown blue - Mae Corbett Photo Album - Rita DeWit Tray, grooved - Irva Ford Tray, small oblong - Irva Ford Belt - Irva Ford Bracelet - Irva Ford Belt, black braided - Ruth Haig Secretary, black morocco - Ruth Haig Box, red leather with stone Viola Harris Purse, large framed cowhide - Anne Hook Gavel and anvil Anne Hook Tray, oblong, rolled edges - Anne Hook Telephone book cover - Nora Huyck Purse, carved framed - Reta Larmour Wall Plaque - Daphne Lingwood Necklace, centennial - Daphne Lingwood Brooch earrings, trillium - Daphne Lingwood Box, only, gold-tooled - Robert Muma Jug, handmoulded - Robert Muma Napkin ring - Robert Muma Candle holder - Robert Muma Book, (Holy Flame) calf-bound - Robert Muma Guest Book - Robert Muma Shoe horn - Jean Newton Belt, carved - Jean Newton Gloves, men's brown - Clarice Packham Gloves, lady's - Clarice Packham Bookends - Gwen Prestwich Photo folder - Gladys Riddell Smoking set - Sadie Roebuck Album, snapshot - Sadie Roebuck
Page 10 — CRAFTSMAN AWARDS
Belt with sterling buckle - Olivia Smith Candle Sticks with copper cups - Olivia Smith Coasters - Olivia Smith Book Cover - John Trops Brief case - Helen Wheaton
CRAFTSMAN AWARDS
INTERNATIONAL ASSEMBLY OF LEATHERCRAFTSMEN
Nan Astley - maple plaque Fred Brown - paper tray, double pen stand, small desk set Miss Burgess - round stool Clara Cavanagh - red and black bottle Eleanor Coutts - paperweight Reta DeWit - snapshot album Irva Ford - brown bag, small tray Huldy Gutekunst - brown sandals Dorothy Harwood - black bag Anne Hook - handbag Nora Huyck - notebook Daphne Lingwood - wall hanging, necklace Clarice Packham - blue gloves Gladys Riddell - double picture frame, triple picture frame Olivia Smith - candle holders Dwayne Trew - Lamp
DID YCU KNOW?
The two members travelling the furthest to attend the International Assembly were Helen Robinson of Sussex Corners, New Brunswick and Tom Swafford of St. Joseph's,Missouri. It was nice to have them attend and do hope they can take part in many more Internationals.
Door winners chosen at the dinner following the International were Mrs. Robertson of New Brunswick and Miss D. Coveyduck of Woodstock, Ontario.
Page 11 — BOX COVERING
BOX COVERING
By Nora Huyck
The foundation for leather covered boxes is usually a lightweight wood - cedar, pine, basswood. To reduce weight, plywood may be used, especially for the tops and bottoms of large boxes. The thickness of the wood will depend on the size of the box - 3/16" or 1/4" is enough for smaller boxes. Those constructed with mitred corners should be avoided. In the method of covering where the leather goes onto the lips of the box, the leather is mitred at the corners. It is possible for the knife to cut through the leather and down into the wooden mitre, thus ruining the leather which has been glued to the outside of the box.
Boxes are made as one unit and then sawn in two to form the lid and body of the box. Even when several boxes are being made of the same size, it is improbable that two boxes will be identical. The lid of one box may not fit another box and the lid may fit on its own box in one way only. Some mark must be put on each box before they are sawn, so that they may be correctly reassembled. Likewise, the leather marked up and cut for one box may not fit a similar box and may have to be adhered to its own box in a certain way (not back to front, even though the corners appear to be square). The leather will have to be marked to match its own box.
There are many ways of covering the boxes. The lid may be hinged to the body of the box in such a way that there is no room for leather between the lid and the body of the box. This is the simplest one to cover. The leather covers only the outside of the box. Another kind will have a liner over which the lid fits and there will be no hinge. The liner serves to hold the lid in place and to keep out dust. The leather may be brought up the sides and onto the lips of the box. It may even be carried further and glued against the interior sides of the box before the liner is glued back in place. Still another kind will have a hinge of leather to fasten the lid to the body of the box. In some of these methods, parts of the wood will not be covered by leather. These may be stained and finished before proceeding with the covering of the box.
Whatever the method, it is advisable to start with a paper guide. It will give the approximate size and shape of the pieces of leather to be used and is a guide to the steps to be followed when marking up and cutting the leather, thus avoiding costly mistakes. The leather will always be cut larger than the paper guide because leather is thicker than paper and more leather is needed to get around the corners. If the design used, requires the moistening of leather for its application, it must be remembered that the leather may shrink some as it dries and allowance must be made for this in determining the size of the pieces of leather to be used.
Page 12
The paper guide is just a guide. It must not be used a as a pattern by which the leather is cut to shape. The leather will be marked up and cut in much the same way as the guide but not exactly. Read the instructions through to the end before starting to cover the box.
Start with a small box - 5" x 8" or smaller and a simple one - where the lid is held to the body of the box by hinges fastened on the lips of the lid and the body of the box. Remove these hinges (or the pins from the hinges) if possible. The box can be covered with the hinges in place, but it is awkward. Directions are given for the body of the box and this will be referred to in this section as the box, the parts joining the front and back as the ends. Medium or heavy brown paper is used for the guide.
Place the box in the centre of the paper. With a pencil, trace around the outside of the bottom of the box. When the box is removed, a pencilled rectangle shows. Make some mark on the paper and on the box so that the box may always be set back in the rectangle in the same way. With a ruler extend all lines of the rectangle. Crease along all lines. Cut the extensions only of the lines indicating the front and back of the box. Do not cut into the rectangle. This will allow the paper to be pulled up against the ends of the box. Do not cut the fo extensions of the lines indicating the ends of the box. Cut 1/2" beyond them. This will allow the paper to be turned up against the front and back of the box and will give a turnover to be turned onto the ends of the box. Replace the box in position on the paper. Turn the paper up along all sides of the box and crease at the outer edges of the lips. Cut off the excess paper at these creases. This is the completed parer guide. It should resemble Figure A in which the dotted lines indicate the creased lines and the solid lines the ones which are cut. Make a guide for the lid in the same way.
If a design is to be used on the lid, prepare it now. Directions are given for a tooled or carved design. Other methods may be used and directions will have to be adjusted accordingly. The choice of leather will depend partly on the design. The thinner leathers are easier to work with. Heavy leather will have to be gouged wherever the leather is turned onto
Page 13
another part of the box. This is indicated by the dotted lines in Figure A. For the first box it might be advisable to use a thin leather such as morocco which requires no decoration to make a presentable box.
As mentioned before, cut the leather larger than the guide. To apply the design for the lid, first dampen the leather. On the flesh side, trace the outline of the lid. Use only sufficient pressure to make the line show through faintly to the grain side. It will be enough to indicate where to place the design but will not show when the box is covered. Use some mark to indicate which way the lid fits into this outline. Complete the design, colouring and finishing of the leather. Let it dry completely before proceeding further.
The body of the box will be covered first. Place the box in the centre of the flesh side of the leather. With a pencil (or something that will show up easily) draw around the outside of the bottom of the box. Extend all lines; cut the extensions of the front and back lines and 1/2" beyong the extensions of the end lines (as on the paper guide). At this stage, the procedure differs from the preparation of the paper guide. For ease in fitting the corners, cut away a triangular piece from the bottom of the turnover. This can be seen in Figure B. If the leather is heavy, gouge on the flesh side, the lines where the leather will be turned onto another part of the box. If the leather is light, crease them well with the bone folder instead.
The turnovers and the parts of the leather which cover them must be skived. The areato be skived is indicated in Figure B. If the skiving is not carefully done, the leather will be uneven when the covering is ; completed. The edge of the leather covering the turnover must be fine-edged so that when the leather is glued in place, the cut edge is so thin as to be inconspicuous.
A handwritten “Fig B” caption stands beside the diagram at this point on the page.
The leather is now ready to cover the box. A strong adhesive is needed but avoid contact cement until experience is gained. Glue the leather to the bottom of the box first,,then to the front and back. Press the leather firmly against the wood so that no wrinkles or airbubbles remain. The turnovers are glued onto the ends of the box next. Pull the leather tightly around the corners and press firmly in place. With a sharp knife trim the leather flush with the ton of the box. Sand (or roughen in some way) the turnover so that the end leather will adhere well. The end leather is then glued in place, pulling the leather up firmly against the box and making sure that the fine edged parts lie close to the corners of the box but do not lap over onto the front and back of the box. If
Page 14
they have been well skived and well glued, they should be inconspicuous. Trim the leather flush with the top of the box. This cut edge - especially if thick, may need to be dyed and finished.
This completes the covering of the box. The same procedure is followed for the lid. Replace the hinges and the box is finished.
If the box is large and deep, a large piece of leather would be needed to cover the body of the box. In order to economize on leather, another method of covering could be used. The lid would be covered in the usual way, but only the front, back and ends of the body of the box would be covered with the same leather. A less expensive leather - perhaps a thin skiver - would be used for the bottom of the box. A strip (or strips) of leather wide enough to cover the sides and to leave some for trimming at the top and to provide a half-inch turnover onto the bottom of the box, is needed. If a long enough strip is available, the one turnover can be turned onto the back of the box from one of the ends. If not, use a strip to cover the front and ends with turnovers onto the back and another strip to cover the back - or four pieces of leather with turnovers onto the of the box. If the leather for the front, back and ends of the box has to be matched with that on the lid for grain or colour, then the last method (4 pieces) will have to be used for any box.
Skive the turnover areas as usual and gouge or crease wherever the leather will turn onto another part of the box. The turnover onto the bottom of the box will be skived and feather-edged to present a smooth appearance when the bottom leather is glued in place. In order to turn it easily, slit the turnover part at each corner. When it is glued in place on the bottom there will be a double thickness of leather at each corner. Mitre these corners by cutting from the outer corner to the inner corner of the small overlapping rectangles and removing the two triangles thus formed. Press the leather back in place. If the leather is not slit, it will form into ears on the bottom. These can be trimmed flush with the bottom of the box and then smoothed with fingers or bone folder. The bottom leather will be skived if necessary and fine-edged, then glued in place.
A leather lining may be used in the box. Cut a piece for the inside bottom of the box and cement in place. Trim off the excess leather. Cut another strip long enough for the inside front, back and ends. Glue it in place, meeting the bottom leather exactly and having the join at one of the front corners.
Page 15
Do not overlap it. Trim off the excess along the top. Do the same for the lid. If the inside ton and bottom are to be padded, put the strip around the sides first. Cut pieces of cardboard or stiffener a bit smaller all around than the inside of the box, so that when covered with leather they will fit in snugly. Cut a piece of wadding (or other podding material) about 1/8" smaller all around than the cardboard and another piece a bit smaller than that. Cut the lining 1/2" larger than the cardboard. Put the smaller piece on the cardboard first, then the larger one, then the lining. Turn the extra lining onto the underside of the stiffener and glue in place. Trim with scissors the ears formed at each corner. Push these nodded boards into the lid and bottom of the box.
The lid of the box can be padded on the outside of the top, too. Build it to the desired height with layers of padding, the largest one about 1/8" to 1/4" smaller than the lid of the box, each succeeding one about 1/4" smaller than the previous one. The smallest one is secured in place on the lid with a couple of dabs of cement, the largest one last. Cut a piece of brown paper the size of the lid, place it over the wadding and glue in place along the edge of the lid. Then proceed with the covering as usual.
If the box has a liner instead of hinges to hold the lid in place, the leather may be brought up onto the lips of the box. Remove the lines if possible - it is rather difficult to work with, if the liner can't be removed.
Prepare the parer guide, starting as before and carrying through to the crease against the outside of the lins of the box. Cut off the tops of the turnovers only on this crease. Crease the paper on the inner edge of the lips and trim off on these new creases. To finish the paper guide, put the paper on the box again and mitre the corners where the lip papers overlap by cutting from the inner corner to the outer corner and removing the two small triangles thus formed from each corner. The paper guide should appear as in Figure C,
1 The steps for preparing the leather and gluing it in place are the same as before. The guide is a guide, not a pattern.
The leather is not cut off on the inner crease as in the guide.
It is cut off flush with the inside of the box after it is Fig x glued in place on the box. When each corner is mitred, the lip leather covering one triangle will have to be lifted enough to remove the triangle, then pressed back in place carefully.
The lid is covered in the same way. Then the liner is
Page 16
glued back in place. It may be left unfinished or stained and finished before replacing or covered with a thin leather. The liner is usually four pieces of wood bevelled at the ends to make mitred corners when in place in the box. Cut the leather a bit longer than the combined length of the pieces of the liner and about half an inch wider than the depth of the liner. Glue the liners face down to the leather in their proper order, then glue the turnover leather onto the backs of the liners. Trim off the excess leather at the bottom of the liner and at the ends of the long strip. When the liner is set up in a rectangle the corners between the bevelled ends. As the liner is pushed back into the box, make sure that the turnover slides down inside the box. If the liner fits too snugly, the box frame will push the turnover up as it is being slid into place. It is advisable to test it first before gluing the leather in place and trim the ends of the pieces of the liner if necessary, being careful not to spoil the bevel.
The sentence beginning “When the liner is set up in a rectangle” breaks off unfinished on the printed page; it is set out here as it stands.
For some boxes it might be desirable to turn the outer leather onto the lips and then down against the interior of the box. On the paper guide, another crease will be made at the bottom of the interior and cut off on this line. In order to make it fit inside the box smoothly, each end of the part being turned in, will have to be trimmed by the width of the lips of the box. Trim only the part being turned in. On the leather, it seems easiest to do this after the leather is glued to the outside of the box but before it is adhered to the lips. The leather from the front of the box would be pulled onto the lips. One end of it would be held in place along the end lip and carefully trimmed flush with the inner edge of the lip being careful not to cut into the leather which covers the lip. Repeat for the ends of all pieces being turned in. Glue the leather to the lips. Mitre the corners before gluing the leather to the inner part. Otherwise the little triangles couldn't be removed. Finally trim the leather carefully against the bottom of the box.
In all these operations, if a bone folder is used instead of hands and fingers to press the leather against the box, be careful not to exert too great pressure. Shiny spots on morocco or dark spots on light leathers can develop.
DON'T FORGET the 14TH INTERNATIONAL ASSEMBLY OF LEATHERCRAFTSMEN TO BE HELD AT THE PARKWAY INN, NIAGARA FALLS, NEW YORK, MAY 3, 4 and 5.
IF YOU'VE NEVER HELPED ANOTHER WHEN THE ROAD WAS PRETTY STEEP, IF YOU'VE NEVER SHARED A BURDEN, NEVER LOST A BIT OF SLEEP
OVER SOMEONE ELSE'S TROUBLE, NEVER SMILED WHEN HEART WAS SORE, MAY I ASK YOU, QUITE POLITELY, "WHAT ARE YOU AROUND HERE FOR?"