
An issue of the Society’s newsletter, transcribed from the original.
(16 pages, 2.6 MB)
the full-resolution scan, 37 MB, for close research
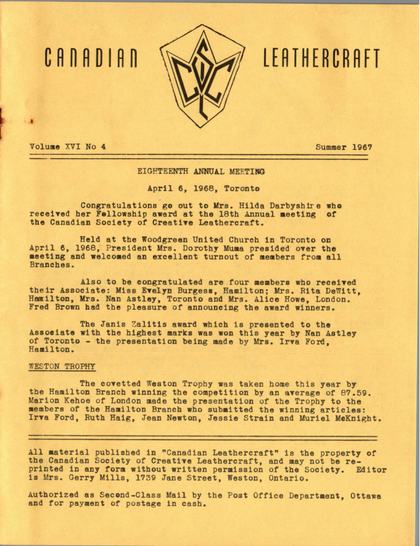
Page 1 — EIGHTEENTH ANNUAL MEETING; WESTON TROPHY
Canadian Leathercraft
Volume XVI No 4 Summer 1967
Both this issue's own masthead and the reprinted Fall notice further on (p6) date themselves "1967" even though every event they describe — the 18th Annual on April 6, 1968, the 14th International Assembly that May — is a 1968 one; the volume numbering seems to have simply fallen a year behind the calendar.
EIGHTEENTH ANNUAL MEETING
April 6, 1968, Toronto
Congratulations go out to Mrs. Hilda Darbyshire who received her Fellowship award at the 18th Annual meeting of the Canadian Society of Creative Leathercraft.
Held at the Woodgreen United Church in Toronto on April 6, 1968, President Mrs. Dorothy Muma presided over the meeting and welcomed an excellent turnout of members from all Branches.
Also to be congratulated are four members who received their Associate: Miss Evelyn Burgess, Hamilton; Mrs. Rita DeWitt, Hamilton, Mrs. Nan Astley, Toronto and Mrs. Alice Howe, London. Fred Brown had the pleasure of announcing the award winners.
The Janis Zalitis award which is presented to the Associate with the highest marks was won this year by Nan Astley of Toronto - the presentation being made by Mrs. Irva Ford, Hamilton.
WESTON TROPHY
The covetted Weston Trophy was taken home this year by the Hamilton Branch winning the competition by an average of 87.59. Marion Kehoe of London made the presentation of the Trophy to the members of the Hamilton Branch who submitted the winning articles: Irva Ford, Ruth Haig, Jean Newton, Jessie Strain and Muriel McKnight.
All material published in "Canadian Leathercraft" is the property of the Canadian Society of Creative Leathercraft, and may not be reprinted in any form without written permission of the Society.
Editor is Mrs. Gerry Mills, 1739 Jane Street, Weston, Ontario.
Authorized as Second-Class Mail by the Post Office Department, Ottawa and for payment of postage in cash.
Page 2 — DEMONSTRATIONS; TRAVELLING EXHIBITION
Branch standings were as follows:
Hamilton 87.59%
Toronto 85.06%
Barrie 84.44%
Mrs. Anne Hook appraised the articles submitted and commented on the unusual techniques applied on some of the articles. A list of the articles submitted and the judges remarks are listed further on in the bulletin.
Mrs. Marion Kehoe acted as moderator of the Question Box session and members would be wise to make note of their leather problems during the year to present at the next Annual as many worthwhile solutions to problems are found.
The ladies of Woodgreen United Church served a delicious roast beef dinner at the noon hour. Head table included Mrs. Muma, Mr. and Mrs. C. Roebuck, Rev. Thomas - pastor of Woodgreen United Church and Mr. Gordon Barnes, administrator of the Ontario Craft Foundation and guest speaker.
Mr. Barnes spoke on the formation of the Ontario Craft Foundation's School of Design in 1967. Due to shorter working hours, there will be more time for leisure for the working man and woman and with even shorter working hours being anticipated, the Ontario Department of Education felt that something must be done to help people fill these leisure hours. An earlier bulletin stated the classes - both full time and summer courses that are held and Mr. Barnes said that already, the results are expected to exceed any prediction previously anticipated.
DEMONSTRATIONS
Six demonstrations kept the members busy during the afternoon. Hamilton Branch member, Miss Lorna Robson demonstrated a specialty change purse. Glove makers were shown the fundamentals of making a glove pattern and glove construction by Clarice Packham, Toronto. Marion Kehoe and Joan Carroll, London showed the making of several small articles, from book marks to jewellry.
Miss Evelyn Burgess, Hamilton demonstrated upholstering of stools and made it look so easy. Mrs. Clara Cavanagh, Barrie demonstrated the construction of wallet interiors and Nora Huyck showed how effective leather is in covering boxes.
TRAVELLING EXHIBITION
Displayed at the Annual was the 1968 Travelling Exhibition. The exhibition was organized by a committee of Anne Hook, Viola Harris and Fred Brown.
Page 3 — WOODSTOCK - OUR NEWEST BRANCH; CSCL Executive - 1968-69 Officers
The exhibition "LEATHER TO-DAY" is being toured across Canada by the Ontario Art Institute and is comprised of 41 leather pieces purchased from 20 craftsmen. They are exhibited in four cases constructed by Mr. F. Baldwin, University of Toronto, who upon the advise of the committee mounted the articles.
A grant of $1,500 from the Ontario Board of Education Community Programs enabled the purchase and setting of this exhibition for CSCL and the committee is to be congratulated on the excellent job they have done in promoting leathercraft.
WOODSTOCK - OUR NEWEST BRANCH
Woodstock was welcomed as the sixth CSCL branch at the Eighteen Annual meeting. To date, Woodstock has 8 members with an increase expected when the fall season commences.
President - Beula Reynolds
Vice- Pres. - Loreen Manual
Secretary - Joy Hutcheson
Treasurer - Carol McLean
Membership - Dorothy Aird
Publicity - Carol McLean
CSCL Executive - 1968-69 Officers
President         - Mrs. Dorothy Muma
Past President    - Miss Viola Harris
1st Vice Pres.    - Mrs. Irva Ford
2nd Vice Pres     - Mrs. Helen Wheaton
Rec. Secty.       - Mrs. Thelma Terry
Corr. Secty.      - Mrs. May Corbett
Treasurer         - Mr. Cecil Roebuck
Executive Council
Mrs. Anne Hook         Miss Olivia Smith     Miss Betty Henstridge
Mrs. Clara Cavanagh    Mrs. Sadie Roebuck    Mr. Gel Brigden
Mr. Jack Layton        Mrs. Ruth Haig        Mrs. Nora Huyck
Mrs. Gladys Riddell    Mrs. Gerry Mills      Mr. George McPhail
Mrs. Kay Cloughley     Mrs. Del Jacombs
Historian - Mr. Robert Muma
Chairman Council of Fellows - Mr. Fred Brown
Page 4 — C.S.C.L. Committee's for 1968-69; JUDGES REMARKS ON WESTON TROPHY ENTRIES
C.S.C.L. Committee's for 1968-69
Vice Chairman in charge of Branches - Mrs. Irva Ford
Vice Chairman in charge of Committees - Mrs. Helen Wheaton
Exhibitions Chairman for C.N.E. - Mrs. May Corbett
Membership Chairman - Mrs. Nora Huyck
Editorial & Publicity Chairman - Mrs. Gerry Mills
Teaching Standards Chairman - Robert Muma
Liason Officer for C.S.C.L. & Canadian Guild of Crafts - Miss Viola Harris.
JUDGES REMARKS ON WESTON TROPHY ENTRIES
BARRIE: BOX: Trinkets. 1¾ oz. cowhide over wooden box. Cerise with inlay. Avoid liquid on wood a/c danger of wood swelling. A very well done piece of work.
TIE RACK: Useful.- some variety in shape or color would have made it more interesting to look at.
PICTURE: Imaginitative - pleasing to the eye. A conversation piece. Great caution should be observed when working with mixed media. This one happens to have struck a good balance.
HAMILTON: WASTE BASKET: Attractive to look at. Well shaped but a little uneven in contour. Handles effective to look at, but not functional. A beautiful dye job, inside and out. POCKET SECRETARY: Beautifully made and finished. Interior edges not even.
LARGE BOX: Very nicely made. Interior well finished.
Would have been improved by using a formal letter on the lid. PURSE: A nice piece, but one gusset is slightly higher than the other. Attractive decoration.
TORONTO: ROUND TRAY: Beautiful color job. Centre doesn't lay flat to table. Decoration and finish very well handled.
ASH TRAY: A sturdy piece. Tray seems a trifle small for the glass. Borders a bit uneven.
OVAL TRAY: An unusual shape in a tray, and unusual decoration. Good color job. Bottom could be better polished. Edges well done.
PURSE: Functional and well finished. An excellent design -
Page 5 — ARTS, CRAFTS AND HOBBY SHOW - C.N.E.; FALL EXHIBITION; THIS AND THAT
possibly the clasp a little low. Wrinkles in lining - almost impossible to use this lining without getting wrinkles. PEN STAND: A lovely piece, well dyed and finished. Groove beautifully bevelled. Calendar and pens well positioned.
ARTS, CRAFTS AND HOBBY SHOW - C.N.E.
It is that time of the year again to be thinking of the C.N.E. and for those submitting articles for sale or for the Handicraft Guild should be busy at it now.
This year, the A.C. & H Show will be in the Queen Elizabeth Building (no horses) and the Handicraft Guild will be located on the West side of the Better Living Building during August 15 to September 2.
Last year 50 members from the branches either demonstrated or sold articles. Twenty-one members had articles sold and 838 articles were sent in and 573 articles were sold.
The Branches will be called upon again this year and it is to be hoped an even more successful year will be reported.
FALL EXHIBITION
Just a brief word to advise the members that in lieu of our Annual Fall Sale there will be an Exhibition at the Canadian Handicraft Guild after the New Year. Those submitting articles for this Exhibition may also submit them in Branch Competitions, Annuals, for their Associate, etc. Keep this in mind when working on your leather this summer and fall and really make this a prestige exhibition.
THIS AND THAT
Simcoe County Arts and Crafts Association are holding a Quilt, Rug and Craft Show at the Stayner Collegiate Institute on July 18, 19, and 20. Our Barrie Branch are active participants in this show so keep these dates in mind and if in the area, make it a point of dropping in and giving our Barrie members the support they deserve.
Page 6 — 14th INTERNATIONAL ASSEMBLY
Canadian Leathercraft
Volumn XVII No. 1 Fall, 1967
14th INTERNATIONAL ASSEMBLY
Niagara Falls, N.Y.
The Michigan Leather Artisans, the Frontier Leather Art
Guild and Eastern Leathercraft Guild were hosts for the 14th International Assembly of Leather Craftsman at the Parkway Inn, Niagara Falls, New York on May 3, 4, 5, 1968.
Registration convener Julia Tuttle reported 106 members registered for the Assembly and with her assistants were busy registering members, distributing dinner tickets and favor bags.. The latter (favor bags) were assembled by Al Terech and his committee.
Workshops on the week-end were by Iro Bela on Binding, Rhea Patterson on Fun with Design and Knife Sharpening by Walter Mickey.
Demonstrations were conducted on Glove Making by Helen Wheaton, Wallet Interiors by Clara Cavanaugh, Box Covering by Nora Huyck, Specialty Change Purses by Lorna Robson, Small Articles by Marion Kehoe and Joan Carrol and Upholstered Stools by Evelyn Burgess
After a hectic day, an absolutely scruptious dinner was served, giving everyone an opportunity to relax and compare notes with old friends. Will Robertson of Buffalo added to the evening by performing his magical tricks keeping everyone amused and captivated.
Judges Jean Delius and Irva Ford chose to name a third judge to assist them in the difficult task.
SPEAKER'S COMMENTS
Mrs. Jean Delius as speaker of the evening emphasized the dire need for leathercrafters becoming active in international craft organizations to make leather more recognized as an important craft.
She felt after viewing the articles in the exhibit that we have not been courageous enough with leather. If we are to have any impact, we must get more leather articles around and educate the public to want better articles, such as clothes, toys, furniture,
Page 7 — CANADIAN NATIONAL EXHIBITION
wall panels, room dividers, etc. Mrs. Delius commented on the lack of decoration. The quality of the leather was what was outstanding and gave the tote bag as an example.
The need for better findings, she said was desperately needed to upgrade the quality of leathercrafted articles. She suggested that in looking for better findings, we co-operate with other craftsmen to help make better findingsto up-grade our articles.
She begged us to adapt the concept of not only looking but seeing - keeping eyes, ears and hearts open and then getting by yourself and applying these observations to leathercraft.
The urgent need for film, either 35 MM or movies on visual exploring of leather is needed she felt, starting at the animal hide, showing each step through to the resulting article.
Paul Payne reported on the Advisory Board meeting held Friday evening. Paul also emphasized the need for slides on leather and has requested that slides be shown at the next International Assembly and anyone having any are asked to please submit them to Robert Muma, 118 Hazelton Ave., Toronto 5, Ont. Mr. Muma has consented to be film custodian. The slides must be 2" x 2" so please forward your best film to be used for this worthy project.
The 15th International Assembly will be held in London,
Ontario, May 2, 3, 4, 1969.
Officers of the Advisory Board for 1968-69 are:
| President | Paul Payne |
| Secty-Treas | Dorothy Payne |
| Editor | Paul Payne |
| Membership | Bob Dengler |
CANADIAN NATIONAL EXHIBITION
Don't forget the C.N.E. this year and give your support to May Corbett in making our show this year even better than ever before. May needs volunteers to man the booth, so if you have not been approached before, drop May a line and let her know when you can give a helping hand. Mrs. May Corbett, 10 Highland Ave., Barrie, Ontario.
Page 8 — MAKING HANDBAG PATTERNS
MAKING HANDBAG PATTERNS by Nora Huyck
This article's typewriter strikes its "o" heavily in a handful of spots and the bowl fills in solid, so the letter can be taken for another: "of the top" and "Do this" both print with a filled "o". They are given here as the page prints them.
Materials - heavy brown paper, bone folder, stab awl, ruler or square, pencil, cutting knife.
Bag with end gussets
Decide the width (the greatest width if the sides are to be rounded or slanted) and height of the bag, the width of the bottom from front to back, the width of the top from front to back (in most cases this last measurement should be not less than one and one-half inches).
The following measurements will be used here: height - seven inches; width - ten inches; bottom - three inches; top - two inches. The size and shape of the flap will be determined later.
Start with a sheet of fairly heavy brown paper with one straight edge. The straight edge will be the top of the front of the bag and will need to be wider than the width of the bag. The required length is determined by the total of the height of the front, the width of the bottom, the height of the back, the width of the top and a bit more than enough for the flap -7, 3, 7, 2, 5, total 24 inches.
Fold the straight edge in half, The resulting fold is at right angles to the straight edge. This fold and all others made during the construction of the bag must be well creased with the bone folder. As the pattern progresses, this fold remains the centre line of the bag.
Keeping the ruler parallel with the straight edge, measure away from the fold, half the width of the bag - 5", and pierce straight through the two thicknesses of paper with the stab awl. Do this at three or more points. Place the ruler along these points and cut off the extra paper. When opened up, your paper should measure 10 inches by 24 inches.
With the paper still folded, about one inch in from the cut edge, measure down from the straight edge the depth of the bag - 7 inches and mark with the awl through both thicknesses of paper. Then measure further on three more inches for the bottom, seven more for the back, another two for the top and mark with the awl at these points. There will be four awl marks down the side of the paper.
Unfold the paper. Four corresponding awl marks should appear on the other side of the paper. Using these awl marks as guides, make the folds to separate the front, bottom, back and top. These folds will be at right angles to the centre fold.
Page 9
In order to allow the front of the bag to lie flat against the back of the bag, bring the two folds forming the bottom of the bag together so that the bottom lies folded between the front and back. (If the finished bag is to have the bottom folded, the stiffener will be either in two long strips or will have a narrow strip cut out along the fold to within one quarter inch of the ends. If the leather is heavy, it will have to be gouged on the fold line. If the bottom of the finished bag is not to be folded, then the stiffener will be in one piece and the fold will be ignored). For ease in finishing the paper pattern, the top can be folded in the same manner.
To shape the flap, refold the paper on the original fold, then cut with the scissors or knife in the desired shape. If both sides of the paper are not to be the same, shape the flap with the paper opened up.
The gusset - A piece of paper with one straight edge is used - a bit longer than the height of the bag and wider than the desired opening width of the bag. The straight edge will be the bottom of the gusset. Make the centre fold as before. Work with the fold to the left and the straight edge towards you. Draw a line parallel to the fold and half the width of the bottom - 1½ inches away from it. At the bottom of the gusset make a slit along this line extending only ¼ inch up from the bottom. From the top of that slit cut down and out to the right at an angle of about 45 degrees to form a notch. (When the bag is being constructed, this angle may have to be increased some for a good fit).
Draw a second line parallel to the fold and half the width of the desired top opening of the bag (this bag is to open 7 inches wide - the measurement used is 3½ inches) away from it. With the bag pattern folded in such a way that the complete front only is showing make a mark at the bottom ¼ inch in from the right side. With the bottom of the bag and the gusset toward you, place this mark at the top of the notch and the top right corner of the bag just touching the second line. Draw a pencil line on the gusset paper along the top of the bag and down the right side. Cut on these lines and there is the completed gusset.
If the bag is to lie flat, the gusset will have to be folded at the bottom. With the gusset open and the bottom toward you, place the bottom edge exactly along the edge of the side so that a fold is formed starting at the top of the notch. Crease this fold just to the centre line of the gusset. Bring the other notch down to the first notch and bring the two sides exactly together. A fold will now be formed from the second notch to the centre fold meeting that first fold. From the spot where these two right angles to the rest of the centre fold. If it has been properly formed, the gusset can be set in place and the pattern will lie perfectly flat when all folded.
Page 10
If the gusset is very wide at the top, it will extend far into the centre of the bag and will use up too much space. To avoid this, bring the centre of the top of the gusset out nearly to the sides of the gusset thus reversing the centre fold to a point part way down and adding two new folds which extend in a V from this point to the top of the gusset. It can be a deep V or a short one as you wish.
Variations - The bag as described is rectangular. The shape can be varied - the sides may be narrower at the top or may be curved. This can be done after the folds are made but before the flap is formed, or it can be done after the first fold, which outlines the front of the bag, is made. With the bag folded along the original centre line cut the side of the front,the desired shape. When the paper is unfolded, both sides of the front will be identical. Keeping the bottom out of the way so that it will not be cut, place the front against the back and shape the back. If the sides are curved or slanted in toward the bottom, the bottom will have to be shortened at either end and the ends of the bottom will be straight whether the bottom of the bag is to be folded or not. If the sides of the bag are narrower at the top and the bottom of the bag is to be folded, then the parts of the bottom that project beyond the sides when the bag is to be folded will have to be trimmed off so that the ends of the bottom are in the shape of a very shallow V. Don't trim if the bottom of the bag is not to be folded when finished. The bottom of the gusset for the folded bag will have to have a correspondive shallow V.
For any of these shapes, the top of the bag can be a rectangle the same length as the top of the front and then the flap shaped as desired or it can be cut as part of the flap.
The pattern for a bag with end gussets may require a rather long piece of leather. If the hide is small, it may be impossible to get it in one piece. Then the top and flap of the bag can be a separate piece. It will be fastened to the bag in one of two ways: (1) cut it half an inch longer and stitch it between outer leather and the lining of the back. (2) cut it longer and in a decorative shape and stitch it to the outside of the back of the bag.
The all-around gusset
This bag usually has rounded corners and the sides can be straight, curved or rounded. The front is one piece and the back, top and flap form the second piece. The gussets at the sides of the bag are continued along the bottom to make the third pattern piece,
Page 11
Prepare the first two parts, using the paper with the straight edge and centre fold as before.
To make the gusset pattern, start with a piece of brown paper longer than the combined length of the sides and bottom of the bag and a bit wider than the desired top opening of the bag. First, fold the paper crosswise. This short fold matches the centre line of the bag. Fold the paper lengthwise to form the centre line for the full length of the gusset. There are now four thicknesses of paper.
With the long fold of the gusset toward you and the short fold at your right, draw a line parallel to the long fold and at a distance away from it equal to one half the width of the bottom of bag, plus whatever allowance has to be made for the turn-up along the length of the gusset in construction - at least one-quarter inch for lacing, less for stitching.
Draw a second line parallel to the long fold and at a distance away from it equal to one-half the desired opening width at the top of the bag.
Holding the front pattern with the bottom away from you, place the front pattern on the gusset piece so that the centre fold of the bag is exactly at the short centre fold of the gusset with the bottom edge of the bag along the first pencil line. The rounded corner of the front must be pivoted around on several pivot points so that the edge of the bag always just touches the first pencil line. The distance of these pivot points in from the edge depends on the type of finishing - for lacing, one quarter inch (or whatever amount is turned up along the edge of the gusset) - for stitching perhaps no more than one-eighth of an inch.
The first pivot point is directly above the spot where the corner starts to curve away from the first line. Hold the front in place on the gusset with the awl at this pivot point - don't pierce through the paper. Pivot the front around this point just so long as the edge of the front will touch the pencil line. Make a new pivot point, where the corner starts to curve away from the first line, and pivot the front around this new pivot point just so long as the edge of the front will touch the pencil line. Continue this until you are around the corner of the bag. (If the side of the bag is not straight, you will have to determine just where you want the corner to end. The finished gusset will not start to widen until this point is reached). At this point pierce right through the bag front and the four thicknesses of the gusset at the same distance in from the edge as the pivot points. Still holding the awl at this point, swing the front until the top right corner just touches the pencil,
Page 12
Draw a line on the gusset paper along the top of the bag. This line is the top of the gusset. Continue down the side of the bag to meet the first line. Cut these two lines and continue along the first line to the short centre fold. Unfold and there is the complete gusset. If the sides of the bag were rounded or an irregular shape, the sides of the gusset past the straight part should match the shape of the sides of the front.
The bag with the round bottom gusset
Decide the measurements of the bag and start with the straight edge and centre fold. Make the fold for the bottom of the front. Make a mark on the bottom of the front one-quarter inch in from the right corner. (If the bag is to be stitched, one eighth of an inch is enough) Since the bottom of the bag is rounded, it is not known yet how much to allow for it, so the rest of the bag can't be formed yet.
Make the gusset next. Start again with a folded sheet of paper. Draw a line parallel to the fold and at a distance away from it equal to one-half the desired distance between the front and back of the bag, adding the allowance for lacing or stitching. Draw a second line parallel to the fold and at a distance away from it equal to one-half the desired opening width of the bag.
With the fold at your left hand, place the top right corner of the front on the outer line and the bottom corner on the inner line. On the gusset paper draw along the top of the bag and down the side. With the stab awl pierce through both thicknesses of the gusset paper at the point marked on the bottom of the bag front. Remove the front. Shape the bottom of the gusset to the desired roundness, keeping in mind the outer one-quarter inch (or less) will be lost in construction. Cut out the gusset. Open it up and two awl marks will show, one at either side of the bottom of the gusset.
Fold the pattern for the body of the bag at the centre fold again. Place the fold toward you with the top of the front at your left hand. Then place the gusset pattern on the bag pattern with the side of the gusset along the side of the bag and the awl mark on the gusset on the mark at the bottom of the bag. Using this as the first pivot point, pivot the gusset bottom around along the bag pattern edge until the centre bottom is reached where an awl mark is made piercing through both thicknesses of paper and continuing around to the second awl mark on the other side of the gusset. Once again pierce through the bag pattern. There will be three awl marks for the bottom of the bag, two for the sides and one for the centre.
Shape the back, top and flap of the bag as usual.
Page 13
The framed bag - bottom opening
Make a mark on the frame at the exact centre of the top and at the right corner on the inside edge of the frame just where it starts to curve for the corner.
Decide the height of the bag. Make the centre fold on the paper as usual and then the fold for the front bottom. Refold paper on the centre line.
Place the frame on the paper with the centre of the frame at the fold and the top of the frame along the straight edge. Draw a pencil line along the inside edge of the frame and part way down the leg. Mark the point where the inside of the frame starts to curve for the corner. Set the frame aside. From this point draw a line to the straight edge and perpendicular to it.
The straight edge is the top of the front of the bag and the short line just drawn is the beginning of the side. The top of the bag has to slide into the top of the frame. If the handbag is to be laced, then the width of the top of the bag will have to be narrowed a bit in order to fit it. Handstitching needs no narrowing.
The side of the bag starts with the short line and then is shaped as desired down to the fold for the bottom of the front. Form the bottom of the bag and the back.
To shape the gusset, start with the centre fold. Keep the fold always at your left. Draw a pencil line parallel to the fold and at a distance away from it equal to one-half the width of the bottom of the bag. Open the frame as wide as you will be opening the finished bag. If you try to open it further than this later, the bag is apt to pull out of the frame.
The two legs of the frame form a wide angle. Place the frame on end on the gusset paper so that the hinge is at the fold and the fold bisects the angle. Draw a line part way along the leg to indicate this angle on the paper.
Close the frame. Place it on the paper so that the outside of the bottom of the leg, not the hinge, is about one-eighth of an inch in from the fold and the outside of the leg lies along the line drawn.From the fold, draw a line in to the leg and then along the outside of it, continuing around the corner just to the end of the curved part and mark with the awl.
Set the frame aside. On the bottom of the bag front make a mark one-quarter of an inch in from the right corner. With the fold of the gusset paper at your left, place the top right corner of
Page 14
the bag at the point marked at the end of the curb and the mark at the bottom right corner on the pencil line parallel to the fold. Draw a line along the side of the bag, then one-quarter inch along the bottom of the bag to the line, down one quarter inch on the parallel line and then to the fold at right angles to the fold.
When the gusset is cut out and unfolded, the wide angle at the top should be curved a bit at the bottom instead of a definite angle.
A tote bag
This is usually a big bag. The top is usually curved or hollowed. It doesn't have the usual top and flap for closing, except perhaps for a tab which draws the front and back partly together.
Folding and cutting is done as usual. The gussets are made as usual - or a slight variation can be made. The gussets can be rounded at the corners instead of notched. No matter how much they are rounded, the flat part at the bottom must match the flat bottom of the bag. The gusset can have the top rounded if you like, or shaped some other way since it does not have to fit under a top and flap.
The straps of this bag can be fastened in the usual way - stitched to the front and back of the bag a short distance down from the top or they can be fastened between the outer and inner leather.
A pocket can be added, stitched to the lining. It can be made of one rectangular piece of leather pleated at either end. The ends will extend a bit beyond the pleats to allow for stitching. The fold is held at the bottom by stitching, but opens at the top the width of the pleat. A second section can be added to this pocket. It is cut the depth and width of the folded pocket and a flap is added. Cement it at the edges to the first pocket and stitch it all in place. This is only one type of pocket. Use your ingenuity and make them to suit your purpose.
Back to the bag again - a centre section can be put in this bag before the gussets are put in place.
The bottom of this part is made one-quarter to one-half inch narrower than the outer part in order that it may slide easily into the outer part and yet fit snugly enough that the two bags will be fastened together by the gussets. Usually this section is higher than the outer section and the tab is omitted. This inner section can be closed with a zipper if desired. To cut down on the weight, only the top part which show above the outer part, has to be of leather.
Page 15 — SALON WINNERS at INTERNATIONAL ASSEMBLY
The rest can be made of thin lining covering the stiffener on both sides. Grey pattern paper or construction paper can be used for the stiffener.
To economize on leather, the bottom can be a second piece. An allowance of one quarter-inch is made at the bottom of the back and the front and along each side of the gusset. The corners are mitred so that there won't be excessive thickness at the corners when the gussets are put in place. The seams are folded to the bottom and skived if necessary for neatness.
SALON WINNERS
at INTERNATIONAL ASSEMBLY
Salon awards are made on the basis of originality, creativeness, workmanship, method of carrying out design, the techniques used and their suitability to leather.
| NAN ASTLEY (CSCL) | 1. Zipper Ring Binder - Briefcase 2. Niger Calf Handbag and Matching Belt. 3. Expansion Belt - Brown 4. Expansion Belt - Red |
| HILDA DARBYSHIRE (CSCL) | 1. Red Morocco Writing Case |
| IRVA FORD (CSCL) | 1. Antique: Calf Clutch Bag 2. Red and Black Cowhide Sandals |
| HULDY GUTEKUNST (FLAG) | 1. Green Oasis Box with 3D Design in Red and White 2. Red & Black Cowhide Sandle. |
| ALICE HOWE 'CSCL) | 1. Brown Morocco Box |
| NORA HUYCK (CSCL) | 1. Letter Caddy 2. CSCL Ring Binder |
| MURIEL McKNIGHT (CSCL) | 1. Morocco Box with Tray |
| RHEA PATTERSON (FLAG) | 1. Hand Made Shoes |
| GLADYS RIDDELL (CSCL) | 1. Oval Box |
| JULIA TUTTLE (FLAG) | 1. Brawn Morocco Box with Calf Top |
| STEVE WALKER (FLAG) | 1. Turned Table Lighter |
Seventeen Awards were made to 11 Craftsmen!
[The machine this page was typed on has no key for the digit 1; the typist struck a lower-case l for the numeral, and it is set here as the numeral.]
Page 16 — CRAFTSMEN AWARDS AT INTERNATIONAL ASSEMBLY
CRAFTSMEN AWARDS
AT INTERNATIONAL ASSEMBLY
| NAN ASTLEY (CSCL) | 1. Centennial Base and Pen Stand 2. Niger Calf Belt with Snap Buckle 3. Expension Belt - Brown 4. Expansion Belt - Red |
| KAY CLOUGHLEY (CSCL) | 1. Square Dark Brown Bag |
| ELEANOR COUTTS (CSCL) | 1. Picture with Driftwood & Moulded Fish |
| HILDA DARBYSHIRE (CSCL) | 1. Two Colored Maple Leaf Pins 2. Ash Tray |
| IRVA FORD (CSCL) | 1. Navy Bracelet 2. Black Morocco Prayer Book Cover 3. Black Pocket Secretary - Monogrammed |
| HULDY GUTEKUNST (FLAG) | 1. Brown Llama Sandals with Chain 2. Black and Red Sandals |
| NORA HUYCK (CSCL) | 1. Letter Caddy 2. Ring Binder - CSCL 3. Small Round Box |
| DOROTHY HARWOOD (CSCL) | 1. Black Alligator Bag |
| MURIEL McKNIGHT (CSCL) | 1. Morocco Box with Tray |
| GLADYS RIDDELL (CSCL) | 1. Black Pen Stand with Calendar |
| TOM SWAFFORD (CSCL) | 1. Stamp Case |
| 2. Natural Carved Billfold | |
| JULIA TUTTLE (FLAG) | 1. Brown Morocco Box with Natural Calf Top |
| STEVE WALKER (FLAG) | 1. Turned Table Lighter |
| HELEN WHEATON (CSCL) | 1. Deerskin Gloves |
Maturity is the ability to do a job whether you're supervised or not; finish a job once it's started; carry money without spending it. And last, but not least, the ability to bear an injustice without wanting to get even.
HAPPY HOLIDAYS!
[The machine this page was typed on has no key for the digit 1; the typist struck a lower-case l for the numeral, and it is set here as the numeral.]