
An issue of the Society’s newsletter, transcribed from the original.
(12 pages, 2.1 MB)
the full-resolution scan, 31 MB, for close research
Page 1
Canadian Leathercraft
Volume XXXIII No.3 Spring 1985
0045-5121
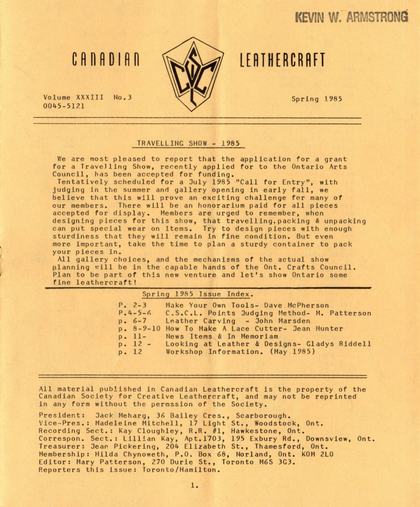
TRAVELLING SHOW - 1985
We are most pleased to report that the application for a grant for a Travelling Show, recently applied for to the Ontario Arts Council, has been accepted for funding.
Tentatively scheduled for a July 1985 "Call for Entry", with judging in the summer and gallery opening in early fall, we believe that this will prove an exciting challenge for many of our members. There will be an honorarium paid for all pieces accepted for display. Members are urged to remember, when designing pieces for this show, that travelling,packing & unpacking can put special wear on items. Try to design pieces with enough sturdiness that they will remain in fine condition. But even more important, take the time to plan a sturdy container to pack your pieces in.
All gallery choices, and the mechanisms of the actual show planning will be in the capable hands of the Ont. Crafts Council. Plan to be part of this new venture and let's show Ontario some fine leathercraft!
Spring 1985 Issue Index.
P. 2-3 Make Your Own Tools- Dave McPherson
P.4-5-6 C.S.C.L. Points Judging Method- M. Patterson p. 6-7 Leather Carving - John Marsden p. 8-9-10 How To Make A Lace Cutter- Jean Hunter p. 11- News Items & In Memoriam p. 12 - Looking at Leather & Designs- Gladys Riddell p. 12 Workshop Information. (May 1985)
All material published in Canadian Leathercraft is the property of the Canadian Society for Creative Leathercraft, and may not be reprinted in any form without the permssion of the Society.
President: Jack Meharg, 36 Bailey Cres., Scarborough.
Vice-Pres.: Madeleine Mitchell, 17 Light St., Woodstock, Ont.
Recording Sect.: Kay Cloughley, R.R. #1, Hawkestone, Ont.
Correspon. Sect.: Lillian Kay, Apt.1703, 195 Exbury Rd., Downsview, Ont.
Treasurer: Jean Pickering, 204 Elizabeth St., Thamesford, Ont. Membership: Hilda Chynoweth, P.O. Box 68, Norland, Ont. K0M 2L0 Editor: Mary Patterson, 270 Durie St., Toronto M6S 3G3. Reporters this issue: Toronto/Hamilton.
[The masthead boilerplate prints "permssion" — the Society's own dropped letter, kept as printed. The same boilerplate is set "permission" in other issues.]
Page 2 — Make Your Own Tools- Dave McPherson
Make Your Own Tools - by David McPherson
This article has come about as a result of the workshop I did at the 1984 annual meeting in Woodstock. The topic may not interest everyone, but it is one way of making an original design- by creating your own tools. I have not done a lot of this, nor do I pretend to e xhaust the subject here.
The basic set of equipment needed includes a vise, a hacksaw, tin snips (metal shears), emery paper, and various sizes of files. A small portable vise is satisfactory. At least one of each shape of file is required- large flat, small round, and triangular for starters. Stamping tools can be designed from scratch and made from various sizes of nails. Other shapes can be made from chisels, screw drivers, glass cutter, nuts and bolts, Allan wrenches, socket wrenches. It is not always necessary to purchase new tools to start with, as you can use your files to modify a used or worn-out tool.
Sheet metal can be used to make templates for shapes which you use a lot. Remember how cardboard patterns do wear out. Cut out shapes with tin snips. I still use a spacing wheel I made years ago from sheet metal using a triangular file to cut notches in a circle and adding a wooden handle. Another of my favourite tools is a swivel knife blade with the corners filed off. Only the centre part of the blade will cut, but the filed off corner creates a very wide vee-shaped line with a flat bottom. Do this to an oldknife blade, not your best carving blade.
I have become partial to hexagon shapes to create honeycomb patterns. Allan wrenches and bolt heads filed flat, then used evenly spaced creates a honeycomb. I have a machinist friend who very kindly used his lathe to hollow out the centre of the heads of hexagonal bolts. A socket wrench with face filed flat presents the hexagon inside a circle. Some tools may be very hard for filing and take a lot of patience to get the shape you want.
The various shapes of screwdrivers can be revised with a file to create interesting stamping tools. Chisels can be filed (blunted) to make different straight-line stamps. Any metal tool can be used as is, or revised with a file to make an interesting tool to create a pattern. A glass cutter can be filed to create several small squares at a time.
The steps to follow in making stamping tools from nails or spikes, (as large as six inches), start by clamping the nail in the vise and using the large flat file to create a flat top on the head and the basic shape for the tools whether round, triangular, or rectangular. Use a fine marking pen to mark pattern lines on the basic shape. Use triangular and round files to create the design. Use emery paper to smooth sharp edges. Cut off or file off the point of the nail for striking. If the basic shape is large, it will be necessary to cut deeply and remove at least half of the surface or it will be difficult for the tools to make an imprint in the leather if there is too much flat surface.
The following sample shapes might be as shown, but use your imagination to create more.
Page 3
(1). Horseshoe or flower stamp.
Flatten one side with a large file
Triangular file grooves all to the same point. QW Use round file.
(2). Pine Tree
A Make head triangular with large flat file dd Triangular file grooves all to the same point
Ad Round file at the bottom.
(3). Basket Weave
LJ Make flat rectangle with large flat file CU Make three triangular grooves across the centre
Use side of flat file to bevel out centre parts a of sides
Make two triangular grooves in bevel being careful th not to touch cross grooves.
INVITATION TO A SPECIAL TOUR - BATA SHOE MUSEUM, TORONTO.
All members interested in a tour of the Bata Shoe Museum, off Don Mills Road, Toronto, are invited to get in touch with Rene Hackstetter, who has made contact with the museum for a special guided tour.
Included in the museum are items of very ancient shoe-making, books, tools and other archaic artificats related to the art of working with leather, as well as more recent examples. Tour will be guided by museum curator. Time to be arranged to suit members. Tel Rene at: (416) 923-5852
Or write to him at: 30 Rosedale Road,
Toronto. M4W 2P3,
page 3
Page 4 — C.S.C.L. Points Judging Method- M. Patterson
C.S.C.L. Method of Points Scoring.for Judging
During a recent Toronto Branch meeting, following judging by Branch members to determine entries for the Weston Trophy Competition at the Annual, Chairman of -Fellows, Fred Brown, showed the members how the scoring sheets used by the Fellows work. General Competition =:
Judging of these items, such as the Weston Trophy Competition, is done on a 10 point system. (see sample score sheet). Both design and workmanship are individually scored on a scale of 1 to 10. Each individual scores are then multiplied by 10. (See sample score sheet). The total is then divided by 2 to give a score of "X" points out of 100.
Bonus points are awarded for items which have outstanding qualities, for a "really exciting piece". Bonus points are 5- no more, no less. Only a few pieces merit this type of "bonus".
Associate Judging:
The 4 pieces entered for approval by the Fellows, to achieve the standing of "Associate" are judged on a different point system. The design of each article is scored out of a possible 10 points. The workmanship of each article is scored out of a possible 10 points. But the points awarded for design are multiplied by a factor of 7, and the points awarded for workmanship are multiplied by 13. (See sample score sheet, with example filled in.)
This method of scoring gives emphasis to the basics- (workmanship), the most fundamental part of our craft that a beginner must master. Design, on the other hand, is given less points, since it is allowable to use commercial patterns (NOT kits though!), and also commercial designs. Naturally, well-executed ORIGINAL designs are looked on more favourably and would score better.
As is the case with the General Comp. pieces, each piece, after the scores are multiplied by the factors given, can score up to a maximum total of 200 points, which is then divided by 2 to get a final score. 75% on EACH article is necessary to reach Associate standing. However, it is possible to pass on 3 pieces only, and have the scores held for next year, when a 4th piece must be completed and passed by 75% or more. ONLY the 4th piece is juried on that second attempt, and if the 4th piece passes, then Associate standing is granted.
Fellow Judging:
The 4 pieces entered for this advancement in status are judged in exact reverse of the Associate judging, as far as the "factor" goes. (See sample score sheet). Workmanship, after being scored out of 10, is multiplied by a factor of only 7, Since by this time the applicant should have mastered workmanship well. The emphasis is on design, and this score out of 10 is multiplied by 13. The total of the two (a possible 200 once again), are then divided by 2 to get a final score. 80% is a passing mark for EACH article, at this level. NO commercial designs or patterns are allowed, and if pieces or a piece fails, ALL pieces must be rejuried next year, with replacements made for those failed articles.
Design encompasses both "surface" design, and basic shape design.
Page 5
Some extra ideas mentioned by Fred Brown re jurying of items- "In Associate judging, originality is much to be desired and might improve your marks".
"Decoration MUST be compatible with the piece created". (In other words, a wispy, delicate design on a rugged, strong article would be marked down sue to incompatability ).
"Colour is scored under EITHER design OR workmanship, or under both".
BIENNIAL EXHIBITION JUDGING: This type of judging is more a question of "general concensus" of suitability, workmanship & design. Outside judges are requested to follow guidelines as set down by the C.S.C.L. for jurying.
The original prints "concensus", kept exactly as printed.
SCORE SHEET *** CANADIAN SOCIETY FOR CREATIVE LEATHERCRAFT
CLASS- General - Associate- Fellow- Competition
RULES- Design & Workmanship are each marked out of 10. Bonus is for competition ONLY. 5 marks are given for articles with real impact and appeal. (The mark in this Bonus column shall be either 5 or 0.)
To calculate the final marks, use the following weighting factors:
| CLASS | DESIGN | WORKMANSHIP | PASS MARK ON EACH ARTICLE |
|---|---|---|---|
| Fellow | 13 | 7 | 80 (No conditions) |
| Associate | 7 | 13 | 75 (Condition on one article) |
| General Competition | 10 | 10 | This will give a possible 200. Divide by 2, and add Bonus (if any) |
Sample score sheet, filled in as an example:
| Entrant's Name | Description of Article | Design | Workmanship | Total | Bonus | Final Mark, Aver. of Judge | Final Comp. Mark, Av. of Articles |
|---|---|---|---|---|---|---|---|
| Sample Fellow Score | Box | 8 (x13) | 9 (x7) | 104+63 | N/A | 167 | 83.5% |
| Vest | 9 (x13) | 7 (x7) | 117+49 | N/A | 166 | 83% | |
| etc. etc for 2 more pieces | |||||||
| Sample Associate | Box | 8 (x7) | 9 (x13) | 56+117 | N/A | 163 | 81.5% |
| Vest | 9 (x7) | 7 (x13) | 63+91 | N/A | 154 | 77% | |
| etc. etc. for 2 more pieces | |||||||
| Sample General Competition | Box | 8 (x10) | 9 (x10) | 80+90 | - | 170 | 85% |
| Vest | 9 (x10) | 9 (x10) | 90+90 | 5 | 185 | 92.5% | |
[The lower half of the page is the score sheet’s header row and its worked sample (Fellow/Associate/General Competition, each with a Box and a Vest example), set out here as two tables.]
Page 6 — Leather Carving - John Marsden
I think that it proves interesting, when comparing the sample marked "box", to show how differently it scores depending on the type of competition.....
For Associate OR Fellow standing, the 8 pts. for design are sufficient to help it pass. The 9 points for workmanship also. However, for general competititon, it actually scores higher... since no particular bias is placed by the factor system
The original prints "competititon", kept exactly as printed.
But note the article marked "Vest". A real difference occurs between Fellow and Associate. Luckily, a piece entered for Associate standing just requires 75% to pass. Its' mark of 7 for workmanship dragged it down when being judged most particularly for workmanship.
If a piece had received just 7 for design, and 9 for workmanship, the judging totals would have looked like this for "Fellow"
7 (x 13) = 91 plus 9 (x 7) = 63 = Total 91+63=154 2 = 77% and this would NOT have been enough to pass in Fellow judging DESIGN is the point item!
Hope this has NOT just complicated things for our members who must work on their own without the benefit of Branch members advise] Any questions may be sent on and we will see that they are given to the Fellows for clarification.
Mary Patterson
John Marsden ---- LEATHER CARVING - A Toronto Workshop/Meeting Care of Carving Tools:
Take the time and trouble to make a wooden rack, with holes drilled to fit your tools. This protects them from damage when they bump together if casually put in a drawer or box. If the rack has a cover of foam rubber, so much the better. And ALWAYS make sure that they are stored in a moisture-free area- it will prevent rust- and keep them cleaned lightly with Brasso cleaner. Or, Silvo cleaner or jeweller's rouge can be used, and then buff them lightly to keep them in good-as-new condition.
Working on marble is the normal procedure, but a light piece of cardboard over the marble won't affect the working surface, but WILL protect those tool face an extra little bit!
Procedures:
Case leather well, using whatever method of dampening and storing that you prefer. Some people like to moisten leather, wrap in plastic overnight, and store this wrapped leather in refrigerator. Trace the design on the leather- then cut outline with a smooth stroke, with carving swivel knife held firmly in a proper upright position. Make sure that you don't undercut your lines. Use a camoflage tool, followed by your pear shader.
... Remember ............
ALWAYS STRIKE TOOLS VERTICALLY!!
6.
Page 7
Pear Shader: ALWAYS slide shader along smoothly as you use it. These come in three sizes and the medium and large ones are easier to use, as they will not cause the unpleasant ridges that sometimes occur with the small one. Beveller: When doing regular carving, use beveller to bevel outside.
When doing inverted carving, bevel on inside.
Veiner & Seeder are used following the above.
Background Stamps: When you are using background stamps, (or any tools!), make sure that, if you have two identical tools, that they ARE truly identical. All too often slight casting differences occur, and if you interchange them, your work will look mismatched. If you have an extra tool of one pattern, try filing it down to make a "smaller area" tool to fit in those tiny, awkward spaces.
Decorative Cuts: Here's an area that really proves the mastery of the craft!
Decorative cuts should be made so that they FLOW correctly and smoothly and that all cuts fade into the SAME spot, (like perspective in the drawing of a building.)
Pine Cone Design
Draw an egg, and divide as marked (Fig.A) Pine needles and stylized bud goes with this design.
Tools that are used are checkered
Figure carving tool # F 976 (very sharp) Also V 893.
Bevel the individual "petals" of the cones very deeply in the area marked darkly, to give real depth to the : carving. (Fig. "B")
Ci; Fig E * For carving techniques, see: ea "Inverted Leather Carving"
Al Stohlman.
NOTE TO NEW MEMBERS - BACK ISSUES OF CANADIAN LEATHERCRAFT Back issues of Canadian Leathercraft will be available for purchase at the Annual Meeting. Many of these have technical articles and patterns that may solve many problems for you, and we are reaching the last of the copies of many of the older issues. If any "run out" it is possible now to reprint them off the coloured paper... something not available to us until recently, without sacrificing quality.
Page 8 — How To Make A Lace Cutter- Jean Hunter
HOW TO MAKE A SIMPLE LACE-CUTTER
Jean Hunter
While it is not necessarily cheaper to cut your own lacing than to buy the commercial kind, there are definite benefits in being able to use a simple cutter and beveler. Commercial lacing now available is seldom beveled, and many of us like the way a beveled lacing lies when we use the double or triple cordovan stitch. With this simple little gadget it is possible to bevel commercial lacing and even to cut it down on the beveler if it is too coarse and heavy for our project. It is also valuable to be able to cut lacing to match a lining, or to be able to do a dye job with hand-cut natural lace to co-ordinate it with an article.
Leathers Suitable for Hand-Cutting: Use only top-quality leather as shown in diagram. Lacing cut from stretch (leg) areas
[Beside the diagram, a hand-lettered caption reads: "ON TRIM CALF YOU CAN CUT OUT FARTHER — ALSO ON LACING CALF, MOROCCO IS MORE STRETCHY."]
will not be good. A hand-crafted article is only as good as the lacing on it. Many people throw a good article away when the lacing gives up, not realizing that a repair job may be done.
Leathers good for lace cutting are: Morocco, calf, (I particularly like trim calf which cuts beautifully and dyes very well,) goat. I recently tried coloured lacing leather, Genuine lacing calf from Tandy's, and once I got the angle of holding my cutter right it gave a good mileage.
However, the same system of cutting as in the above diagram seems necessary. Lace cut too close to the leg or flank area tends to crack when pulled. As in other hides, these areas should be used for other projects.
Wood:
For a lace-maker that is to be used a great deal, hardwood, Maple or oak, is the best choice, since it holds the blades firmly for a longer period of time. However, hardwood is more difficult to work with, because the grain grabs the blade when you insert it, and it may become a contest of wills in which the tree may feel it is entitled to the last word.
For a first effort, it is probably better to use a soft wood. Construction will be given later.
Blades:
I use razor blades, either Schick or Safety.(Wilkinson's) If using Schick, cut in three pieces with a pair of blunt-nosed pliers, pressing downward to separate the end pieces. Cover the exposed part with a tissue or cloth - the free end sometimes springs when the blade snaps.
If using safety blades, break them in half horizontally first, then each part in half vertically. snap off the ragged edges, and protect the rough edges with masking tape if desired. i; Ee
A diagram note beside this paragraph reads "ON TRIM CALF YOU CAN CUT OUT FARTHER. — ALSO ON LACING CALF, MOROCCO IS MORE STRETCHY", and the drawing below it is captioned "SAFETY BLADE"
Page 9
Construction:. +:
For your first attempt, use a piece of wood 5" x 1" x 5".0r 7} For the Cutter: The thickness of the cut depends upon the weight of the leather to be cut. Morocco takes 4° a thinner cut than calf. Make the cut with a coping saw, hack saw, or other small hand-saw that can be Li easily controlled. Keep the cut perpendicular to the length of the stick, and keep the base of the cut level with the base of the block. Use a jeweller's file and/or fine sandpaper or emery board to smooth the sides and base of the cut, and to widen the cut if necessary.
Establish the depth of the blade set so that the space from the blade to base of cut gives the size (width, example 5/64) of lacing desired. You may get some help by measuring, but it is easier to lay a piece of sized lacing you want in the cut against set blade —> the base, holding it snug against 4 the block. Mark the top edge and set the blade there. Tap it with a mallet, or squeeze it in (straight) with a pair of wide-mouthed pliers. Try it out, and say a word of thanks if it is right. If not, pull the blade out and try again. Your block will be tolerant through two or three tries.
To make the beveler: This can be made on the same block, either on the same side as the cutter or on the underside. I like to use the opposite side from the cutter, having the blade also fastened on the opposite side.
Make a cut the width of the lace that was cut, being careful as before Lo to keep the cut straight and the base Aa square with the bottom. Finish again with file and sandpaper. Set the blade at an angle - about 15 or 20 degrees. Again, trial and error and a great deal of patience are needed. It takes a while to get the hang of setting these beveler blades correctly.
Do not wax or shellac the cuts. They will polish themselves with use.
USING THE CUTTER AND BEVELER
(For your first effort, use a scruffy bit of leather until you get the rhythm. After that, use only the best.) Cut a circle with radius of 6 or 7 inches out of prime centre of hide. (see beginning of article.) At centre, cut out a "doughnut hole" of radius 13". Let the circle rest on the cutter as shown in diagram, and gently case the leather on to the blade. Grasp the end of leather lace that will appear under the blade and draw the lace away. You should get a continuous run of very even lace right down to the outer edge.
The printed page reads “Your block will be tolerant through two or three tries”
Page 10
To bevel:
Skive the end of the lacing strip and trim to a SHARP point. Insert this point through the beveler ee between the blade and the base, coming through to the blade side. NOTE! Bottoms up! the lace most be inserted right side down so that the skiving will be from the flesh side. Draw it down and through as shown in diagram. When you reach the end. skive and point the end in hand and run it through to skive the other side. On heavy lacing there will be a thinning of the os Pure 2 EinGeR Downward> A 45° ANGLE whole lace. Try it out on a short piece for strength.
If your lacing has been cut from a coloured hide, dye the edges by dipping, or by running the flesh side of the lace over a piece of batting or a swab that has been saturated in matching dye.
If lacing has been cut from a natural calf (e.g. trim calf) and the whole thing is to be dyed, run it through a dye bath. I make a track with the wire end of a swab and run it through a bottle. Warning: do not use this dye bottle for airbrushing. There may be just enough fibre to plug the needle. Note: Water-based dyes are more tender on hand-cut lacing than spirit dyes. But whichever you use, rub lightly with lexol to restore the oils - not too much or it may discolour a dyed calf.
General Comment: Experiment with the angle of holding the cutter until you find the position that supports the round and cuts without cutting out. If the lace is continually breaking,either your holding angle is wrong for your leather and circle, or the cutting slot may be too narrow or too wide for your leather.
You know the old adage: If at first you don't succeed, try. try again! Never surrender!
Try other kinds and shapes of wood for your cutter. I made an excellent thonging cutter from one of those old-fashioned clothes pegs that are being used now for doll-making. Just cut it off to a comfortable length for handling, sand the existing slot, set the blade and voilà! You are in business. I have also made them out of old
PEG BROOMSTICK or DOWEL
broom or mop handles. These are not so easy, for the grain grabs the blade. In these the blade should be set at the widest part of the cylinder.
Page 11 — News Items & In Memoriam
CONSTITUTION COMMITTEE
We were pleased to hear that this newly formed committee is working on updating the Constitution as there are a number of items which, after 35 years, are no longer applicable.
Especially welcome is the leadership that Dorothy Muma will bring to this committee, through her many years of working with the Society in many functions.
New members are advised that there are some copies of the Constitution available, if you do not as yet have one, and it would be wise to arrange to pick one up by contacting the Corresponding Secretary. Copies are, however, limited, and will be updated after report of the Constitution Committee next year.
IN MEMORIAM
It is with regret that we must report the recent passing of Long-time members Evelyn Austin, (Hamilton Branch), and Alvin Haig, (formerly of Hamilton Branch).
Toronto members, Winnifred Coombs and John Trops have also recently passed away. These members will be much missed by all, and sympathy is extended to Bea Austin.
BRANCH CHANGES
Illness and changes in membership have forced both Barrie Branch and Belleville Branch to dissolve their membership as a Branch, and convert to Members-at-Large status for their members. We hope that this will prove to be just a temporary measure.
In the meantime, scheduling of reporting duties for upcoming issues of "Canadian Leathercraft" has been changed, and we are happy to report that Hamilton and Toronto members filled in quickly with information for this issue, and Hamilton Staking charge of the next issue, which will report all the happenings at our upcoming Annual Meeting in Barrie. Fall 1985 issue is to be in the capable hands of our newest Branch, Mississauga. Followed by Norland reporting for the Winter 1985 issue. (How time flies!)
RERERKXX EXECUTIVE MEETINGS SUMMARY ¥*¥****
In future issues, watch for a summary of items discussed at the C.S.C.L. Executive meetings, courtesy the President & Recording Secretary. This new feature, will, we trust, shed light on many decisions and discussions, and make EVERYONE aware of upcoming events, decisions and problems. Watch for it!!
["pick one up by" is set out here (not "jick... up-by"). The In Memoriam notice is hand-set in a cursive typeface, harder to read than the newsletter's usual type (the same pattern as 1985-86-winter p4) — set out here in full: "It is with regret...", "Winnifred Coombs and John Trops... recently passed away... will be much missed by all". Both names are already on the memorial record, sourced to this exact page; "John Trops" also fixed a long-standing data bug in the officer and award records, where a stray repeated "s" had corrupted his name to "Tropsss"/"Tropssss" in six rows.]
Page 12 — Looking at Leather & Designs- Gladys Riddell; Workshop Information. (May 1985)
- When choosing a design, try to find one which corresponds in shape with the article to which i%.is being applied. this will make the item look "suitable". - Place pattern on the leather lengthwise, avoiding any stretch that is not desired, which can occur on some hides. Test your leather to see how much stretch exists. - For the sturdiest articles, place the pattern piece that gets the most wear on the spine area of the hide, from the tail to the neck, taking advantage of the strongest areas of the hide
- Place pattern on the leather lengthwise, avoiding any stretch that is not desired, which can occur on some hides. Test your leather to see how much stretch exists.
in this way. - If you are making an article such as an album cover, book cover, or anything else that will be subject to a great amount of handling, use the butt part of the hide, (the back of the animal hide). This rule applies to all types of skins.
- Use simple designs, such as a curved branch of maple leaves, or a cluster of oak leaves, or any such simple natural design. - When your imagination runs dry, and you cannot plan a design of your own that suits you, try leafing through some magazines taking portions of designs from a number of different items. Then try to fit them together, to make an individual pattern. - Another idea that will help out a stalled imagination is to fold strips of paper, and cut out some freehand designs... see what you've come up with by random cutting, and you may be most pleasantly surprised! - When you have finished designing an article's shape, use the same techniques to plan a design pattern to decorate its' surface.
WORKSHOP - SAT. MAY 25/85
Carol McLean with
"DECORATIVE DESIGN CONCEPTS"
Time: 9:45 SHARP TO 4:30 P.M.
Place: St. Martin in the Fields Anglican Church, Toronto — 1 block north of Bloor & Keele
Bring your lunch - tea/coffee will be provided.
Workshop cost - $10.00 per person.
Materials List For Workshop
Bring drafting materials including: pencils & coloured pencils & inksticks, compass, ruler, square, gluestick, scissors, any templates for shapes, French curves, etc., lots of paper.
** Mark your tools & share them.
WORKSHOP AIMS
Each participant will be expected to have worked out, by the end of the day, a definite design for a project using a technique taught at workshop....
If you have a "special" project, bring it along to solve
[This notice is a hand-lettered flyer, boxed off from the typed article above; set out here as it is lettered.]