
An issue of the Society’s newsletter, transcribed from the original.
(12 pages, 1.5 MB)
the full-resolution scan, 31 MB, for close research
Page 1 — A SHORT HISTORY OF THE CANADIAN NATIONAL EXHIBITION
LEATHERCRAFT
Fall--Autumn,
October 1977
CANADIAN
Volume XXVI, No. 1
0045-5121
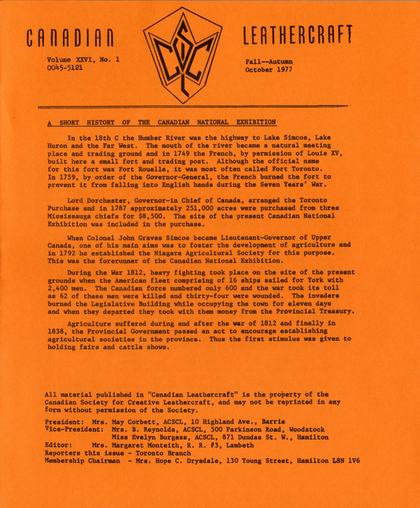
A SHORT HISTORY OF THE CANADIAN NATIONAL EXHIBITION
In the 18th C the Humber River was the highway to Lake Simcoe, Lake Huron and the Far West. The mouth of the river became a-natural meeting place and trading ground and in 1749 the French, by permission of Louis XV, built here a small fort and trading post. Although the official name for this fort was Fort Rouelle, it was most often called Fort Toronto. In 1759, by order of the Governor-General, the French burned the fort to prevent it from falling into English hands during the Seven Years' War.
Lord Dorchester, Governor-in Chief of Canada, arranged the Toronto Purchase and in 1787 approximately 251,000 acres were purchased from three Mississauga chiefs for $8,500. The site of the present Canadian National Exhibition was included in the purchase.
When Colonel John Graves Simcoe became Lieutenant-Governor of Upper Canada, one of his main aims was to foster the development of agriculture and in 1792 he established the Niagara Agricultural Society for this purpose. This was the forerunner of the Canadian National Exhibition.
During the War 1812, heavy fighting took place on the site of the present grounds when the American fleet comprising of 16 ships sailed for York with 2,400 men. The Canadian force numbered only 600 and the war took its toll as 62 of these men were killed and thirty-four were wounded. The invaders burned the Legislative Building while occupying the town for eleven days and when they departed they took with them money from the Provincial Treasury.
Agriculture suffered during and after the war of 1812 and finally in 1838, the Provincial Government passed an act to encourage establishing agricultural societies in the province. Thus the first stimulus was given to holding fairs and cattle shows.
All material published in "Canadian Leathercraft" is the property of the Canadian Society for Creative Leathercraft, and may not be reprinted in any form without permission of the Society.
President: Mrs. May Corbett, ACSCL, 10 Highland Ave., Barrie Vice-President: Mrs. B. Reynolds, ACSCL, 500 Parkinson Road, Woodstock
Miss Evelyn Burgess, ACSCL, 871 Dundas St. W., Hamilton
Editor: Mrs. Margaret Monteith, R. R. #3, Lambeth
Reporters this issue - Toronto Branch
Membership Chairman - Mrs. Hope C. Drysdale, 130 Young Street, Hamilton L8N 1V6
["Fort Rozelle" is set out here as "Fort Rouelle", matching the page. The masthead's "Fall--Autumn" and the article's "the War 1812" are printed exactly so.]
Page 2
In 1846 the Provincial Association and Board of Agriculture for Canada West was organized and under its direction, the first Provincial Exhibition was held in Toronto on October 21st and 22nd of the same year. The site was on the Government House grounds at the corner of King and Graves Streets (now Simcoe). For the next succeeding years the Exhibition moved to different sites in the province and in 1858, it was held in Toronto again for four days at the end of September. The first permanent exhibition building was erected on part of the Garrison Reserves just south of what is now the Ontario Hospital. Originally named the "Palace of Industry", it was commonly known as the Crystal Palace because it was build of diffused glass.
The Exhibition was very successful and Toronto civic leaders over the years became increasingly anxious to have it permanently located in their city. When the travelling fair was to return to Toronto in 1878, the Council appointed a deputation to be sent to Ottawa to negotiate for the land now within the boundaries of Exhibition Place and as a result the city of Toronto obtained a lease for a tract of land containing fifty-two and three-quarters acres and a roadway sixty-six feet wide leading east from Strachan Avenue. Later more land was added to Exhibition Park bringing the area up to its present 350 acres.
The city drew up a plan for the grounds that called for an expenditure of $150,000 but this was opposed and defeated by the Property Owners' Association. Council then placed $75,000 on the estimates and although this was again defeated, they went ahead using only this money and within 90 days had created one of the finest fairgrounds in the Dominion.
Toronto felt that now there was good reason to host the fair for at least two or three years if not permanently, but at the next meeting of the Agricultural and Arts Association, it was decided to hold the next fair in Ottawa. Toronto Alderman John J. Withrow shocked the meeting by saying that Toronto would hold its own great fair in 1879. He gained so much support that the Industrial Exhibition Association of Toronto was formed for "encouragement of agriculture, horticulture, arts and manufactures" and incorporated by act of legislature March 11, 1879.
The main object of the new Association was to stage a continuing exhibition at Toronto and it got support from grants and contributions of city businesses which would benefit by an influx of visitors.
The Industrial Exhibition in 1879 was the first actual Canadian Exhibition although the name was not officially changed until 1912. There were by then 23 buildings, the main one being another Crystal Palace.
Some 100,000 people attended that year and the Exhibition boasted 8,234 exhibits and more than $19,600 in prizes.
The Exhibition has continued to thrive ever since as a great deal of vigor and energy have always gone into the staging of this fantastic annual event.
Today the officers of the CNE are striving to make the Exhibition more than ever a display of Canadian creativity and progress in all fields of rational endeavour.
Condensed from an article by Mike Filey
Centennial Manager of C. N. E.
[Two stray underscores not on the paper are left out here, and the opening quotation mark of "encouragement of agriculture..." is restored. "build of diffused glass" and "rational endeavour" are printed exactly so.]
Page 3 — GLOVEMAKING
GLOVEMAKING by Clarice Packham, FCSCL and Dorothy Proctor, ACSCL
Gloves are the most important item of clothing apart from shoes. It has been said that hand-sewn gloves add "that touch of completeness" to your outfit and make you feel well-dressed even in your casual clothes.
The chief use of gloves is to keep hands clean and warm. It is best to start with a pair of slip-ons which can be made to match or tone with your general wardrobe colouring.
Leathers
Today the choice of leather is very limited. Chamois or chrome-tanned sheepskin makes very serviceable gloves. With suede gloves, make sure that all pieces shade darker when stroked from the finger tips towards the wrist. Deerskin
This is a very popular hide for durable wear. A hunter's licence is usually required for a tannery before the tanning. Deerskin hides are two-way stretch, so check for greater stretch to go around the hand.
Washing of deerskin gloves is done in mild soap flakes with luke-warm water. Wash gently. The badly soiled parts may be sponged with a pad of cotton dipped in the suds.' Rinse in several changes of clean luke-warm water until the water is clear. Squeeze out the surplus water from the fingers downward. Never wring. Pull into shape, and blow into the gloves to separate surfaces. Hang up by side seam to dry keeping away from direct heat or sunlight. When nearly dry, ease hand carefully into the glove to restore softness.
Different types of leather affect the size of gloves. The thinner and more pliable the leather, the large the glove; whereas, the thicker and more rigid the leather, the smaller the glove.
Never let your washable gloves get too soiled. Also it is very important to know that gloves have been dry cleaned, cannot be. washed.
Diagram A. — DIAGRAM C — DIAGRAM D
[The foot of the page holds three hand-lettered diagrams: Diagram A, the back of a glove with its decoration points; Diagram C, the two fourchette pieces numbered 1 and 2; and Diagram D, the left thumb piece over the trank, its label "LEFT THUMB" lettered upside-down. Read straight across rather than as separate captions, these run together as nonsense; set out here as three captions.]
Page 4
Glovemaking - continued
Pattern
To make a good-fitting glove requires a good pattern and precise workmanship. Purchase a standard glove pattern in the size you normally buy in a ready-made glove. Size can be ascertained by placing a tape measure around the knuckles. If it measures 7", buy a standard 7 size.
To draw your hand
The hand that you use most may be larger; therefore, it you are left-handed, draw the left hand and vice versa. Place your hand at ease on a flat surface using an unlined paper. Fingers should be together having the elbow well on the table to relax the hand. With a pencil held vertically, trace, starting at the wrist and continuing around the thumb and forefingers. Before removing the hand, mark the base of each finger clearly as well as the crotch (1) and the base of the thumb (2) See Diagram B.
Base of Index
Finger
Crotch
Base of Thumb
Correct hand Drawing — "B"
DIAGRAM E — Start
If your two hands vary in size due to enlarged joints, etc., draw two drawings.
Cut the hand drawing carefully down each finger to the base. Place this drawing on a standard pattern placing the base of the index fingers together (See 3) and adjust your hand drawing to the commercial or standard pattern by adjusting the finger lengths and shaping the tips the same as the pattern. Measure all fingers in the same manner working on the palm side of the pattern to measure finger lengths. Lengthen or shorten finger lengths on the back of the hand trank to correspond. Extend the length of fingers at the base on the back side only by 3/8" to allow for the webbed portion of the hand.
set out here as printed (the paper's own "it you are left-handed" is printed exactly so). The hand-lettered labels of the "B" hand drawing and DIAGRAM E are easy to run together; set out here as separate captions.
Page 5
Glovemaking - continued
Thumb
Measure hand drawing with a ruler from the base of the index finger to the crotch of the thumb, 2" to 2 1/4" is about average for 6 1/2 to size 7 Standard pattern. If the standard pattern measures 2" and the hand drawing measures 2 1/4", lower the thumb hole 1/4". If the thumb hole is too low, the glove will be uncomfortable when the thumb is sewn in. If it is too high, it is apt to tear.
Measure standard thumb pattern around your thumb and make length and width adjustments where necessary. The thumb piece when cut in leather, is larger than the thumb hole so stretching of the thumb hole helps to ease it in. (Similar to sleeve and armhole of dress.)
Make sure that all adjustments are made to your standard pattern prior to placing and cutting your leather. Make sure that you cut a pair of gloves. All pieces should be turned over for the second glove.
Decoration points
This is a personal matter, but the usual is 3 lines extending 1/2" above the middle finger line across the base of the thumb. The centre point is approximately 1/2" less in length.
Fourchettes
You require 6 fourchettes for each hand - 3 of number 1 and 3 of number 2. (See Diagram C) The index and little finger require only one fourchette each.
Sewing
Sew decorative points on the back of the hand using the stab stitch (a running stitch with two motions--one through and one back). Do not draw thread tightly. Waxing of thread is desireable with some leathers.
The thumbs are sewn in next. Take the left thumb and place it upside down on the left trank (See Diagram D) matching number 1 and 1, 2 and 2, and sew; likewise, match 3 and 3, and 4 and 4. (Number 4 always goes to the back of the hand).
Place the fourchette between the index and second finger with the deeper part to the back of the hand. The fourchettes may be adjusted for length from the tip of the fingers.
Take a thread approximately 30" in length and starting at the tip of the index finger, sew down. (See Diagram E). Reinforce at the base of each finger where the fourchettes are joined with two stitches.
Summarized from the Bulletin, Canadian Society for Creative Leathercraft, Autumn, 1957.
See also the Bulletin, Spring 1955 Highlights of Decoration.
["trank" is easy to misread as "thank", as on the previous page; set out here as printed.]
Page 6 — CANADIAN NATIONAL EXHIBITION HANDCRAFTS 1977 - LEATHERCRAFT; LARMOUR MEMORIAL LIBRARY
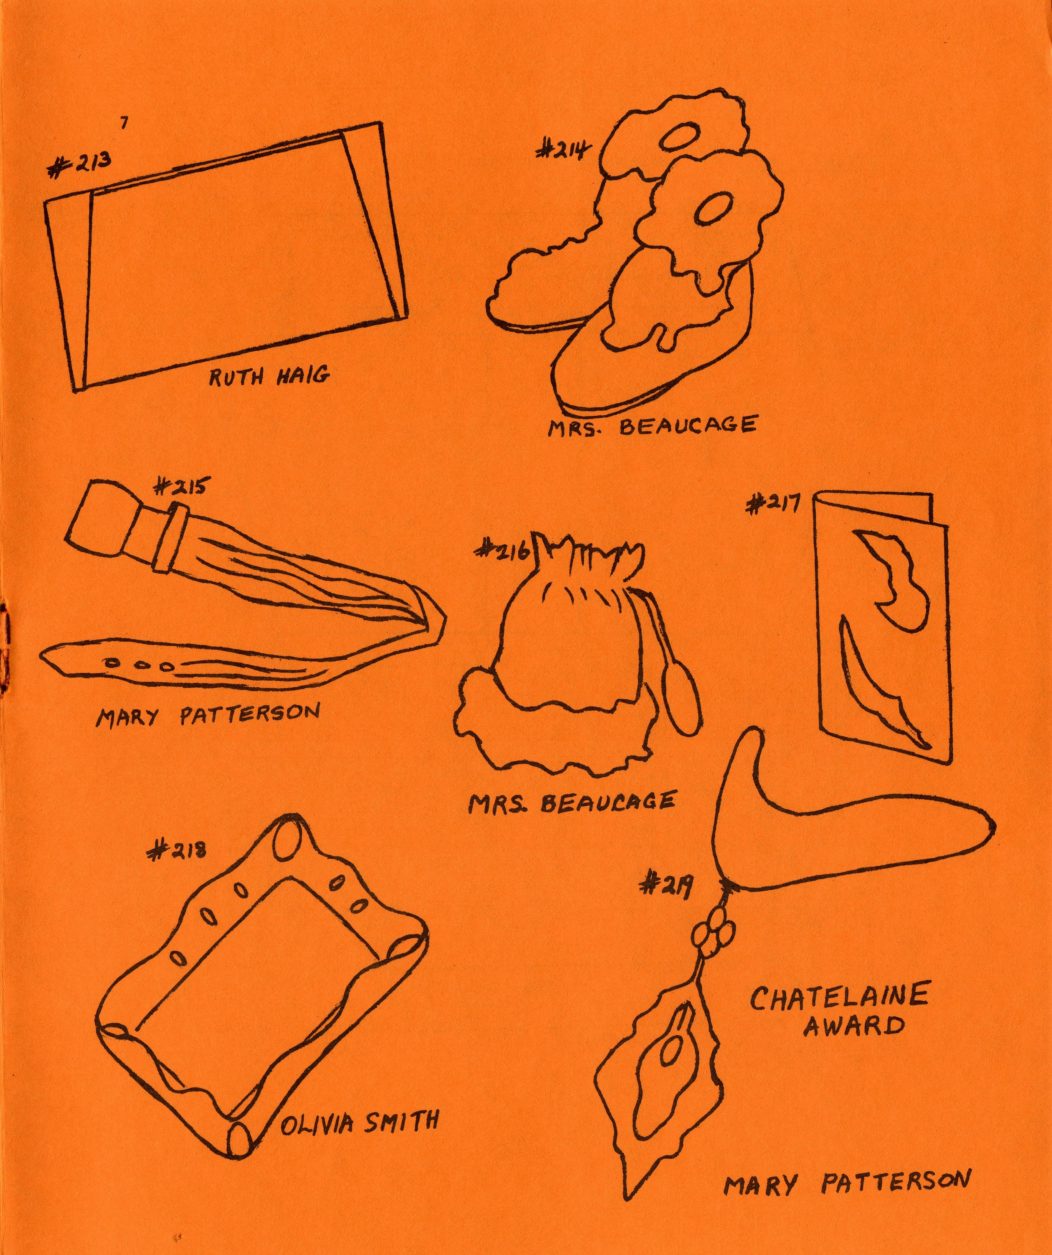
CANADIAN NATIONAL EXHIBITION HANDCRAFTS 1977 - LEATHERCRAFT
Household articles:
#213 Ruth Haig Hope Drysdale Clyde Barrett
Wearing apparel:
#214 Mrs. Beaucage Hope Drysdale Sally Barrett
Belts:
#215 Mary Patterson Ruth Haig Dave Elliott
Handbags etc;
#216 Mrs. Beaucage Robert Tallman Dave Elliott
Pocket-size items:
#217 Ruth Haig Mary Patterson Dave Elliott
Moulded articles:
#218 Olivia Smith Don Hannington Ruth Haig Jewelry:
#219 Mary Patterson Olivia Smith Hope Drysdale
CHATELAINE AWARD: Pendant by Mary Patterson.
ONTARIO CRAFTS COUNCIL
Irva Ford, Anne Hook and Carol McLean each had work accepted in their respective Regional Exhibitions; no leathercraft was chosen to go on to the C.N.E. Ontario Crafts Council exhibit.
LARMOUR MEMORIAL LIBRARY
If any Members-at-Large did not receive a note regarding the Larmour Memorial Library would you please let us know.
Also, if you are a member of a group and did receive a notification, please advise.
In order to take advantage of this circulating library make sure that your fees are paid for the current year.
Jessie Little and Jean Hunter,
Snelgrove, Ontario.
[The class label "#214" is easy to lose, with the Belts heading welding onto the Wearing apparel line; set out here separated and restored. "Robert Tillman" is set out as "Robert Tallman", as the page prints it. The three unlabelled columns are read as 1st, 2nd and 3rd prize, matching the p7 sketch plate's first-column winners.]
Page 7
[This page is a plate of sketches of C.N.E. Women's Division class entries, each numbered and captioned with the entrant's name, easy to read inconsistently. Transcribed below as printed.]
#213 — Ruth Haig
#214 — Mrs. Beaucage
#215 — Mary Patterson
#216 — Mrs. Beaucage
#217
#218 — Olivia Smith
#219 — Chatelaine Award — Mary Patterson
Page 8 — EMERGENCY KIT
EMERGENCY KIT — Designed by Jean Hunter
A. Buttons, Snaps — D. Safety Pins
B. Card holding lengths of thread of various colours tucks in behind this flap
C. Folded edge — this pocket holds blade, knife, or scissors; this pocket holds needle holder. Domes are put on last.
E. Blade holder — sharp edge, #1 punch holes
Saddle stitch — 5" of lace
F. Cardboard thread holder
G. Needle holder — cement or stitch flannelette or felt to hold needles
[Sewing/mending emergency-kit pattern designed by Jean Hunter; no award names. The hand-lettered part labels are easy to run together into nonsense; set out here as separate labels.]
Page 9 — CLEANING SUEDE
Suggested Leather:
Exterior - 2 1/2 to 3 oz. kip, cowhide, morocco, novelty leathers
Lining - good quality for best results
Pockets, Flaps - morocco
A - Cut one exterior and one lining.
B - Cut single. Edge-crease.
C - Cut pattern on fold of paper for pocket.
Edge-crease. Lace up as shown in diagram to separate into two sections.
D - Cut two. Punch holes for safety pins, snap, fasteners, buttons etc. with #0 or #1 punch.
E - Use only if you are using a blade. (Tiny knives or scissors are great when you can get them.) Punch holes as shown with small punch, and attach Schick single-edged razor blade, sharp edge to the fold, by threading it in with strip of lacing or cord. Fold and saddle-stitch as shown. Blade can be raised at the top and lowered by pulling the knotted end of the lacing.
F - Flanelette or felt should be cemented at ends for easy insertion of needles.
G - Cardboard thread holder can be smaller if desired.
Shape and size can be adapted to a good piece of scrap leather. It is a nice touch to tuck a needle-threader under the thread for an older customer.
CLEANING SUEDE
The collar of my suede coat gets soiled very quickly, and I'm getting tired of paying $15 or more to have it cleaned. Is there anything I can use to clean the oil stain off the collar myself?
I've been told that the dry powder hair "Shampoos" do a very good job on suede. You just dust the powder on the soiled area, rub it in with your fingers, and then brush it off with a wire suede brush. Any of the dry shampoos will do, I'm sure, and there's no danger of any of them harming the suede.
Here's another good cleaning treatment for stained looking suede. Brush it well and hold it over the spout of a steaming tea kettle or steam iron, just enough to raise the nap, but not long enough to get the suede too wet. Then brush the suede with a soft brush, and let dry.
Page 10 — Toronto Branch Programme for 1977-1978
Toronto Branch Programme for 1977-1978
Oct. 14 - Leather and Macrame
Carol McLean
Nov. 11 - Movie night
Leathercrafting movie
Dec. 9 - Slide and Sound presentation
"La Salle - Expedition 11"
- a re-enactment of the 1681-82 voyage of La Salle, by canoe from Montreal to the Gulf of Mexico
...Fred Leslie
Jan. 13 - to be announced
Feb. 10 - Nature-tan leather
Mar. 9 - Sale and exchange of tools, leather, etc. Special information notice will be sent... Apr. 14 - Embossing with colouring
Jessie Little
May 12 - Flower making
June 9 - An evening with the Larmour slides
Annual Meeting - 1978
Toronto Branch hosts the Annual in '78, from 6:00 p.m. Friday, April 21 through to 12:00 p.m., Sunday, April 23 at the Hotel Triumph. Weekend package rates.
Toronto Branch Sale
The Toronto Branch is planning a sale and exchange of tools and leather at their March meeting. Anyone who has tools that he wishes to dispose of, can mark them and send them to Toronto or plan to attend in person. More details of this sale will be put into a letter and sent to the members by Christmas.
Most articles require lace splicing--the ends will very often break away and wear. Trim lace end to half thickness for at least 1/2", cement and tap flat as usual. Sand lightly on flesh side of splice and lightly feed through. As you continue the lacing process, a thin coat of cement on the flesh side of the join helps to keep it secure and not pull apart. When lacing projects with corners; instead of going through the corner hole three times, I lace twice in the three corner holes (the last one before the corner, the corner one and the first one after). I find that this gives me a smoother, evener job going around the corner.
[The presenter credit "...Fred Leslie" is its own line on the page, not part of the sentence above it. The programme's "La Salle - Expedition 11" is typed exactly so on the paper.]
Page 11 — UPCOMING CRAFT FAIRS AND SALES
UPCOMING CRAFT FAIRS AND SALES
University of Guelph 3rd Annual Fair Sale and exhibition of Canadian crafts November
Room 266, University Centre, Univ. of Guelph
The Canadian Craft Show
Annual Christmas craft show and sale November 28 - December 5, 1977
458 St. Clements Avenue
Toronto
Merton Gallery Christmas Show
This show will have a doll theme in various media November 28, 1977
68 Merton Street, Toronto
The Craft Show for Christmas Giving Toronto area craftsmen's exhibition December 10-18, 1977
Southex Exhibitions, 1450 Don Mills Road, Don Mills, Ontario
Ottawa Christmas Craft Sale
Sale of the best in Canadian crafts December
Ottawa Civic Centre, Lansdowne Park, Ottawa
Leather '78
Hosted by Toronto
Etobicoke City Centre
Tentatively set for October, 1978
Brushes come in several grades, the best being the pure red sable. This is more costly, but you will find the sable will last a long time with proper care. Less expensive brushes may be used, but a poor grade of brush lacks the necessary spring and it is hard to keep the point from spreading, making it difficult to do good detail work. At least two sizes will be needed, an #0 and a #3. A #6 is handy for the larger pictures. A good washing in lukewarm water and mild soap is a must when the days work is through, if you want to keep your brushes in good condition.
Page 12 — Book Report
Book Report - by Carol McLean F.C.S.C.L.
MAKE YOUR OWN GLOVES by Emlyn-Jones
Publisher - G. Bell & Sons Ltd. London England
The author has nearly 40 years experience as a glove maker and has taught many Women's Institute groups and other organizations. She has judged at many competitions and exhibitions as well.
She designed this book especially for people who must work at home without the help of a teacher. There are numerous photographs and clear line drawings to help the novice as well as inspire the expert.
She stresses accuracy as being essential and also good eyesight.
Photos in the Historical Chapter contain many gloves courtesy of The Museum of Leathercraft, The Worshipful Company of Glovers of London and the Royal Scottish Museum.
Each Chapter is headed by a quotation of a famous poet or author concerning gloves and is a most refreshing way to begin.
She shows the proper method for measuring the hand with a gloving tape and how to measure the length of the fingers and transfer this to your pattern pieces on the right direction on the skin, tools and materials needed to make a pair of gloves.
The diagrams on inserting the courchettes and closing the finger-tips are especially well illustrated.
She even deals with "different" types of gloves such as gardening gloves, buttoned-cuff style--lined gloves and crochet backed gloves. There is a section on how to make mitten patterns--for the fur lined version.
Chapter 18 is devoted to care of the gloves and this section is followed by a complete size range of both ladies and gents glove patterns, a listing of good books on the subject and locations of supplies.
I am by no means a handy glove maker but after reading this book I do feel more confident about working on gloves and hope it will be of assistance to others as well.