
An issue of the Society’s newsletter, transcribed from the original.
(12 pages, 2.0 MB)
the full-resolution scan, 29 MB, for close research
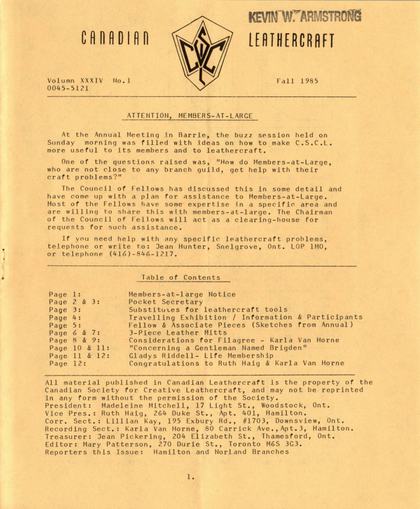
Page 1 — Members-at-large Notice
Canadian Leathercraft
Volumn XXXIV No. 1 Fall 1985
[Printed "Volumn," not "Volume" — the newsletter's own misspelling, kept as printed.]
0045-5121
ATTENTION, MEMBERS-AT-LARGE
At the Annual Meeting in Barrie, the buzz session held on Sunday morning was filled with ideas on how to make C.S.C.L. more useful to its members and to leathercraft.
One of the questions raised was, "How do Members-at-Large, who are not close to any branch guild, get help with their craft problems?"
The Council of Fellows has discussed this in some detail and have come up with a plan for assistance to Members-at-Large. Most of the Fellows have some expertise in a specific area and are willing to share this with members-at-large. The Chairman of the Council of Fellows will act as a clearing-house for requests for such assistance.
If you need help with any specific leathercraft problems, telephone or write to: Jean Hunter, Snelgrove, Ont. L0P 1M0, or telephone (416)-846-1217.
Table of Contents
| Page 1: | Members-at-large Notice |
| Page 2 & 3: | Pocket Secretary |
| Page 3: | Substitutes for leathercraft tools |
| Page 4: | Travelling Exhibition / Information & Participants |
| Page 5: | Fellow & Associate Pieces (Sketches from Annual) |
| Page 6 & 7: | 3-Piece Leather Mitts |
| Page 8 & 9: | Considerations for Filagree - Karla Van Horne |
| Page 10 & 11: | "Concerning a Gentleman Named Brigden" |
| Page 11 & 12: | Gladys Riddell- Life Membership |
| Page 12: | Congratulations to Ruth Haig & Karla Van Horne |
All material published in Canadian Leathercraft is the property of the Canadian Society for Creative Leathercraft, and may not be reprinted in any form without the permission of the Society.
President: Madeleine Mitchell, 17 Light St., Woodstock, Ont.
Vice Pres.: Ruth Haig, 264 Duke St., Apt. 401, Hamilton.
Corr. Sect.: Lillian Kay, 195 Exbury Rd., #1703, Downsview, Ont.
Recording Sect.: Karla Van Horne, 80 Carrick Ave.,Apt.3, Hamilton.
Treasurer: Jean Pickering, 204 Elizabeth St., Thamesford, Ont.
Editor: Mary Patterson, 270 Durie St., Toronto M6S 3G3.
Reporters this Issue: Hamilton and Norland Branches
Page 2 — Pocket Secretary
POCKET SECRETARY WITH CHEQUE BOOK by Betsy Rennie.
[The article opens with a hand-lettered pattern diagram, Fig. A and Fig. B: the outside piece of the pocket secretary, and the inside piece cut to approximately the same size before trimming. The dimensions are also given in the paragraphs below. The lettering, read from the printed page: FIG "A" is marked MIDDLE, POCKET and POCKETS; FIG "C" FOR CHEQUE REGISTER and FOR CHEQUE BOOK; FIG "B" 7 1/8", CUT 1 OUTSIDE, 2 INSIDE and APPROX. MEASUREMENT FOR INSIDE IS 7 1/8" x 6 5/8"; FIG "D" 7 1/8", 2 5/8", POCKET, CUT 1; FIG "E" 5", 3 1/2", 3"; and FIG "F" 4 1/4", 2 1/2", 3".]
The outside piece can be done with 2-3 oz. English cowhide, or a finished leather of your choice. You can carve the outside or leave it plain. Then dye BOTH sides of the cowhide.
The inside pieces are cut out of a finished leather. Two pieces are needed, size 7 1/8" X 6 5/8". I cut the inside pieces the same size as the outside pieces, and then trim them later. You require one pocket, size 7 1/8" X 2 5/8", and one of each of the smaller pockets as shown in the diagram.
On the outside piece, round off all four corners. On the inside, just round two corners, to match the corresponding outside piece, On one inside piece, you make a cut to fit your cheque book, (approx. 2 7/8" long), and then on the opposite side, either a horizontal or vertical cut to fit your particular book. This depends on what style your bank uses. I usually make this cut later, after I have determined the length of the leather. (See Fig. "G" below).
[A second diagram, Fig. G/H/I, shows the two alternative cuts for the cheque book -- make one or the other, not both -- and the placement of the smaller pockets.]
On the other inside piece, I place the pockets. (See Fig. "H" above). One is the length of the pocket secretary, and the other two fit in the corner. Round the corners of the two smaller pocket pieces.
Page 3 — Substitutes for leathercraft tools
Then hand sew or lace the outside. Before you sew or lace the piece sticking up the middle, make sure of the length when the item is folded closed. Trim if necessary and then round the corners to match the outside corners. (See Fig. "T" above).
Now that you have trimmed the piece going up the middle, but before stitching, you must make the cut to fit your particular cheque book. The the piece sticking up the middle may be sewn or laced.
If you have hand sewn your pocket secretary/cheque book, then the edges must be finished. First the edges are bevelled, then the edges should be lightly sandpapered to remove any fuzz. After this, dye the edges to match the finished item colour, and then edge dress it to make smooth edges.
From Hilda Chynoweth- Norland Branch.
The following item was sent in to "Make It With Leather" by a reader in California, hoping it would help some leathercrafters who haven't got all the tools they need.
| Tool required | Suggested substitute |
|---|---|
| 1. seeder or matting tool | sewing thimble |
| 2. ballpoint stylus | empty ball point pen |
| 3. veiner/fancy edge marker | fancy french fry cutter |
| 4. straight-edge marker | pizza cutter |
| 5. four-hole prong punch | a baby fork, flattened |
| 6. large area matting tool | very coarse sand paper, (pressed into damp leather) |
| 7. push beveller | iced tea or small baby spoon |
| 8. fancy flower stamp | check old silverware handles or bottles for patterns |
| 9. seeder | nail setters, which come in all sizes |
| 10. chisel | sharpened screw driver or wood chisel |
| 11. lacing setter | smooth edge pliers |
| 12. line openers | sharpened nut picks |
| 13. large flower outline | cookie cutter |
| 14. circle cutters | short pieces of galvanized pipe, sharpened on one end |
| 15. circle marker | use any round object to draw circle around |
| 16. fancy pear shapers | can be made from nails as well as bevellers or cams |
| 17. want to add colour, but afraid to dye? | use water colour pencils |
| 18. need patterns? | check children's colouring books |
[This list is printed as a two-column table, tool required against suggested substitute, numbered 1 to 18; set out here in the order the columns are meant to be read.]
Page 4 — Travelling Exhibition / Information & Participants
TRAVELLING EXHIBITION
Entries for the Travelling Exhibition numbered approximately sixty, with twenty-three pieces being chosen for display by judges Robert Muma, Paul Williams, and Alison Parsons, (representing the O.C.C.)
Dates and places for the Exhibition will be announced shortly, and at the same time we will be announcing the names of special award winners. In the meantime, the following artisans will have their work in the upcoming show. An honourariam of $20. per item has recently been forwarded to successful competitors, and we trust that these have all been received. If not, please contact our President, Madeleine Mitchell, at (519)-537-7821.
Rae Anderson: Black Mask- "Asleep"; Mask, "Monsieur Baboon",
Mask moulded hands- "Peekaboo".
Sharon Gogischwili: Red pigskin suede stationery folder; black calf bound book in morocco covered box.
Ruth Haig: Moulded box, cowhide dyed mahogany.
Lillian Kay: 12 Keyrings, assorted designs (1 entry) Jessie Little: Wallet, pine cone design.
Loreen Manuel: Pin, calfskin,rose design: Pin, small flowers, tan;
Pin, small flowers, orange dye.
Muriel McKnight: Pocket secretary, tan mission grain calfskin. Carol McLean: Box, tan morocco, 3-D design technique.
David McPherson: Belt, stamped design: fitted jewellery box, cowhide with acryllic dyes.
The original prints "acryllic", with a double l, kept exactly as printed.
Madeleine Mitchell: Miniature furniture set, cowhide dyed brown; executive portfolio, cowhide with morocco interior. Margaret Monteith: Book cover, carved cowhide in leaf deisgn. Gladys Riddell: Double picture frame, moulded cowhide, 3-D design;
Wallet of cowhide, woven design.
Karla Van Horne: Shoehorn, covered, cowhide, braided handle;
Belt, cowhide with saddle stitched decoration;
Canteen, cowhide covered, saddle-stitched.
We congratulate all those whose work was chosen to represent our Society, and, if the exhibit reaches your area, we trust that you will take advantage of the opportunity to view all the fine work on display.
Full descriptions of all pieces will he made in the programmes that accompany the work.
Our thanks to all those who spent time and effort in this project, with special note of the work done by our President, Madeleine Mitchell, in the development of the concept. Sincere appreciation from all concerned to Dorothy and Bob Muma for their gracious contribution of both time and space for jurying of this show, acceptance of parcel delivery, and storage of items.
Page 5 — Fellow & Associate Pieces (Sketches from Annual)
[The page number printed here is faint and could be mistaken for "De"; it is page 5. "Trncated" is the newsletter's own typo for "Truncated," kept as printed.]
From the Annual: FELLOW PIECES - RUTH HAIG
Leather covered Bottle · Leather "Lunch Bucket" · Paperweight (leather) · Trncated Leather Box
Marks: 90.0% Total
ASSOCIATE PIECES - KARLA VAN HORNE
Black Belt with Decorative Stitching · Figure Carved Banker's Case · Leather-covered Canteen
Marks: 84.5% Total
Page 6 — 3-Piece Leather Mitts
3-PIECE LEATHER MITTS by Peggy Weaver (Norland)
[The article opens with a hand-lettered diagram, Fig. A through Fig. G, showing the hand-outline pattern pieces, the thumb cut, and the punched holes for lacing that the paragraphs below describe step by step. The lettering, read from the printed page: Fig. "A" 1" LONGER above the hand outline and 1" WIDER on each side; Fig. "B" 6" FROM TOP TO THUMB CUT., 1/2" ON EACH SIDE OF THUMB. and, on the bracket, THUMB CURB; Fig. "C" FOLD UP.; Fig. "D" 7" LONG.; Fig. "E" THUMB and 7" LONG.; Fig. "F" PUNCH HOLES 1/2" APART and GLUE 1/4" FROM EDGE.; Fig. "G" START., CURVE and CROSS.]
Materials: deer skin or moose hide
Punch holes: 2.8 mem. (or 2nd smallest hole in rotating punch)
Tt doesn't matter, when choosing hides, if there are scars, as this enhances the mitts, (unless they are for a show competition).
Check hides for thin areas, though, and use these on the back of the mitts where there will be less wear.
MAKING the
PATTERN:
Place your hand palm down on cardboard or paper, and draw around it, leaving at least an inch on either side of small and index fingers. (Fig. "A"). Next check how far up the wrist you wish to go for length, as these can be as short or long as you wish.
Approximately at the thumb joint, narrow the pattern in, so as not to have a big opening at the wrist.
Make two patterns- one for the palm of the hand and the other for the back of the hand. The second one will he easier to cut for the thumb.
Fig. "B". Leave approximately 6" from the top of the mitt to the thumb cut. Now fold the thumb up towards the top of the mitt. Fig. "C".
Measure the thumb to wrist approximately 7" long. (Ex. "D"). These may look big at this point, but allowance must be made for the lining, and for the lacing.
Page 7
Now you have three pieces, turn them over, and you have the other hand pieces.... but be sure to mark one side "LEFT" and one side "RIGHT" on ALL THREE PIECES!.
ASSEMBLING MITTS:
Take rubber cement and glue the edges a wee bit, (no more than 1/4" from the edge on the inside of the mitts. Make sure no glue gets on the good side of the leather, as it darkens and doesn't look good. If the pieces are not fitting quite correctly, just pull a little and stretch the mitt to size.
Punch holes 1/4" away from the edge and about 1/2" apart around the mitt. (Fig. "F")
Cut your lacing around outside of the hide, about 3/8" wide and as long as possible.
Start lacing over edges of mitts at the outside of the hand, and continue down to the outside of the thumb. Then cross and go back to where thumb joins the back and continue around the thumb. Starting at the thumb go back to the curve cross to the back and go back to outside of hand where you started. (Fig. "G"). This makes an X and covers the edges.
A small hand-drawn X in the margin here is labeled "LACE HOLES," marking the crossing pattern just described.
Now you make a lining, cut a little smaller, or knit liner mitts. Peoples hands are of many different shapes and sizes, and I wish you luck in fitting vours!
******* FOR YOUR ATTENTION ********
Leathercraft Designs (Canadian distributor of polished solid brass buckles for those who prize quality). 3 Scotsburn Ave., Dartmouth, N.S. B2X 1P8. Please send $l. for catalogue. Jamie I. Hartling, Owner/Manag.
(Ed. Note: During a summer trip to the Maritimes, Hope Drysdale dropped in to meet Jamie Hartling;. and found that this was a new venture for him, as for the past 10 years he has been working as a leathercrafter. Much luck, Jamie).
Leathercraft, Handcraft and Painting Show: Sunday Dec. 1st Toronto Branch member, Hermie Schestak, once again is planning to hold her annual show and sale, and would welcome all members and friends who would like to attend.
Place: B-1 Level- 60 Mountview Ave., Toronto, (just east of High Park, north of Bloor St. Parking at rear of building.
A special feature of this years crafts are Hermie's "Heritage" Christmas decorations.ccceceee
A REMINDER: CHRISTMAS CRAFT SHOW& SALE- Automotive Building, C.N.E.
"One of a Kind" Show.
Fri- Nov. 22 to Sun. Dec. 1st.
Page 8 — Considerations for Filagree - Karla Van Horne
4,
CONSIDERATIONS FOR FILAGREE -
WHAT TQ MAKE AND WHICH PATTERN TO CHOOSE by Karla Van Horne.
Through experience, I have found that the best items to filagree are either small or medium in size, that is, anything which would normally require 2 1/2 to 4 1/2 oz. leather. This includes wallets, coin purses, small handbags, clutch purses and other similar items. It also includes heavier items on which a small area is to be filagreed and then appliquéd on to heavier leather-- as might be the case on a plaque or corner piece on a very large handbag or briefcase.
Under no circumstances make anything with filagree for anyone who will place a great deal of stress on an item. For instance, no matter how much the telephone repairman begs and pleads, do not filagree his lifebelt. Similarly, do not filagree an over-all pattern on a briefcase, handbag or clutch purse for anyone whom you know is a chronic over-loader of these items. Overloaders will cause severe stressing on the lining and the delicate filagree which may eventually cause separation of the filagree or tearing of the lining.
Remember. Filagree looks great, but must be treated with respect.. Choose a design with areas which can be safely removed. Don't for instance, take one with massive areas of backgrounding in combination with delicate floral pattern. If your pattern doesn't have a border, draw one in. If a border exists but is inadequate, (i-e. doesn't have enough pattern touching it), redraw the border or increase pattern lines so that you will have more pattern on the border. Remember, there is a direct line between strength and area removed. The floral portion and border are there to hold things together. The less removed, the better.
Furthermore, if you are making a wallet or some such item which receives stress along a fold, try to find a-pattern where the filagreed pattern areas are either very small, very few, or entirely absent over the area of the spine.
Regarding belts: Remember that your pattern must be smaller in width than would be the case in normal carving. This is because you must allow room for sewing or lacing. In either case, your border should be a full 1/4".
If lacing, you should also remember that the belt width will increase by 1/4" or so due to the thickness of the lacing. You must therefore account for this. (e.g. If you are making a 1 1/2" belt, start with a blank of 3-4 or 4-5 oz. leather, just a hair under 1 1/4" wide. If the borders are 1/4" wide, (total 1/2" of width of belt), you have approximately a 3/4" strip left for carving or filagree. )
It must be emphasized here that the area of the billet where the buckle holes are placed receives a great deal of stress. It is a very good idea not to cut the first 10" of the billet. The alternative is to skive down the first few inches. of the billet prior to carving abd filagreeing.« Also skive this area on the backing piece. This will make a more flexible tip so that the first inches of filagree are not stressed badly when tucked through the belt loops. UNDER NO CIRCUMSTANCES FILAGREE WHERE THE HOLES ARE!!
The buckle end should also not be filagreed further than 2" to3" before the fold over point. Again, this is for strength.
Page 9
FURTHER CONSIDERATIONS:
J. Order of tooling. This must be, WITHOUT EXCEPTION, camoflage, pear shader, beveler, then the rest. If this order is not maintained, you will get everything from a subtle to a great distortion of the symmetry of your pattern.
2. Cutting. Use a SHARP knife. This is NOT to be ignored. Use only the sharpest, pointiest knife in your arsenal. If you don't, you will only work harder, chew the leather up, and be more than disappointed with the results.
I prefer using a # 11 scalpel handle with a #3 blade. There is a similar blade available from X-acto. If you can get a razor edge on a filagree blade, use it-- but only if it is RAZOR SHARP. You can also use drive punches to get into small round areas. They can be either a help or a hindrance. Use them if you like-- but, again, only if they are sharp, sharp, sharp.
3, Finishing. Jf you have used a sharp knife, you shouldn't have too much trouble with either dyeing or finishing. Dye should be applied either by spraying, antiquing, or brushing on to the edges. Finish should also hit ALL of the cut edges- Do not worry about dribbling on the flesh side. This can be lightly roughed up later with sandpaper or emery cloth. All edges must get some finish as this will prevent furry edges later on.
4, Glueing. As stated previously, the finish which has dribbled on to the flesh side should be lightly sanded. To do this, sand away from the cut portion to the inside of the pattern. This way allows you to no destroy the nice, crisp edge your finishing job has given you.
Apply your glue to the flesh side only. Do not put any glue whatsoever onto your backing piece! DO NOT UNDER ANY CIRCUMSTANCES USE BARGE Cement. It won't work. Use either Helmifix, Tandy Contact Cement, or LePage's Gel or regular contact cements. If the article is not to be flexed a great deal, you can use white glue.
Allow the contact to dry to the point where it is extremely tacky. Place your filagreed piece gently-- and accurately-- down onto the smooth, flat piece of backing leather. You only get one chance. Do not move it around by accident. Immediately place a heavy weight on top of the piece of leather. Allow the glue to set absolutely 100% before proceeding.
If you have accidentally gotten glue on to the edges or onto the backing leather, it may be possible to get the majority of it off; use a contact or rubber cement pick-up and a pointed modeller on edges and smooth backing leathers and a bit of emery paper-- delicately-- on sueded backing leathers.
5. Backing leathers. Metallic leathers, textured leathers such as morocco and snake, suedes, etc. all look very good depending on your taste and preference. Bright or muted colours can all be used to advantage.
Hint: If you are using anything but the heaviest of suedes, hand sewing or lacing can be done to finish the project. If heavy suede is used, it is often advisable to lace, particularly if you know you cannot get a good, hard edge. It is good practise to try edgeing a piece of your backing material prior to assembly to see if a good edge will result anyway.
Page 10 — "Concerning a Gentleman Named Brigden"
Concerning a gentleman named Brigden - by Fred Brown.
Geldard Brigden, known as "Gel", is indeed a man of many talents, including leathercraftsman, weaver, silversmith, potter, wood and soapstone sculptor, pewter worker, enamilist, gardener and business man. These have all been amongst his activities. His business connection was as Vice President of the family firm of Brigden Ltd., from which he retired about 20 years ago.
Gel's artistic interests were no doubt encouraged by the outstanding career of his uncle, Fred Brigden, who gained international fame as a great Canadian artist.
Gel's membership with C.S.C.L. goes back to the beginning of the organization, at which time he received instruction from one of our finest craftspersons, the late Rita Larmour. As a continuous member of C.S.C.L. and the Toronto Branch, Gel served for years on the executive and has always been ready and willing to demonstrate or lecture not only on leather, but also on his many other talents. He was honoured at our 1985 Annual with an Honourary Life Membership for service far beyond the call of duty.
It is impossible to talk about Gel without including his. gracious wife Lorna, who has also been of great service to our Society. Lorna is a lawyer, and was responsible for putting our Constitution and Bylaws in proper form twenty-five years ago.
Lorna hosted many executive meetings in the friendly Forest Hill home to which she and Gel moved in as newlyweds. Executive members always looked forward to those occasions during which the Brigdens made an executive meeting into an interesting event. Lorna shares Gel's great sense of humour; hers is Irish, his is English, -a great mixture!
He has sat back quietly at some executive meetings, laughing inside as some of the discussions "warmed up" and proper parliamentary procedure was not exactly the order of the day.
And then we have Gel Brigden as a member of the Board of Directors for the C.N.E. A man with a dream;,a dream that it would be possible to have an arts & crafts hobby show at the annual Exhibition. Somehow he managed to convince the rather"hard-headed" members of the Board that this would be "just what the Old Ex needed"!
Page 11 — Gladys Riddell- Life Membership
So now we have the "Founding Father" of Arts, Crafts, and Hobbies, already a member of the various guilds, given the task of selling the idea to the guilds, thus forming the core of the show. He did his job well and the show opened in 1964 and as we all know, the rest is history.
As a member of the Board of Directors, Gel was appointed Chairman of the building we first occupied, and was, without the slightest doubt, the most devoted building chairman the "Ex" ever had, with his daily visits, his concern for exhibitors, and his tremendous sense of humour which at times proved to be the high spot of the day. The activities of Gel at the age of 85, and of Lorna, are somewhat curtailed now due to health problems, but their interest is still at peak. At the 1985 Annual, no one was more interested in proceedings than Gel. His talk following the receiving of his Life Membership was an interesting, off-the-cuff discourse on what the various craft ventures meant to him over the years. He regrets that he has been unable to write a thank-you letter and wishes to express his sincere appreciation.
To Gel and Lorna we say, "a tip of the hat" to two wonderful people!
Life Member - Gladys Riddell -
No one in our Society deserves the recently bestowed honour of Life Membership, CSCL, than does Gladys Riddell. Through her twenty-odd years of leatherwork she has been actively working for the Society, as Exhibitor, Demonstrator, Toronto Branch President (for well over a dozen years!), and as member of the Executive Council. As well, Gladys managed to fit in the heavy task of Show Chairman of the leathercraft booth at the C.N.E., working with Jack Meharg and George McPhail for many of the shows.
Gladys received her early training with the reknowned late Don McKinnon, and also studied with Fred Brown at Central Technical School, Toronto. At present, Gladys still attends classes at West Park Collegiate, working with Bill Wilder, where many new students find her helpful, kindly suggestions and support of their first endeavours most supportive.
As a Fellow of the C.S.C.L., Gladys puts in numerous hours helping with judging for our various events. As well, she has often been
Page 12 — Congratulations to Ruth Haig & Karla Van Horne
[The words "C.N.E." are printed on their own short line, breaking the sentence; given here run on with the rest.]
totally responsible for judging the Leathercraft classes at the C.N.E. Although retired from the Bell for a number of years, Gladys has not yet decided to "slow down" during retirement, and still competes regularly in the Annual, and the Biennial Shows, winning many awards, including the prestigious "Michigan Artists Award for Most Original Entry" at the Leather '76 Show, at Ont. Crafts Council new building. This was for a suberbly crafted solid leather ship. At present, some of her work will be touring with our recently judged special "Travelling Exhibition",
["suberbly" is printed exactly so — the Society's own transposed letters for "superbly", kept as printed, as is the lower-case "ship" in the same sentence.]
Congratulations on your achievements in the craft, Gladys, but most of all, a vote of thanks from all of us whom you have helped so freely throughout, the years!
Congratulations to Ruth Haig and Karla Van Horne Ruth received her Fellowship this year, with the presntation being made at the 1985 Annual, held in Barrie, Ont. Ruth has been a member of C.S.C.L., and the Hamilton Guild for approximately twenty years. She has made use of her talent in sales,as a member of "Textures" of Hess Village. Ruth is not only a valued and active member in our guild, but is also President of Artisans.Ruth is now Vice President of C.S.C.L. where she is most helpful to all.
Karla also received her Associate Certificate at the Annual in Barrie this year. Karla, although a more recent addition to our Hamilton membership, is also a valued participant in both C.S.C.L. and the Hamilton Guild. At present, she is serving. as Recording Secretary for the C.S.C.L.
Executive Council. Karla, too, has made use of her talent as a member of "Textures" and as an active participant in the Guild and in Artisans. Keep up the good work, Karla!
Both of these leathercraftpersons have been valued contributors to many issues of "Canadian Leathercraft", and both are represented in the selections made for the "Travelling Exhibition".
[Restored against the printed page: "and both are represented", and the sentence ends with a full stop. "leathercraftpersons" is printed as one word and stands as it is.]
Congratulations to Ruth and Karla from all CSCL members!
"Make IT WITH LEATHER" subscribers: If you have not received issues, please contact Karla Van Horne, 80 Carrick Ave., Apt. 3, Hamilton, L8M 3W1. or your Branch Representative. Back issue may be made available to Karla to fulfill subscriptions - New issues will be forthcoming later!
Thanks to Hamilton & Norland for this issue. Toronto will be in charge of Jan '86 (Winter) issue.