
An issue of the Society’s newsletter, transcribed from the original.
(16 pages, 2.9 MB)
the full-resolution scan, 39 MB, for close research
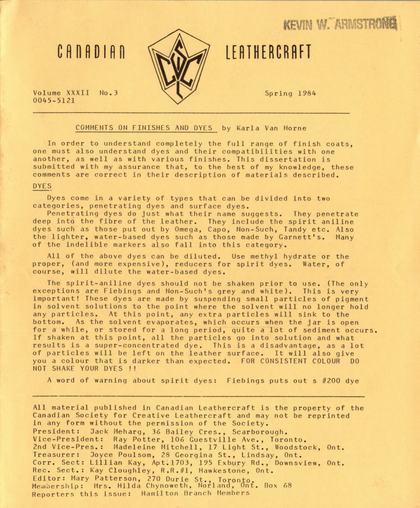
Page 1 — COMMENTS ON FINISHES AND DYES
Canadian Leathercraft
Volume XXXII No.3 Spring 1984
0045-5121
COMMENTS ON FINISHES AND DYES' by Karla Van Horne
In order to understand completely the full range of finish coats, one must also understand dyes and their compatibilities with one another, as well as with various finishes. This dissertation is submitted with my assurance that, to the best of my knowledge, these comments are correct in their description of materials described. DYES
Dyes come in a variety of types that can be divided into two categories, penetrating dyes and surface dyes.
Penetrating dyes do just what their name suggests. They penetrate deep into the fibre of the Leather. They include the spirit aniline dyes such as those put out by Omega, Capo, Non-Such, Tandy etc. Also the lighter, water-based dyes such as those made by Garnett's. Many of the indelible markers also fall into this category.
All of the above dyes can be diluted. Use methyl hydrate or the proper, (and more expensive), reducers for spirit dyes. Water, of course, will dilute the water-based dyes.
The spirit-aniline dyes should not be shaken prior to use. (The only exceptions are Fiebings and Non-Such's grey and white). This is very important! These dyes are made by suspending small particles of pigment in solvent solutions to the point where the solvent will no longer hold any particles. At this point, any extra particles will sink to the bottom. As the solvent evaporates, which occurs when the jar is open for a while, or stored for a long period, quite a lot of sediment occurs. If shaken at this point, all the particles go into solution and what results is a super-concentrated dye. This is a disadvantage, as a lot of particles will be left on the leather surface. It will also give you a colour that is darker than expected. FOR CONSISTENT COLOUR DO NOT SHAKE YOUR DYES !!
A word of warning about spirit dyes: Fiebings puts out s #200 dye
All material published in Canadian Leathercraft is the property of the Canadian Society for Creative Leathercraft and may not be reprinted in any form without the permission of the Society.
President: Jack Meharg, 36 Bailey Cres., Scarborough. Vice-President: Ray Potter, 106 Guestville Ave., Toronto.
2nd Vice-Pres.: Madeleine Mitchell, 17 Light St., Woodstock, Ont.
Treasurer: Joyce Poulsom, 28 Georgina St., Lindsay, Ont. Corr. Sect: Lillian Kay, Apt.1703, 195 Exbury Rd., Downsview, Ont. Rec. Sect.: Kay Cloughley, R.R.#1, Hawkestone, Ont. Editor: Mary Patterson, 270 Durie St., Toronto. Membership: Mrs. Hilda Chynoweth, Norland, Ont. Box 68 Reporters this issue: Hamilton Branch Members
["Fiebings puts out s #200 dye" is printed exactly so (not "a #200 dye"); kept as printed.]
Page 2
in tan, light brown, mid brown and dark brown. These are heavily pigmented dyes which must be shaken very, very well. They are to be avoided; they are actually a buffing compound in suspension and meant to be used with machines. These dyes have much too much pigment for the work that most of us do. This dye tends to smear when applying finishes and leaves a great deal of surface residue. It is important, therefore, to check your dye labels for the #200 or to simply avoid bottles of those colours with a great deal of sediment in the bottom.
Black spirit dye is an odd "beast". It is not like the regular Spirit dyes because it has a resin in it, therefore having a tendency to clog up air brushes and regular dye brushes. It can be cleaned off and the gum removed with lacquer thinner.
Be further aware that not all blacks will require a preparation coat of brown, blue, or green. Newer formulations of Tandy's Super Dye and Fiebings will NOT work over a prep. coat. You have to use black and black alone.
White and grey are also strange. They are a heavy pigment in solvent, must be shaken well and don't seem to penetrate very well. Many coats are required and colour often still shows the natural undertones. These two colours are also NOT TO BE MIXED WITH OTHER SPIRIT DYES, as they are incompatible.
The penetrating dyes can be applied by airbrush, regular brush, dauber, sheepswool applicator or sponge. Take care to get an even coat or they will look streaky.
Surface dyes include acrylic paints, antique finishes and antique dyes.
Acrylic paints break down into acrylic artist's colours, acrylic dye from the Fiebings company, and Tandy's Cova Dyes. Believe it or not, all these are compatible with one another. You can mix Cova dye with artist's colours or acrylic dye to make new colours. They all thin down with water and require no final finish. They don't fade out with time and sunlight as do some of the penetrating dyes and, generally speaking, don't tend to go streaky when applied. They also give magnificent whites and greys.
They do, however, have two drawbacks. They obliterate the grain of the leather- unless you do acrylic rubs carefully- and they crack off if flexed a great deal. (Unless you do acrylic rubs again.) Note: Fiebings acrylic dye tends to be Slightly more crack-proof than the others.
Acrylic dyes and paints are best used either..as acrylic rubs, light washes, or for spot dyeing only. It is best to not use them on articles requiring heavy duty use. Always stir the paint to mix them instead of shaking them, as shaking causes air bubbles. Work quickly.
Antique finishes are really not finishes, but are called by the term finish as they are surface treatments, as are finish coats. They fall into three types:
There are water-based types like Mac's (which is no longer manufactured and has been replaced by Tandy's own recipe), Tandy's Early American, and Fiebings Glo Getter. (There is also a similar Tandy product called Leather Glo.) Beware of the Tandy types (unless tested), as there may be some inconsistency in batches. Tandy Antique may cause a pink tone, and: Early American sometimes causes a green tinge. After testing, if these problems occur, mix Antique with Early American half and half to cure, as the pink cancels the green tone into a neutral brown similar to Fiebings Glo Getter in colour.
Page 3
Antique finish comes in two types; a turpentine-base type which comes in paste form from Fiebings and an acrylic base type from Fiebings and Angelos. Both types give nice effects on stamped and carved items, but care must be used; they tend to get dry and caked in the middle of things, which tends to give the leather a slightly soiled look. They are also difficult to apply without streaking or without getting light and dark spots on large projects such as ring binders, handbags, etc. They also have the tendency to lighten up when the final finish is applied. The final finish is an absolute necessity with the turpentine type- Resoline and TanKote are particularly good.
Antique finish of the turpentine and acrylic type is best applied with a shearling swab or sponge, though the sponges are not cleanable afterward.
Fiebings makes an antique dye that is very penetrating because there is actually a spirit dye in it. I'm not entirely sure what the base is, but it washes out of the jars quite well with water. This is a gel and can again be applied with sheepswool swab or sponge. Again, one has to work quickly and there will still be streaking problems as well as the difficulty with light and dark patches on large projects. This type does not tend to smear around very much when finishes are applied, though it does tend to fade out a little as it dries.
Garnett antique dye is one with which, unfortunately, I have had very little experience. It seems to fall midway between Mac's and a regular penetrating dye, since it penetrates deeper than Mac's but not as deeply as regular penetrating dyes do. It should be noted here than Garnett's Antique dye should not be used on any leather which has been oiled. This is true for most water base dyes, but does not necessarily apply to ALL water-based finish coats. Experiment on scraps first before committing yourself to your project.
One of the nicest things that antiques do is to tone down gaudy dye jobs, or particularly strong dyes. It also brings out stamping, bevelling, veining, etc., as well as natural marks (and sometimes flaws!)
When using the antiques with other dyes:
Put spirit dyes on first. They will not penetrate through the antiquing. Acrylics used in conjunction with turpentine base antiques, spirit base antiques, and regular spirit dyes are usually not a good combination, though, sometimes this situation is unavoidable. If this is the case, a little creative fading with bright sunlight will generally bleach the acrylic back to the original and desired shade without affecting the tone of the other dye.
And now to the finishes.
Prior to the invention of plastic-like lacquers, man-made resins and acrylics, there were only oils and waxes. (Though I have heard of people using varnish and shellac as finish coats.) Today, oils and waxes have had polymeric substances added to them, allowing the craftsperson a tremendous variety of finishes from which to choose,
First the oils. On supplier's shelves one will meet up with pure neetsfoot compound, mineral oil, glycerine, linseed oil, mink oil, lanolin-type-based oils, silicone-based oils, and, from Fiebings, a combination of mink oil and neetsfoot compound.
Pure neetsfoot oil is made from the hooves of cattle. It has a heavy, fishy aroma. It often contains odd, floating bits of material which, fortunately, don't do it any harm. (I think these occur when the oil is subjected to excess cold, but I'm not entirely sure.) Pure
["fall]" is set out here as "fall" and "fishy from@&" as "fishy aroma."]
Page 4
neatsfoot is a heavy oil and is therefore easy to control. A tiny bit of this goes a long way towards darkening and enriching the leather. On veg. tanned leathers, it is also good preventative medicine before applying the final polish coat and will prevent the leather from drying and cracking. Care should be taken, however, not to overdo this, as too much neatsfoot will cause stitching to rot. Please use common sense,
Neatsfoot compound is a mixture of the oil and petroleum by-products usually more by-product than real oil. It usually has a smell similar to kerosene. Two saddle-makers I've talked to say that there is no difference between compound and the real McCoy, BUT two others say that the petroleum products turn the leather black and "take the life" out of the fibres. I've used both of these products, and, in some cases, have found a certain greying to occur with cheaper makes of the compound. I've also noticed that the pure oil gives a much nicer golden tone to natural leather. The compound starts off giving a nice golden tone and then fades to a much lighter tone. This latter trait may or may not be advantageous. I much prefer the real thing, myself, mostly because I like the colour it gives me and the fact that it seems to penetrate better. I think it is better for the heavy duty items with which I am involved, however, I use the compound for small, light-use items.
Because pure neatsfoot will cost anywhere from two to three times as much as the compound, one can get around this cost factor very nicely by using pure oil one to one parts with pure glycerine, (available at most drug stores). I have not tried this myself,.but relive it is worth investigating. Another alternative, highly recommended to me by at least two saddlers, is a silicone-lanolin saddle oil put out by the Fiebings people. A light coat of this doesn't seem to alter the colour to any great degree, which can be advantageous where you have to oil, but don't want a colour change, or where you want an oil finish without discolouration.
The most important use of oils is, of course, to prevent drying out of the leather when it is used- or abused. On cases, holsters, scabbards and other related gear, it is often a good idea to just use oil. In this way, the item can be easily maintained either by saddle-soaping, light re-oiling, or both, as there is no waxy or plastic coating to go through. By the way, if you oil, do NOT use a wax shoe cream, polish coat or similar type of finish. You will not get a decent shine. The plastics and resins are a better choice as final finishes. A mixture of 3 parts polish coat to i part Resoline seems to work where polish coat alone might not.
Linseed oil: I try to avoid this on leather as it is too heavy & expensive. Mink Oils: These come in several types, with the best ones seeming to be a dull, almost pure white paste. (Fiebings and Esquire both make a good mink oil). Purity of colour seems to indicate silicone content. Kiwits Mink Oil, Arctic Dubbin, and Dubbin have a shinier appearance and range in colour from a cream to beige-yellow. They are also harder in texture. Therefore these latter contain more silicone.
Silicone should normally be avoided in large amounts as it will deteriorate leather, literally, by turning it into a non-breathing substance like plastic. It is advantageous, however, in small amounts as in the Fiebings and Esquire Mink Oils- only because it adds to the properties. Like the neatsfoot, too much of a good thing leads to trouble. This deterioration of leather due to the fact that it cannot "breathe" is illustrated nicely by the fact that a foot will be colder due to condensation build-up on the inside of a siliconed shoe than it is in a dubbined shoe. The foot will be warmer still in a shoe
Page 5
oiled with the purer mink oils. Mink oil is best used as a winter protestant for shoes and boots as it waterproofs, and, to a certain degree, salt-proofs leathers. Its main advantage is that you can still put a shine over it with regular shoe polish.
By the way, if you are ever victimized by salt stains, a salt stain remover is available from Fiebings, or you can mix your own by making a dilute solution of plain household vinegar and water. A tablespoon or two in a cup of water usually does the trick... Saddle soap and mink oil after treatment. Apply shoe polish if desired.
The Lanolin-type based oils are a type of which I tend to be leary. I personally never "took a shine" to Lexol, or its Fiebings counterpart (4-Way Care), These oils are very light and therefore very penetrating and difficult to control. It is very, very easy to overdo it with these oils. What I DO like about these two oils is the fact that they make a nice additive to carving or stamping, A couple of drops in a pint of water will prevent the leather from losing too much oil as it dries after these procedures. It also seems to make carving easier. Waxes:
These range from completely natural to man-made. The natural waxes include beeswax and carnauba wax. Most man-made waxes include one or the other of these natural waxes plus paraffin in one form or another.
Beeswax in pure form makes a fairly decent edge dressing. Rub it VERY hard to get a shine. If mixed with paraffin, it becomes softer, stickier, and easier to use. This combination is excellent for waxing threads for hand sewing. A mixture of equal parts PURE beeswax and PURE neatsfoot oil is a good finish dressing for heavy-duty items and for articles which may be subjected to a great deal of dampness. This mixture must be applied warm to pre-warmed leather. The temperatures of each must match in order for it to work, and a great amount of experimentation is involved usually. This makes it a nuisance to use, but well worth the effort on heavy-duty items. This mix should NOT be used on stamped or carved items as it will clog the cuts and turn yellow.
Carnauba wax is found predominately in car waxes, French-type furniture polishes and in Smarties. (Which no one will eat, ever, ever, again!) Its best property is its hardness and it also gives an excellent finger-proof shine. Pure carnauba is too hard and too brittle for use, but blended into carnauba cream it becomes most useful for car interiors and very fine, smooth leathers such as those in coats and upholstery. It should NOT be used on carved or stamped items as it tens to make the cuts appear grey unless very, very carefully applied.
Shoe polishes contain a great deal. of carnauba, but beware, as some do not contain as great a percentage as do others. About the best that I've found is Kelly-Lynn's. Fiebings also makes an excellent product called silicone boot polish. Don't let the name fool you. It's mostly carnauba. Softer shoe polishes are made which are called shoe creams. These are excellent for touching up scuff marks, scratches, etc. on factory-made items. In fact, due to the various and unknown types of plastics used by manufacturers, it is often the ONLY way to touch up or slightly modify the colour of these items. (Note: Either use the same shade or a darker one.). Proberts makes about the best kind, followed by Meltonian, Tana, Kiwi and Nugget.
Polish coat seems like wax to me simply because it polishes up so beautifully, particularly when built upin thin coats. This is an excellent finish coat for nearly every project, although care must be taken to avoid excess build-up in cracks and crevices, and to avoid streaking. Polish coat can be thinned with water. It can also be 5.
Page 6
mixed with other finish coats to further improve its already excellent properties. (More about this later).
The last group of waxes are somewhat in the middle, between carnauba and polish coat. They are put out by Fiebings under the names Leather Balm, and Leather Balm with Atom Wax. The latter is available in colours.
Plain leather balm seems to be a heavy cream, along the lines of carnauba, while the balm with wax is a mildly thicker, more aromatic version of polish coat. However, it is not nearly as good as polish coat and should NOT be used on carved or stamped leather as it greys the cut lines and should ABSOLUTELY NOT be used with Fiebings Antique Finish (Turpentine base) as it makes a gummy finish. I really do not like leather balm with wax very much at all. (I do like the plain balm, but usually in the same applications as carnauba cream which it very much resembles.) I am not fussy about balm with wax for other reasons; it is a very soft wax and fingerprints, scuffs and scratches tend to show up and stay. It also does not provide very good protection against ultra-violet colour fading from exposure to sun. Lastly, it simply does not seal black, navy blue, light blue and red, the "bleeding" type colours of spirit dye, although it doesn't seem too bad with most browns.
In spite of its bad points, however, it does have one redeeming factor. Mixed in combination with resolene and polish coat, it makes one of the finest finishes that I have ever had the pleasure to work with. I will explain this in the experimental section at the end of this article.
Next, we come to the resins. There are two types that I know of: Tan Kote and Tandy Kote, (Tandy's old clear finish), and Bag Kote. Bag Kote is a product that I prefer to avoid as it tends to cause drying out and cracking of the leather. Tandy Kote, I have found to cause greying in cuts, when applied heavily or when it gets a bit old. Tan Kote I love and cherish.
Tan Kote is one of my favourites because of its versatility. For the most part, I use this over many of my ultra-heavy-duty items. It is a light finish which imparts a semi-gloss to articles and which will wear off with use. It is ideal for the heavy articles, as, by the time the finish wears off, the item in question has had its pores burnished closed by handling (i.e, no more colour will come off.) Further maintenance with saddle soap or oil is more easily done. Tan Kote is also a nice finish for belts, wallets, and coin purses, as well as for other items for indoor use. It goes on easily, doesn't streak nearly as much as other types of finishes, and gives a nice gloss. It is an excellent finish for very nearly all the dyes and finishes, with the possible exception of black spirit dye. (The resins in the black tend to mix and lift off with those in the Tan Kote.) Do NOT use this with Fiebings Antique Finish (Turpentine Base) as it will run all over the place if it accidentally is exposed to rain or snow. It CAN pe used with this Antique Finish if used indoors ONLY, or if followed by an acrylic or lacquer. In this latter case, the Tan Kote acts as a sealer coat which will keep lacquers (in particular), from cracking and peeling off. It is also possible to touch up spirit dye colours through the Tan Kote.
The other interesting thing about Tan Kote is that you can make your own antique finish from it. A four-ounce bottle of Tan Kote with 20 to 25 drops of dark brown spirit dye in it will just about produce the same tone as Mac's used to do. Add more (or less) colour, or vary the colours to please yourself. No final finish is required. A word of warning: Do NOT mix more than 1 part dye to three parts of Tan Kote. Mixtures higher in dye content than this tend to turn into a gel, and will not work well at all.
Page 7
By the way, the Tan Kote label says not to mix anything with Tan Kote, but in my opinion, this is untrue.
Which brings us to the plastics. What you'll encounter in this category are mostly acrylics and lacquers. In the future you may encounter polyesters as I am told that Fiebings is researching this area.
Acrylic finishes come under the names Resoline and Supershene. This latter one replaces Andy's Neat Shene. I have had trouble with greying in cuts with Supershene and Neatshene, but not with Resolene.
Resolene is one of my personal favourites. It is a light gloss finish which is ultra flexible, mellows with age to a mellow golden brown, and is as water resistant as you'd ever want. It doesn't seem to cause leather to dry out, but if this should occur, Resolene is strippable. Use Fiebings #5 Dye Prep, re-oil or saddlesoap, and appy finish coat. Resolene seems to be about the only kiddy-proof finish for black spirit dye. Nothing seems to bleed through it once it's dry. It is one of the nicest finishes over natural leather, particularly oiled leathers, as it brings out the mellow tones, and can be used as an all-round finish coat for almost everything. It has excellent resistance to sun fading. Streaking seems to be its only problem, particularly on large projects. This can be avoided by either careful application or by applying it with an airbrush. DO NOT APPLY A SECOND COAT BY HAND.! If you should find some accidental streaking, allow item to dry thoroughly, then apply a light coat of Fiebings Saddle Lac, very carefully. This will further increase resistance to sunlight damage.
Since we've already touched on Saddle Lac, we'll continue with lacquers. Saddle Lac is a spray, as is Tandy's Spray Lac. Fiebings type is very light and flexible. Tandy's is much heavier, darker in colour, sprays on thick, and I have found that it tends to crack when flexed. Items to be sprayed should first be sealed with Resolene (for gloss), or TanKote (for high gloss). Otherwise the finish is absorbed without any gloss appearing. Particular attention to sealing is important over Black Spirit Dye, Antique Finishes, and Antique Dyes, as failure to seal these causes the finish to crack and flake off.
The other lacquers are applied by hand. These are Neat Lac, from Tandy's,Tanner's Lac, from the Leather Factory (which I haven't tried), and Lac Kote from Fiebings. Fiebings Lac Kote is lighter in colour and viscosity, dries to a hard shine no matter how humid the weather, and in this way has the advantage over Neat Lac which sometimes doesn't dry out. Sealing the leather is once again a good idea prior to use. Finally, the Experimental Section:
I have already explained at length the mixing of Early American and Tandy Antique to acquire a neutral finish. I have also explained how to make your own antiques under the Tan Kote Section.
Ruth Haig contributed the 3 parts polish coat to one part Resolene formula This is an excellent finish coat, the best of all worlds, and can be applied in light coats and polished to a hard, high, finger-proof gloss. My only other contribution is edge dressing. Edges are to me a work of the devil, and I have tried to come to grips with edge burnishing with water, shoe polishes, dippity doo, gum tragacanth, and lots of prayer. However, I remembered that Ruth's polish coat and Resolene, mixed half and half with Resolene results in a quick and easy edge dressing. Apply spirit dye over the edges, and rub lightly with a bone folder to start the fibres lying down. Apply the edge dressing with either finger or dauber (The fingers, adding body heat seem to do a nicer job), allow to dry, then rub briskly with the bone folder. Repeat, rubbing with a denim (or similar) cloth instead of bone folder. A third coat is usually unnecessary. Majority of time is spent waiting for drying of dressing.
[The page itself prints "appy finish coat" — the Society's own typing slip (a missing "l") — kept as printed.]
Page 8 — SPECIAL NOTICE; CALL FOR ENTRY - Leather '84
And that's about it. I hope it helps.
The information presented is what I have found to work for me. Personal variations and product variations may change the results. Experiment. Find out what products you like and which products are consistent. When you discover something you like or something that works for you, stick to it!
Karla Van Horne.
SPECIAL NOTICE
Re: SEWING MACHINE STITCHING OF ARTICLES FOR COMPETITION
From: The Meeting of the Council of Fellows
March 23, 1984.
"It has been brought to our attention that machine stitching of a leather article is sometimes preferable, for practical, or other reasons, to hand stitching.
Moved by Bea Austin, Seconded by Jessie Little, that, although a crafted leather project submitted for competition should be completed by hand techniques as far as possible, we will nevertheless allow machine stitching when the entry is accompanied by a written justification of its use in that particular instance".
Motion Accepted
Approved by Bob Muma,
Chairman of Standards Committee
CALL FOR ENTRY - Leather '84.
Omission of Award from Award List.
Please note than the following award, omitted in error from the Call for Entry, will be presented at Leather '84,
The Mary Zatyko Award for Soft Leather Article - $ 35.00
CALL FOR ENTRY - FEE FOR ENTRY
We apologize for another error in typing in the Call for Entry. The correct entry fee is $5.00, as is listed in one place in the call for entry, rather than the old fee of $3.00, listed elsewhere.
The notice reads "Please note than the following award"; set out as printed.
Page 9 — What a Leathercraftsman Could Learn From a Shoe Making and Shoe Repair Course
What a Leathercraftsman Could Learn From a Shoe Making and Shoe Repair Course.
by Lydia Vincent
In 1982 I had the privilege to attend Mohawk College course in shoe making and repair held at Paul's Shoe Repair shop in Hamilton.
First of all I would like to say that a modern shoe repair establishment is far removed from an old-time cobbler's shop. Practically all operations, such as cutting, trimming, sanding, polishing, sewing and nailing are carried out with the help of machines. These constitute a major investment and they would not be practical for a craftsman to acquire. There are, however, some tools, methods and materials that could be adapted to creative leathercraft.
The basic shoemaking tools are expensive, but can be most useful in leathercraft. Lasting pliers come in handy whenever leather has to be stretched over a form. The shoemaker's hammer with a smooth, rounded end is excellent for flattening skived and turned edges on certain types of leather. The French knife is good for cutting thick leather and can also be used for skiving. The shoemaker's awls, which come in several sizes make fine saddle-stitching possible.
Craftsmen who work with thicker leather and would like to achieve a durable high gloss on edges of saddle-stitched articles, or stacked leather items could adapt methods used in shoe repair.
After the trimming and scouring operations have been completed on heels or edges of soles, a coat of burnishing ink, (Superfill edging or Fiebings burnishing ink), is applied. This must be allowed to dry so that the wax which the ink contains can penetrate the leather. Then the edges are burnished with a variety of wheels applying some pressure. Some of these wheels can be heated by lowering a lever which produces heat through friction. During this process, more burnishing wax which comes in a solid cake form is applied to the wheel and the burnishing is continued until the desired gloss is achieved.
A home craftsman could use an electric iron placed upside down in a vise, and then could rub the article against its edges or improvise a suitable attachment or sleeve for an electric drill or grinder.
In making some leather articles such as a pen holder for a desk, one could do some "cheating" and achieve a stacked leather effect with one thickness of leather, a wooden core, and a layer of felt undderneath, by using material meant for covering imitation stacked leather heels. This consists of thin leather strips glued together. This material is available in pieces with curved designs to suit different types of heels and also in sheets with straight lines. The latter would be suitable to imitate stacked leather, and is available in black, brown, and neutral, and could be dyed and polished.
Saddle-stitching as done by many craftsmen is rather coarse, although it can be decorative. The holes made by an awl or punch have to be large enough to allow a double thickness of thread to go through, and later the thread may not fill the holes completely. <A much finer seam can be made by thinning the ends of the threads::to half the thickness. This can be done by separating the strands, (usually 8), of the waxed linen thread, (Barbour's pure flax sinew), and thinning each by a quick snap that produces a feathered end. Then the thin strands are bound together again by rolling them with the palm of the hand against
[Three readings set out here as printed: "nen holder" as "pen holder"; "laver" as "lever" (a small correction mark is printed over the word, which two independent readings both mistook for part of the letter); "3arbour's" as "Barbour's" (the linen-thread maker). The page itself prints "undderneath" — the Society's own doubled-d typing slip — kept as printed.]
Page 10 — MOULDED LEATHER BOWLS
the shoemaker's apron which is draped tightly against the thigh. Then wax is applied and a long tapered end results. Sewing is done with a shoemaker's needle, (straight or curved), or hog's bristle.
The whole operation, especially using hog's bristles, requires some practice, and it would take too long to describe it here, step by step. One method is described in "Shoe Repairing", by Henry Karg, on pages 134 through 137.
The holes for the thread to pass through are made with a shoemaker's awl. These come in several thicknesses and can be bought separately as required,to be fitted into a handle that fits them all. (Available at Capitol Findings, Toronto.) The thinnest of the curved awls is used to make a seam that penetrates only half the thickness of one of the leathers joined together. This is necessary in some handmade shoes, because the inner sole has to be perfectly smooth. This type of stitching can be seen from one side only. It is possible to do this if the leather is sufficiently thick and damp when sewn.
It might be useful to know how the shoe repair trade handles zippers. These are available in several grades, and are sold by the metre and cut up as required. The matching sliders and stops are bought separately. To begin a zipper, a certain number of the metal hooks that run along both sides of the strip of material are pulled out with pliers or a special tool for this use. Then the slider is inserted by pushing both sides of the zipper inside the slider as far as possible. When this is done, and the slider runs smoothly, the stops are inserted by pushing their prongs through the fabric strip and flattening them with pliers on the wrong side of the zipper. For those needing a strong zipper of unusual length for some project, a friendly shoe repairer could be of help with this system.
MOULDED LEATHER BOWLS by Bea Austin
Requirements: 2 circles of 6 to 7 oz. Cowhide.
Barge Glue or Contact Cement (or similar)
2 Circles are needed to make a good sturdy bowl, These can be as large or as small as you wish, since it depends on the size that you cut the circles the size of the bowl that you end up with eventually.
Soak your leather circles in warm water and place them in a plastic bag for a short while. When ready to mould, take one circle with the flesh side facing you and start to mould. It is easier to have a small round wooden form or a plastic bowl etc. with which to start. Start forming around the round object with your hands when getting started, and start raising the sides up, but keep the bottom flat. You only need the form to get the bowl started- after a while it will be in your way.
This will be quite full, so start putting folds in by pinching in about one inch. (Fig.A) Starting at one side and then moving to the opposite side, keep 4 J alternately putting in the folds at regular wT distances, the same size and height. You 4 Ege, will have 12 folds unless you make a small: £1G.B circle, which wouldn't require as many folds. Fig. 3 indicates the positions of the folds.
To keep the bottom flat, take your hands on each side of the bowl, 10.
[The page prints "Capitol Findings, Toronto" — a supplier's name — set out here as "Capitol", not "Capital".]
Page 11 — EEL SKIN NEW PURSE LEATHER
and bounce the bowl bottom up and down on your work table until a nicely flattened bottom area results. When you reach the point when you feel that it is high enough, and that the bottom is flat enough, let it dry- THOROUGHLY!
Take the other circle and just reverse - the grain side facing you. By pushing the wet circle down inside the first circle, (it must be the same wetness as the first circle was), and pressing into the folds, and keeping the bottom flat at well, it should eventually fit snugly.
The inside will be higher than the outside piece. When you have the inside circle fitted inside the outer bowl, the folds and the bottom fitting to your own satisfaction, (it does take time to arrive at this stage,) then let the two pieces dry completely, one circle within the other.
Before you take the inside piece out, make sure that you mark an "X" on the flesh side of the inside bowl and a matching "X" on the flesh side of the outside bowl. This will show you just where to replace the two pieces when glueing them together.
Apply glue to the inside of the outside bowl and to the outside of the inside bowl. Let stand until tacky. Don't have too thick a layer of glue or it won't adhere well. Two thin coats of glue are better than one thick one. A medium coat is best for adhesion.
It is impossible to drop the inside glued piece into the glued outer piece. Take waxed paper strips (this is a MUST), about 1 1/2 " in width and long enough to go down just to the edge of the bottom, and protruding higher than the bowl in height. Place the wax paper strips all around the bowl, just touching each other. Now ease the inner bowl down into the outer bowl. When you have it down, just about to the bottom, start easing the wax paper pieces out gradually. When they are all out, push down the bottom with your hands to make sure that the two pieces have adhered to each other. Also press in the folds. When you have it all fitted together, take a sharp knife and trim the inside bowl even with the outside piece. Bone the edge as you would a belt edge.
Make sure the bottom is good and flat so that the bowl sits even on the table, and if not even, tap on the table as before until it sits evenly. You may need to dampen the leather to do this.
If the folds are not even in height, take a ruler and stand it up straight against each fold, and work the edge with a bone folder until all are even. If necessary, dampen the bowl to do this. It won't hurt the piece.
You can dye the leather before or after the bowl is formed- whichever way you wish. By using the two circles, you will end up with a nicely finished bowl both inside and out. Good luck in making one!
EEL SKIN NEW PURSE LEATHER - from the Toronto Star
Eel skin is being used in the construction of a beautiful line of exotic leather goods. As well as being fashionable, it's ecology-conscious. The products are imported from Korea where eel is plentiful. The importer claims that eel skin is 150% stronger and more durable than leather, mainly because the eel must withstand incredible pressure in the ocean depths, as well as the ravages of salt water. Avoid scarred pieces.
["Oe must be" is set out here as "(it must be".]
Page 12 — HOLE IN BOTTLE FOR LAMP BASE; BOOK REVIEW: Making and Repairing Western Saddles, by Dave Jones
HOLE IN BOTTLE FOR LAMP BASE - by Bill Miller
Materials Needed:
1. A bottle 2. One piece of brass or copper tubing the same diameter as the hole you want.
3. Small amount of putty (for a dam)
4. Valve grinding powder or Carborundum powder, (available from a Rock Hound store).
5. Wooden cradle to hold bottle, or a bag of sand, if a cradle is not available.
6. Plastic insert for hole. 7. Drill press or hand drill.
8. Information on how to find centre in top of bottle for electrical nipple.
9. Eye protection goggles 10. PATIENCE.
Use a bottle with a flat side if possible.
File flutes, (slots) in end of tubing to allow grinding compound to work down into glass.
Fasten bottle in wooden cradle, or imbed in sand bag so it will not move. Build putty dam around where hole is to be ground, so that grinding compound will stay in the grinding area.
Apply steady but light pressure with drill at fairly slow speed. Too much pressure or speed will cause bottle to overheat and crack. REMEMBER, YOU ARE GRINDING NOT DRILLING. And always use goggles for eyes. This is where the patience comes in. If using a drill press, hang a light weight on the handle and let it go. Check to make sure that the grinding compound is in place, and doing its job. TO FIND CENTRE of bottle top for electrical nipple: draw a circle on a piece of cardboard the diameter of the bottle top. Cut circle out of cardboard. Place cardboard on bottle top- compass centre will give you the bottle top centre.
COVER BOTTLE
Insert plastic fitting in hole to protect wire. The fitting should stay in, but a spot of glue will not hurt.
If hole is a little rough, wrap a small file handle with emery paper to clean it up. DO NOT USE A PLAIN FILE- GLASS IS HARDER THAN THE FILE ALONE.
SHADE - For 25¢ you can information on lamp shades from Lewiscraft.
the rice paper used for shades does shrink a little as it dries. Practise on a small shade as it is really the only way to learn.
BOOK REVIEW: Making and Repairing Western Saddles, by Dave Jones
Arco Publishing, Inc., 1982.
Dave Jones is a horse trainer and saddlemaker. His book is a good little volume similar in format to John Hopper's, although a little less informative and involved. However, it makes an ideal companion book. Whereas John Hopper hasn't gone into detail on covering forks, Dave Jones has, as well as covering putting a ground seat in impeccable detail, a most important point, as a saddle with a poor ground seat "rides likes rocks", An informative little volume.
["For 25¢ you can information on lamp shades" is printed exactly so — a word (almost certainly "get") is missing between "can" and "information" in the original typing, not lost here. Also "imbed in gand bag" is set out as "imbed in sand bag".]
Page 13 — BOOK REVIEW: Cowboy's Complete Saddlemaking by John Hopper
BOOK REVIEW: Cowboy's Complete Saddlemaking by John Hopper
Chahala Publishing, 1982.
John Hopper is a master saddle-maker from Jackson Hole, Wyoming.
The book that he wrote is unlike other texts, as his is complete, offering almost 200 pages on saddle manufacture alone. Furthermore, additional chapters deal with making chaps, saddlebags, halters and bridles, breast collars- and even such information rarities as skid boots and bucking rolls.
Mr. Hopper, in addition, offers a list of equipment(mostly in the form of photos), and a list of suppliers. The bulk of his information is offered through photographs with printed captions. What he does not give through photos is explained by hand-drawn sketches and patterns.
It is not a book for those who want perfect spelling and grammar. It is, however, a book for those who appreciate craftsmanship and for those who care to learn, for John Hopper not only tells you how, but also why. He also stresses incorrect methods and why they are incorrect. A fine volume.
Book Reviews by Karla Van Horne.
MASK WORKSHOP
Saturday May 26th
PLACE: ST. MARTIN-IN-THE-FIELDS CHURCH, KEELE ST. at GLENLAKE — TORONTO.
TIME: 9-12 and 1-4
Potluck Luncheon
* WORKSHOP DIRECTOR: Rae Anderson *
Contact your Branch Representative for a list of Materials Required.....
FEE: $10.00 p.p.
The lower half of this page is a hand-lettered flyer, in ink rather than type. The fee is written "$10" with a raised "00", which is $10.00.
Page 14 — Remembering or Forgetting; UPCOMING EVENTS
From a recent newspaper neighbourhood news item, sent by Allie Wagar of Hay Bay, Ont.
Remembering or Forgetting
Just a line to say I'm living, That I'm not amongst the dead. Though I'm getting more forgetful, And more mixed up in the head. For sometimes I can't remember, When I stand at the foot of the stair, If I must go up for something, Or did I just come down from there. And, before the fridge so often, My mind is filled with doubt, Have I just put the food away? or, Have I come to take something out. There are times when it is dark out, With my nightcap on my head.
I don't know if I'm retiring or just getting out of bed. So, if it is my turn to write to you, There's no need in getting sore. I may think I have written, And don't want to be a bore, So, remember I do love you, And wish that you were here. But now it's nearly mail time, So I must say goodbye dear. There I stood beside the mailbox With a face so very red.
Instead of mailing my letter, I had opened it instead.
(How well this suits your editor by the time I reach page 14 or so!)
5th Annual
WINTER'S END SHOW & SALE
April 25th,Wednesday through
April 29th, Sunday
Place: Queen Elizabeth Building,
C.N.E. Grounds, Toronto.
Hours: Wed. 7 p.m.-10 p.m.
Thurs. to Sat. -noon to 10 p.m. Sunday - noon to 6 p.m. This is always an excellent show.... we suggest that all leather workers plan to attend.
MEMBERS AT LARGE
Please note!...
Your issue of Canadian
Leathercraft, for which you will be submitting the articles, as editorial staff, is the Fall issue, 1984,
Material for this issue is due on or about Sept.15th please.
We would like this to be a "special" issue, with shop tips, perhaps some small article patterns, such as used for craft show sales, and/or anything that you feel is missing from our regular bulletins.
Remember, as Members at Large, not attending regular branch meetings, your ideas are more apt to be "new" to others. We'll accept anything, from 2 lines to 10 pages!
SPECIAL NOTE: If any Member at Large would care to contribute a write-up on the (July) Leather'84 show, we would be delighted to accept this as an article. (Would you let us know of this ahead of time, and we will set aside particular space for it.)
UPCOMING EVENTS
5th Annual HARBOURFRONT
CRAFT SHOW
Dates: July 27th to 29th (Friday through Sunday)
Outdoor tents, outdoor booths and inside sales area.
Hours:Friday evening award
presentations 6 p.m.
All day Saturday and Sunday.
Queen's Quay, Toronto.
TALL SHIPS
For photographers, a "must"! July 6-111th, the Tall Ships Rendezvous at Toronto.July 17-21 at Kingston. This is an event worth making a special trip to see, with schooners from around the world.....
[Set out here: "dours" as "Hours"; the row of dots after "excellent show", easy to misread as "ShOWeee-e we Suggest", as "show.... we suggest"; and the trailing "...ece" after "Please note!" is decorative border noise, dropped.]
Page 15
Craft News: A Report of Events from our O.C.C. Representative.
Lillian Kay has kindly reported the following upcoming events, of interest to all craftspersons.
Celebration '84: A Sense of Occasion
This major international exhibition was organized by O.C.C. in co-operation with The Art Gallery, Harbourfront, Toronto, and The American Craft Museum - sponsored by Seagrams. The exhibition will be held at the Harbourfront Gallery, with the opening slated for June 1st, from 4:30 - 8:00 p.m., with the exhibition being opened by Patricia McClelland, President, Canadian Craft Council.
[A row of asterisks appears here, matching several other partial-width dividers on this page; it does not run full width. The one row that prints fully across the page sits later, beneath the IMAGE 84 paragraph.]
ANNUAL GENERAL MEETING - ONTARIO CRAFT COUNCIL
- Dates: June 2-5 Place: Sheraton Centre, Toronto.
The Annual Dinner will feature, as guest speaker: Stephen Hogbin, - "The Future of Crafts".
UPCOMING EVENTS AT THE ONTARIO CRAFTS COUNCIL GALLERY - 346 Dundas St. West
April: "Marionettes"- the eccentric sculpture & zany puppets created by Anne Isabelle Piche and Jerome Poitier. (to Apr. 29th)
May: "Maps and Documents - Kathryn Lipke
June: "Costumes from Stratford".
CRAFT FOCUS 1 -
450 Craftspeople have entered slides for jurying in Craft Focus 1, which is the juried slide competition replacing the annual juried regional competition we have been used to seeing in the past. Winners will be published in an insert, part of the June Issue of Ontario Craft.
IMAGE 84- Sept. 13-Oct. 14 - Art Gallery of Hamilton
Juried show of crafts open to residents of southwest Ontario, (see listing in Ontario Crafts for more details. Media include: Clay, glass, leather, metal, wood, textiles,plastics. Entry deadline: June l. (We might point out with pride that Carol McLean is one of the three judges of this Lillian Kay points out that all leather workers might consider entering the juried FibreArts show at: Centennial Gallery, Oakville, Ont. Nov. 8-Dec.9 th 120 Navy. Street, Oakville, Ont. L6J 2724
Open to all fibre artists residing in Ontario- 2 entries per artist max. All entries must be received between July 16th- July 27th. (1-5 p.m.) There will be a Salon de Refuses as well, at Gairloch Gallerys, 1306 Lakeshore Rd. East, Oakville, Ont. (Entry info: Tel: 844-4402) Judge: Mariette Rousseau-Vermette - head of Fibre Arts, Visual Arts,
Banff School of Fine Arts.
Winning entries will tour Canadian public art gallerys for a year.
Page 16
THE COMPLEAT OFFICE SHOW (O.C.C. Gallery- February '84) We were pleased at the calibre of pieces at this recent exhibition, and, of course, particularly pleased to see our Society represented by the fine work of Lillian Kay, who had a modern design picture frame of leather, hot water formed, and laminated, with a sponge-dyed scroll frame in this show. By the way, Lillian reports that the frame was sold, making it unavailable for competition in the forthcoming Leather'84 show, as well as the Weston Trophy.
Of particular interest to some of us of dual-craft-participation, was some of the excellent stoneware/porcelain/ raku work on view. The wood pieces showed exceptional style and calibre of craftsmanship. All in all, a show worth viewing.
We were shocked to read in the Toronto Star that the Sheridan College, School of Crafts and Design, is closing its Metal Arts studio and Weaving studio, due to"low demand, high costs and poor employment opportunities", to quote Oakville campus principal Norm. Gray. This Board decision has been under fire from many craftsmen, and members of the public who are concerned about this loss of studios are asked to write to: Mr. T. Osler, Chairman of the Board of Sheridan College, Trafalgar Road, Oakville, L6H 2L1.
Surely an alternative to closing could be found in the form of increased outside participation, beyond the regular school curriculum, with an emphasis on adult workshops, expanded night school or summer courses, etc. whose fees could offset the cost for students in the regular courses.
We appreciate the efforts of the Hamilton Branch, who have acted as reporters for this issue. A special thanks to Hope Drysdale for her help. Next issue will be looked after by Toronto Branch, and all material for this issue, if any items are being sent from other branches, should be sent to M. Patterson, 270 Durie St. Toronto M6S 3G3 by June 1st.
SPECIAL NOTICE TO ALL C.S.C.L.
MEMBERS:
All memberships are due as of April 1st each year.
Have you paid your fees to your Branch Treasurer yet? Yearly dues for C.S.CL. are $10.00 per person and Members at Large are asked to send their cheque
(payable to Canadian Society for Creative Leathercraft) to C.S.CL. Treasurer: Mrs. Hilda Chynoweth, Box68
Norland, Ont. K0M 2L0
Membership Form - C.S.C.L.