
An issue of the Society’s newsletter, transcribed from the original.
(12 pages, 1.9 MB)
the full-resolution scan, 30 MB, for close research
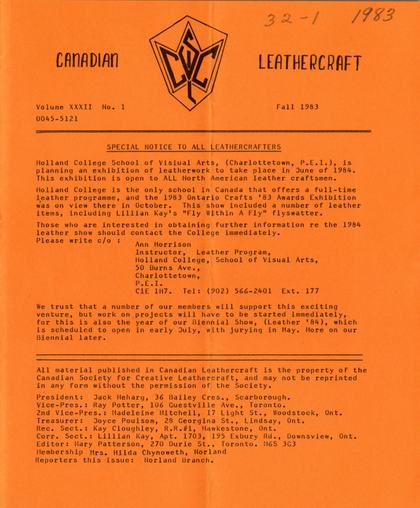
Page 1 — SPECIAL NOTICE TO ALL LEATHERCRAFTERS
Canadian Leathercraft
Volume XXXII No. 1 Fall 1983
0045-5121
SPECIAL NOTICE TO ALL LEATHERCRAFTERS
Holland College School of Visiual Arts, (Charlottetown, P.E.I.), is planning an exhibition of leatherwork to take place in June of 1984, This exhibition is open to ALL North American leather craftsmen. Holland College is the only school in Canada that offers a full-time leather programme, and the 1983 Ontario Crafts "83 Awards Exhibition was on view there in October. This show included a number of leather items, including Lillian Kay's "Fly Within A Fly" flyswatter.
Those who are interested in obtaining further information re the 1984 leather show should contact the College immediately.
Please write c/o:
Ann Morrison
Instructor, Leather Program,
Holland College, School of Visual Arts,
50 Burns Ave.,
Charlottetown, P.E.I.
Tel: (902) 566-2401 Ext. 177
We trust that a number of our members will support this exciting venture, but work on projects will have to be started immediately, for this is also the year of our Biennial Show, (Leather '84), which is scheduled to open in early July, with jurying in May. More on our Biennial later.
All material published in Canadian Leathercraft is the property of the Canadian Society for Creative Leathercraft, and may not be reprinted in any form without the permission of the Society.
President: Jack Meharg, 36 Bailey Cres., Scarborough.
Vice-Pres.: Ray Potter, 106 Guestville Ave., Toronto.
2nd Vice-Pres.: Madeleine Mitchell, 17 Light St., Woodstock, Ont.
Treasurer: Joyce Poulsom, 28 Georgina St., Lindsay, Ont. Rec. Sect.: Kay Cloughley, R.R.#1, Hawkestone, Ont. Corr. Sect.: Lillian Kay, Apt. 1703, 195 Exbury Rd., Downsview, Ont. Editor: Mary Patterson, 270 Durie St., Toronto. M6S 3G3 Membership Mrs. Hilda Chynoweth, Norland
Reporters this issue: Norland Branch.
The school's name is printed two ways on this page: "School of Visiual Arts" in the notice at the top, and "School of Visual Arts" in the address block below. Both are set out here as printed.
Page 2 — RECENT NORLAND EVENTS; WORKSHOP TIPS; SHOP TIP
RECENT NORLAND EVENTS by Emma Windatt
The members of the Norland Branch of C.S.C.L. met in the workroom of Mrs. Hilda Chynoweth, on the occasion of a special demonstration on "Pokering". Our demonstrator was a guest from Haliburton.
Although it was an informal meeting, a great deal of information was forthcoming. Everyone had an opportunity to experiment with the "Poker".
(Editors Note: "Pokering" is the art of decorating leather by. incising designs in leather by the use of heat. Some of the 'mini-soldering tools' are adaptable to this method of surface treatment. )
We hope that we will be able to become proficient enough to engrave the work that we offer for sale at "Ye Olde Jail", in Coboconk, Ont. and at "We, Us, & Co." in Norland.
Our appetitie has been whetted by this demonstration, and we look forward to having more advanced instruction at a C.S.C.L. Workshop.
Norland Branch had a definite "Fun Day" when Mrs. Jean Hunter came up to our meeting to demonstrate the "Art of Dyeing". It was a most interesting event, ranging from the ridiculously messy use of sponges to dyeto the precise and economical use of dry brush dyeing.
We are indebted to Jean for her generous gift of time and talent.
WORKSHOP TIPS by Hilda Chynoweth
(1) Try waxing your lace when you are lacing an article, as this keeps it from losing its shape, or "thinning out" from the constant strain of being drawn through the holes.
Since there seems to be a lot of poor lace on the market these days, the wax application helps keep the back of the lace from splitting.
(2) Sometimes it is hard to cement a zipper in place and have it right. Use a stapler to place staples every eighth of an inch along the edge of the leather until the glue is set, and you are ready to punch the holes. As you punch the holes, you gradually remove the staples.
(3) If you use your kitchen table as a work bench, use a 1/4" rubber mat to keep from scratching the table surface.
(4) Neat-lac applied to the edges of your cardboard pattern pieces will both make them easier to use, AND will make them last longer.
(5) I work saddle soap into the leather after the design has been traced and carved as this acts as a dirt repellant. It also helps the tools work or slide better and keeps the leather flat and moist as it begins to dry out.
SHOP TIP: by Jean Hunter....
Wallet weight morocco leather has a "pasted" back, where the "hairs" that stand up on the flesh side of the leather are flattened by "pasting". If you have leather that you are having difficulty with, try using hair setting gel to achieve the same result.
2.
The Workshop Tips list's first entry is set out here as "(1) Try waxing your lace..." — the list's own run of (2) through (5) settles the numbering.
Page 3 — TO BEGIN CARVING - A Guide for Beginners
TO BEGIN CARVING- A Guide for Beginners- by E. Windatt. After having properly cased, (moistened overnight), your leather, and you have traced your design, you are almost ready to begin carving. But first, make sure that your swivel knife is SHARP. Strop the blade on a piece of leather on which you have put an application of jewellers rouge. Jewellers rouge comes in powdered and stick form, with the stick form being a bar of a waxy-like substance impermeated with jewellers rouge. The powdered form is useable, but takes a little more effort to build up on a leather strop.
Keep the knife upright. If allowed to slant, it will cause the cuts to be of uneven width and they will appear bevelled instead of sharp and crisp.
Then bevel the cuts on the outside according to the design. It is important to use a beveller of the proper size to assure a smooth job. The use of the pear beveller comes next. Follow the shape of the leaves, or other parts of the design, with the pear shader to give contour to the design.
Veiners are next used. These come in a variety of sizes, giving you a choice to be used according to the size of the your design. The use of the veiner takes some practise, and best results are usually obtained by slanting the tool to fit the design.
Stems are usually worked with a camouflage tool, which gives the stems more prominence.
Lastly, decorative cuts are added. They must follow the flow of the design and not be used to excess.
The backgrounding should be of even depth and not redone in one area, as overworking of one area will cause darker spots when the article is dyed. Try to strike the background tool evenly in depth AND spacing for best results.
You will have more confidence when carving if you practise using the tools on scrap leather. This experimenting to find what each tool is capable of when held at different angles, or struck harder, or more softly is invaluable. Often, using experiments, you will find that one tool can be made to do the work of several sizes of the same type of tool. (A real saving for the beginner).
It is most advisable to keep your hands very clean when working on leather at this stage, (undyed and unpolished), and remember to keep your fingernails short enough that you don't mark the leather with them.
SHOP TIP: Storing "cased leather" is a delicate procedure. Leather.: that is properly moistened is sensitive to touch, so keep the hide wrapped, (some people a piece of soft cloth and plastic as a good wrap), and remember to check that you don't leave the leather too damp and in a sealed bag where it will develop mildew!
Page 4 — NOTES FROM OUR O.C.C. REPRESENTATIVE
NOTES FROM OUR O.C.C. REPRESENTATIVE
We may be a little late with this item... we are trying for a Jan. 31st deadline that is listed by "Western Works" for their 1984 Spring Shows. However, Lillian Kay has given us this material which should be checked into by our western members, even if they may have to wait for forthcoming show dates later in the year.
Spring Show Dates & Locations:
May 3-6th Spring Show in Winnipeg,Manitoba May 9-13th Spring Show in Calgary, Alberta May 16-20th Spring Show in Edmonton, Alberta
| Applications for Alberta Shows: | Applications for Manitoba OR in both Provinces: |
| Western Works, The Spring Shows | Western Works, The Spring Shows |
| Attn: Ms. Bonnie Murdoch, | Attn: Mr. Ron Mark, |
| 2711-17th Avenue S.W., | 500-338 Broadway, |
| Calgary, Alberta. | Winnipeg, Manitoba. |
| T3E 0A6. | R3C 0T3 |
| Tel: (403) 242-1169 | Tel: (204) 942-8580 |
These shows provide alternate market places for makers of handcrafted objects. A preview show precedes each show enabling the craftsperson to display his/her work to professional buyers, designers and retailers. Marketing and advertising backup provides professional structuring to the shows. Shows have been held since 1979, and are juried events.
Lillian reports that she was fortunate in receiving awards from Tandy Leather and Tilley Leather for her "Fly Within A Fly" piece in the O.C.C. '83 Show, and was pleased when this piece was placed in the Atlantic Tour by the Ontario Crafts Council.
We were also pleased to hear that she had 32 leather clown face ornaments at the Ontario Crafts Council "Christmas Tree" ornament sale. These all sold, and new designs are already scheduled by her for next years display/sale.
ONTARIO CRAFTS COUNCIL 1984 EXHIBITIONS LIST
(Editor's Note: This is the last list of dates received, and are subject to change, so please check at the Council for additional information, etc.)
Feb. 2-26 "THE COMPLEAT OFFICE: DISTINCTIVE ACCENTS FOR THE EXECUTIVE". All items for the Executive Suite. Mar. l-Apr. 1 TORONTO COLLECTS. A spectacular display of 20th century collected glass.
Apr. 5-29 MARIONETTES: Designed by Anne Isabelle Piche & Jerome
Poirer. Eccentric & zany puppets.
May 3-27 KATHRYN LIPKE - Handmade paper works
May 31-July 1 - Costumes from Stratford.
The Alberta and Manitoba workshop-application addresses are printed as a table, and are set out here in the table's own column order: Calgary, Attn: Ms. Bonnie Murdoch, 2711-17th Avenue S.W., T3E 0A6; Winnipeg, Attn: Mr. Ron Mark, 500-338 Broadway, R3C 0T3. The marionette designer's name is printed "Poirer", and is kept as printed.
Page 5 — SPECIAL NOTICES: ANNUAL MEETING - CSCL - 1984
SPECIAL NOTICES ANNUAL MEETING - CSCL - 1984.
PLACE: WOODSTOCK - Woodstock General Hospital Nurses Residence DATES: APRIL 13-15th Details next issue Can. Leathercraft Dinner, Meeting and luncheon will be held at the Nurses Residence, which is on Wellington Streeet East.
LODGING: Rooms for the Annual will be arranged at the Woodstock Inn
WESTON TROPHY ENTRIES *****
Entries for the Weston Trophy Competition are due in by MARCH 23rd.-10 a.m. Judging for the Weston Trophy will take place on MARCH 23rd starting at 10:00 a.m.
We trust that ALL branches will attempt to field a full entry this year. This is a good trial ground for pieces and styles planned for the Leather '84 Show!!
LEATHER '84
A tentaive opening date for Leather '84 has been set for July 5th but this will be confirmed and announced at a later date.
HOWEVER!! ALL MEMBERS PLEASE NOTE!!
Call For Entry forms will be sent out as soon as possible. Due to summer vacations, etc., the date for the judging of pieces entered in Leather '84 will be MAY 25th, 1984.
PLACE OF EXHIBITION: SCARBOROUGH CIVIC CENTRE
ONLY MEMBERS in good standing of CSCL will be eligible for entry in this show, so please see that your dues are in in adequate time. Pieces may be entered that have been made AFTER the Leather'82 Exhibition. We are looking forward to a quality show this year, as we are aware of many excellent pieces created since that time. Watch for the Call for Entry.... we want YOUR entry!
DEMONSTRATORS FOR ANNUAL MEETING- 1984.
Please let Carol McLean, 555 Huron St., Woodstock Ont. N4S 7B1 know of the subjects (and, if possible) demonstrators requested for the Annual. We apologize that this is late
The street name is printed "Wellington Streeet East", with three e's; set out here as printed.
Page 6 — HAMILTON MEETING SCHEDULE - 1984; TORONTO MEETING SCHEDULE - 1984
HAMILTON MEETING SCHEDULE- 1984
All meetings are held at the John Howard Society building on the 2nd Friday of each month. Parking is at the rear of the building, which is situated at 19 Albert St., Hamilton. This is the first street east of the CHML radio station. New leathercrafters are welcome.
January: Bill Miller, Hamilton.
"Rice Paper Shades":
February: Ruth Haig, Hamilton.
Mini Workshop - "Leather Buttons" March: Election of Officers, and Demonstration & Talk by Karla Van Horne, Hamilton, on "How to use finishes".
April: Bea Austin, Hamilton
Mini Workshop - "Soft Leather Moccasins"
May: Pot Luck Supper
Silent Auction
Bake Sale
Mystery Demonstration
Sale of Leather & Findings of Mr. C. Vermeir.
TORONTO MEETING SCHEDULE - 1984 }
All meetings are held at St. Martin's -in'the-Field Church at Glenlake and Keele, just one block north of the Keele St. subway station. (1st street north of Bloor). Time: 7:30 p.m. sharp. Interested Leathercrafters always welcome. oe
2nd Friday of each month.
January 13 - Ways of Finishing Leather - Fred Brown.
(see write-up next page on this lecture). February 10th - Using Leather as Jewellery ( including Flower Making)
- a seminar discussion with members contributing.
This entry ends with a dash at the line's end; set out here, the dash closes the February item — "...members contributing-" — before the March item begins.
March 9th - Make Your Own Lacing - Jean Hunter
(Election of Toronto officers)
April 13th - Methods of Lacing - Bruce White
May lith - The Care & Sharpening of Leathercraft Tools- with Harold Brister
June 18th - Closing Social Evening
We are sorry that this issue was delayed, as we were waiting (IN VAIN!) for some articles from the Members-at-Large. We trust that some will be forthcoming very soon, '
We congratulate Norland for their work on this issue.
6.
Page 7 — LEATHER FINISHING
LEATHER FINISHING by Fred Brown
This article, notes taken from a Toronto seminar discussion/meeting led by Fred Brown, describes some of the little things that make a piece of leatherwork "special". We felt that this would be most topical with the upcoming season of competitions we are facing. Belt Finishing:
A point deduction can reduce your show points considerably when you neglect to 'fine'finish the back of your belts,(and the edges also.) All too often people neglect to edge bevel a belt, making it rough to the finger touch, and this, according to Fred, is the first way to test a good belt. If, when it is picked up, you immediately feel either rough edges, or back, or blunt edges that are unbevelled, you are well aware that this piece has been done without care. A number 3 beveller is about the correct size for a dress belt.
Before doing any work on the back of a belt, make sure that the belt(which is dyed:and has had application of polish coat on the front face), has a quick, light coat of polish coat applied to the back. This is to protect the unfinished back from the edge dressing application. Apply 1 coat of edge dressing, using either a cloth, or, better still, apply by using fingertips. Rub well with a piece of canvas, or use a notched one folder especially fitted to the belt edge size, until the belt edge is slick and smooth. An alternate method of smoothing the edge after application of edge dressing is to use a plastic "edge finishing wheel" or a lignum vitae (special extra hard African root wood) wheel. These work easiest when mounted on a benchpolisher, or, as most people do, use a wheel mounted on an arbour shank, inserted in a portable drill which can be held in a vise.
A suggestion from Jack Meharg: Use a 3/8" or 1/4" machine bolt, (depending on the size of your drill,) and mount your edge dressing wheel on this. Jack says that he uses the following mounting arrangement on this bolt. Place a washer next to the bolt head, then your wheel, then a nut and then a lock washer. (Or, in place of the lock washer, a second nut may be used.) Change widths of "slicker wheels" to suit different widths of leather edges that you are working on, and you can do this yourself by regrinding the shape of the groove in the "slicker". DO NOT make a sharp "V" in the bottom of the slicker wheel as this will cause the belt you are dressing to possibly whip out and cut you. A smoothly rounded groove is essential. If you have a variable speed drill that can be set at a slower speed, it is safer, but caution is ALWAYS advisable when working with electric polishing equipment as leather is so pliable. A variety of portable drill mounts are available or you can, as we mentioned, merely mount the drill in your vice. A mandrel and motor arrangment is quite adaptable for this kind of work.
BACK OF BELT:
Fred suggests that edge dressing be used to finish the back of a belt, combined with MUCH hard work. Go WITH the grain, when rubbing the back of the belt with a bone folder. If the fibres start to stand up, your rubbing AGAINST the grain. This polishing can also be done with a wheel, of wide width, mounted on your drill. Then apply a '7.
[The first "portable" on this page has its r and t typed in one space, one over the other; it is given here as the word intended.]
Page 8
number of light coats of polish coat for the best results, each one well polished.
SHOP TIP:
Is the belt blank that you have recently purchased quite rough in spots? (A number of people have complained about the roughness of modern hides!) Then sand the rough spots very gently with fine emery paper BEFORE doing anything to the belt. This technique is quite widely used when making leather trays. Please remember to protect the front face from any gouges on your worktable, by placing it on a piece of towelling, or tissue paper.
BELT KEEPER :
Make a number of forms suitable for the width of the various belts that you make, these forms to be shaped from wood, and to be used to place the sewn, damp keeper on for shaping. These forms are merely pieces of wood of the width of the belts, and are tapered at either end so that the keeper can be shoved on until it fits snugly. While still damp, run an edge creaser over the keeper on the form, so that you have a neatly marked edge crease. The keeper itself is cut to size, punched at both ends, and sewn through several times in a X pattern, (2 holes to each end of the keeper). Saddlestitching needles are used, and when the keeper is sewn it should be held with the - two flesh sides of the ends held as shown (Fig.1)/ passing the needle through in the X pattern we mentioned above. When the keeper is shoved onto the form (Fig. 2), it assumes its correct shape perfectly. Remember, when saddle-stitching the keeper, that the proper way to thread a saddle-stitching needle is to unravel a small area a couple of inches away from the needle, (as shown, Fig. 3), after threading the needle, and then pass the needle through this unravelled area as shown in Fig. 4, thus "locking" the thread on the needle, so it won't come off when pulling through tough leather.
PUNCHING HOLES IN BELT:
ALL dyeing MUST be done before punching, as the pressure of the punch face around the hole can "bruise" the leather and make a darker area. AFTER punching holes, make sure that you remember to touch up the interior of the holes for a very finished look.
COVERED DOMES:
These are often used for bags, where handles attach with domes, for a particularly well-finished appearance, and sometimes a belt which has a domed buckle style can benefit greatly by attention to a small detail of finishing like this. Cut a circle of good size, (as it can be trimmed away later if too large), using light weight leather, (preferably from. a thin piece of matching hide to the article), and then skive this piece of leather to paper thinness, over the WHOLE circle, as much as possible. Dampen the piece of leather and use a water soluble glue such as BondFast and apply this glue over WHOLE back of the circle. Force leather in place over the dome using the pointed end of your modeller, and allow leather to dry in place. If you wish, you CAN notch edges to remove a little of the leather excess. Be VERY careful when applying these domes to pad your anvil well, to protect the leather covering. The leather can be dyed prior to all this fitting, and adds an excellent touch to your work.
The belt-keeper paragraph is printed beside four diagram captions (Fig. 1-4) in the margin; two caption fragments ("so Fic 2" and "FiG.3 Feet") had drifted into the running prose at the wrong points, splitting one sentence into two. Removed here and the sentence rejoined; the Fig. 1-4 references that belong in the prose are kept.
Page 9
TURNED EDGES:
Turned edges, which hide the cut edge of a piece of leather, are a feature found on most of the finest articles in shows.
To use a turned edge on a book cover is a particulary nice touch, and requires that the leather edge be skived to paper thinness for about 1/4" from the edge. (Or more, if the leather is thicker than morocco. )
Apply glue to the edge that was skived, making sure that the cement gets right out to the very edge. This is best done by working on a small stack of newspaper sheets, each of which can be pulled out and thrown away as you get a smudge of glue on it, thus ensuring an absolutely clean work surface at ALL times.
Turn the edge down with a bone folder, It is tricky to keep this a perfectly straight line, unless you are fortunate enough to be folding the leather down over the edge of a piece of stiffening, such as X-Ray plate, commonly used for this type of work.
While edge is still damp, carefully edge crease with a suitable sized edge creaser. (About a # 3, if you are marking a crease in a small book cover.)
DYED EDGES FOR SADDLE=STITCHING & LACING:
It was noted by a number of workers at this discussion/meeting that sometimes the edges of articles were left undyed until AFTER stitching and lacing. This is an acceptable practice for saddle-stitching, as Fred Brown suggests that sometimes a piece can be stitched, and then trimmed closer to the stitching before finishing of edges are done, to remove a fractional amount more of the outer edge, for a quality look. (If you mark your work for stitching too close to the edge to start with, you run the risk of cutting through with your diamond awl, right out to the edge. It is wiser to leave a fraction more than necessary, stitch, and then trim to finish.
For Lacing:
ALL edges MUST be finished prior to lacing,as there is no access later, and if the smallest area is left to show through the lacing, by error, it can become immensely prominent in its raw, unfinished colour.
FINISHING LACING AND STITCHING:
All lacing and stitching should be flattened down after completion. Most people use a roller to smooth down the lacing, and a bone folder to flatten the saddle--stitching down to blend with the leather face better. This is an ESSENTIAL finishing detail.
SPECIAL HELPS :
To trim around a saddle-stitched item with delicacy, use a "razor-blade plane". This little tool is a helpful way to remove that fraction of an inch mentioned above. Fred Brown advises that older style razor blades be used, as the new ones are not as good at this job... the older ones stay very sharp for a longer time.
Burnish lacing after finishing, as advised, but use an old-fashioned wooden sewing thread spool. These were made of hardwood, and do a good job. Another alternate lacing finisher is a notch cut in a bone folder.
The paper reads "a particulary nice touch" — the Society's own spelling, set out here as printed.
Page 10
To Test For Good Lacing Coverage:
According to Fred Brown, he always holds up a piece of newly laced work to a strong light, and, if no light shows through the laced edge, the job is done right!
More Tips On Lacing:
Heavy lacing can be moistened before working with it to make it flatten out better around the piece.
When your lacing seems a bit wide, skive the edges for a neater finish, according to Jean Hunter. (This tip brought agonized groans from the novice section of the Toronto Branch, as the yards and yards of lacing to be skived came to mind!) But it's attention to this kind of detail that brings home the ribbons!
Some Tips from The Editor:
Being busy scribbling down these rapid-fire suggestions from our Toronto workers, I couldn't add any tips on the evening, as it is very difficult to make both a tongue and a pen work at the same time, I find... so here are a few of my own finishing ideas.
Thread:
A number of items that I have seen don't seem to have as even a tint of colour in the thread used for saddle-stitching as might be obtained. Pre-dyed thread sometimes opens up to a pale, raw-coloured interior. A good dye job, to match your work, may be achieved by dyeing your thread in the dye bottle you are using. If you are planning to apply several different shades to your work, build up this same colour sequence as you work, by dyeing the thread along with the leather. I use a very long pair of jewellers tweezers, (8" long), and use my small bottles of dye to plunge the thread in.... leaving it to soak through for about 1/2 an hour, if a dark colour is required.... then pull out slowly with the tweezers, and allow to drip over a plastic container for a while until dry. When dry, untwist, and if any raw undyed areas show, redye! Then wax thoroughly, using a good block of beeswax.
Keep your wax clean when you are working. A large block of wax divided for separate colours sometimes helps. The wax block can pick up dark dyes and radically change your colour, if you are aiming for particularly sensitive colour matching.
Rough Edges:
Since we work with silver, we have a number of jewellers files on hand, and these are invaluable for filing off small spots of glue that has oozed out, or finishing little corners. They are also handy for touching up the points of pins for brooches, etc. They do very little cutting of the edge, so look through the trays of odds and ends at your garage sales and you may find a few of these, preferably well-worn! Speaking of rough edges... a fine piece of work is made poorer by the use of poorly finished metal parts. Check all buckles, clasps etc. with great care before buying them!
Page 11 — CRAFT SHOW INFORMATION - "FANFARE '84"
CRAFT SHOW INFORMATION - "FANFARE '84"
Arts Scarborough is holding a six-week festival this summer, and part of this event is an outdoor Art & Craft Fair, to be held on:
June 8th, 9th, 10th 1984.
This is a juried event, and those wishing to participate should send 6 slides or photographs OR 2 samples of their work, together with return postage, to:
Arts Scarborough,
739 Ellesmere Rd.,
Scarborough, Ont.
M1P 2W1.
DEADLINE FOR APPLICATIONS: APRIL 30th, 1984.
Submissions must have a cheque attached for $50.00 which will NOT BE CASHED until after the exhibitor has been juried into the show. The remainder of the space rental is to be paid on receipt of acceptance by the jury committee.
All work must be current and original.
Cash Prizes are being awarded for the following categories:
Oils/acrylics Watercolours Printmaking Pastels/pencil/pen& ink
Photography Weaving Pottery Quilting Needlearts
Rug Hooking Sculpture Jewellery Leatherwork Woodcarving Glass Booths are to be located in tents at a cost of $100. for 10' X 10' space. Outdoor spaces at $50.00 for 15' of chainlink fence or a 10' X 10' area will be available in more limited number. All tents will have electricity supplied, (1 outlet per booth). Rental of 8' table + chair $12.00 if needed. Security guards will be provided, but of course no responsibility for losses by theft or damage can be assumed. Entertainment will be provided, and refreshment stands will be available, plus good parking.
PLACE: THOMSON PARK, Scarborough.
Contact person for further information: Joy MacFayden - (416) 431-9442
CNE SALE 1983.
This might be a good place to sum up our sales for CNE 1983. Sales were down, (774 items sold out of 1667 submitted). Losses by theft were down to only 6 this year, a great improvement.
Booth rental of $ 302.40, an item we have never had to deal with in the past, PLUS replacement of wood panels stolen & vandalized at the conclusion of the 1982 sale totally wiped out any profit to CSCL this year. Total sales were $3,262.70.
We should point out that replacement of panelling should be considered an exceptional item, not to be repeated this year, and thus we could count on a probable profit if the sale were repeated.
Thanks to Jack Meharg & Ralph Whately for the 30 hours of carpentry that they each contributed to rebuild our booth.
[The Fanfare ’84 event dates, "June 8th, 9th, 10th 1984.", are printed between "to be held on:" and the next paragraph.]
Page 12
LEATHER SOURCES
We receive many letters asking for sources of "special" leathers, and addresses listed below may be useful to those living in more rural communities, and to those in other provinces who are having difficulty making contact with suppliers. Most merchants sell mainly over-the-counter, with no mail orders filled, but this may be able to be arranged by personal contact. A recent notice from The Leather
Warehouse indicates that they are mail order shippers. (Details below).
Capitol Findings and Leathers Ltd., 580 King St. W., Toronto M5V 1M3. Moore Pearsall Leathers Ltd., 47 Front St.E., Toronto M5E 1B3
The Leather Warehouse, 11 Boulton Ave., Toronto M4M 2J4 (Tel:416-465-3728)
A recent price list from The Leather Warehouse, for you out-of-towners, lists Latigo, Veg-Tan Bridle, Belting leather,Harness, Saddle Skirting, Retan Splits, Garment Leather, Garment (suede) Splits, Rawhide, & Glovtan Leather. Mail orders accepted, C.O.D. shipments by mail, or CN or CP Express, and Bus Parcel Express (prepaid orders only).
7 % Sales tax. Write for an up-to-date price list.
These three companys have served most of the C.S.C.L. members over the past years with care and courtesy, and are sustaining members of the C.S.C.L. Their support is most appreciated.
C.S.C.L. LIBRARY
ALL MEMBERS PLEASE NOTE!!
ALL BOOKS FROM THE LARMOUR MEMORIAL LIBRARY MUST BE RETURNED TO EITHER YOUR BRANCH REPRESENTATIVE, (IN TIME FOR THE EXECUTIVE MEETING, FRIDAY FEB. 24th, ) OR DIRECTLY TO JEAN HUNTER BY THE END OF FEBRUARY, IN ORDER FOR THE BOXES TO BE RE-ORGANIZED, UPDATED, AND GENERALLY REFURBISHED PRIOR TO THE C.S.C.L. ANNUAL. YOUR CO-OPERATION IS NEEDED! THANK YOU.
REPORTING BRANCHES FOR NEXT ISSUES
Winter 1983- 1984: Belleville
Spring 1984: Hamilton
Summer 1984: Toronto
Fall 1984: MEMBERS AT LARGE ..... Please note, all Members-at-Large.
** This issue is yours, and we ask that articles be sent as soon as possible to M. Patterson, 270 Durie St. Toronto. M6S 3G3. We require Shop Tips, Book Reviews, Special Feature Articles, General Craft News, etc.
Material should be sent by Oct. 1st at the latest, but we would appreciate it sooner if possible. THANK YOU.
"out-of-fawners" is set out here as "out-of-towners".